SECRETS, TRICKS & TRIVIA
SHINON (SFC Mana Sword patch only)


1 - First Defeat Forneus with the Poet in your party (Forneus must not be the last Devil Lord), kick Poet out, re-recruit him: listen to his new song (the Song for defeating Forneus).
2 - Go to a storeroom and get Mana's Icon.
3 - Go to the Divine Tower and talk to the non-robed man inside, give him Mana's Icon, and talk to him until he mentions praying with Tiberius, recruit Tiberius.
4 - Be sure you have previously opened the Prayer of Death chest in the Devil King Palace, go to the Ancient Cave and use the Prayer of Life.
Shinon (near Loanne) is now open.
It features unused material (Unfinished Square Business) with new dialogues.
There you will find:
- the names of all the people who worked on the translation (THANK YOU!)
- 2 weapons: hacked Seven Star (don't use Star Stream) & Dragon Spear
- 3 armors: Dragonscale, Hid. Leather, Dusk Robe (careful, this is the true Dusk Robe, once you equip it it's forever, and you won't be able to heal your character or to revive through healing anymore)
- and a cool music selection menu.
GREED COUNTER
(from Character Guide by Khajiit Rankin https://gamefaqs.gamespot.com/snes/588634-romancing-saga-3/faqs/30020
and Metastase's posts https://gamefaqs.gamespot.com/boards/588634-romancing-saga-3/68705618)
Greed Level is checked by some quests (most notably Wood/Ward's). Maximum is 15 and then no quest with Greed lock will accept. Also, your character will automatically ask for money then, so once you reach the limit, you can't go down. On the other hand, you get no bonuses for reaching 0, except for that you can't haggle while selling pets.
Greed will be increased by:
* Haggling while selling pets: +1 each time
* Overlooking the thieves' "business" when paid: +2
* Asking Wood/Ward for money for his job: +2, even if you decline in the end
* Asking the mayor of Vanguard for money: +2 then +1
Greed will be decreased by:
* Accepting Wood's job without asking for money: -1
* Accepting mayor's job without asking for money: -1
Main characters starting greed counter:
- Harid/Khalid: 14
- Julian, Thomas, Sara, Ellen, Katrina: 7
- Mikhail: 4
- Monica: 1
There is no other visible way to tell your Greed Level besides reaching 0 or 15, at which point your character will automatically haggle when selling pets and ask for money, respectively.
As long as you don't have 15 or 0 Greed and you didn't do the Lake Hunt, you can always accept Wood's job without asking for money (-1 Greed) then remove him from your party in any pub, then repeat this process as much as you want.
DUPLICATE THE ROYAL RING AND THE DOLPHIN STATUE / FIGURINE
Equip one character with the item and kick him out. The item will be on sale in Yamas / Yarmouth (Pretty Ring / Fine Ring 10G turns into Royal Ring in your inventory; Dolphin Statue / Figurine 9999G). For the Dolphin Statue, this must be done before activating Vanguard. Also, when activating Vanguard, leave all your duplicates in the Storeroom, otherwise all the Statues in your inventory will disappear. With this trick (which is a feature since it was not corrected in the Remaster) you can equip each of your characters with a Royal Ring (equip, kick, buy, repeat at will, and finally re-recruit all the characters you have dismissed).
TWO SEVEN STAR / TRIONES SWORDS
On SFC:
Condition: Starburst has not been sparked yet.
Characters that are not suitable: Shonen, Paul, Sharl, Yan Fan.
This is easier with characters without magic or with a TP Crown.
Three steps:
1) Equip Seven Star in any of the hand slots #2 to #4 and remove all other items in the remaining hand slots.
2) Select Tiger's Den formation and Commander Mode. (The other formations, in CM, make the character attack with Kungfu.)
3) Save your game and battle using 'Tiger's Cave' until Starburst (SparkLVL 27) is sparked: a LV Seven Star sword (atk 60) appears in hand slot #1 after the battle. If not, load your game and repeat. If you remove the sword or use Starstream it will revert to a regular Seven Star.
Note 1: This can be used to place a LV Seven Star in Harid's Curved Sword hand slot (#1).
Note 2: This also works with Training Cane's Draw Sword & Swallow Hit, but all you get is a poor Epee with 10 Atk..
In the Remaster edition, this bug was corrected but a new bug allows you to get it.
Condition: Spark Starburst (Supernova) beforehand.
1) On a character (ideally with low SPD, CON & WIL, like Nora): equip Triones Blade in hand slot #1, an expendable weapon that allows a tech that does not deal damage (like a Shortsword, Spear) in slot #2-4, and remove all techs except the non-damaging tech (Feint, Sweep).
2) Place this character in a formation slot with high target probability (spot 1 in Phoenix Dance or Desert Lance), and optionally equip the target character with Sleep immune item (Nightcap, Dream Gem), some other character(s) with Mind immune (Matriarch's Helm, Ring of Demise), & all except the target character with Golden Bat/Feather Seal to make them invisible.
3) Fight an enemy that uses Confuse attacks, like the convenient Trentino at the start of the Phantom Labyrinth: kill only the Sindy at the top (to limit incoming attacks and to prevent the Trentino to use close range attacks), keep using Sweep/Feint, get Confused by Pollen until you get to Confusion Phase 3 (you lose control of the character), wait for Star Burst/Supernova to occur, and flee the battle. Your weapon in slot 2 will have been replaced by a LV Triones Blade (the icon is the same but atk 60). Careful, if you use Star Stream, it revers to a normal Triones.
Note: You can actually duplicate any weapon that transforms into another weapon (the only other useful weapon being Masquerade Greatsword, atk 35 - the other weapons transforming into weaker weapons). Note that in your next NG+, Triones disappears but you can keep the Masquerade Greatsword (but you cannot access Loanne with it).
START THE ICE LAKE QUEST, ROAM THE WORLD, FINISH LATER
If you talk to Wood and start the Ice / Arctic Lake Quest, the Ice Lake is the only destination you can go when you leave Justerm.
Nevertheless, if you finish the 1st or 3rd phase of the Business Minigame in Justerm after starting the quest, the Ice Lake destination will be overridden and you will be transported before Fullbright in Wilminton, and are now free to roam the world with Wood, and to finish the Ice Lake Quest at any time. This could be of use if you wanted to recruit and use Wood early and fish some Triton later.
9999 DMG VS DRAGON, UNDEAD, FEMALE (SFC ONLY)


Equip an attack scroll (Spirit stone, Sand of Mars, or Eternal Ice), set up a passive counter (equip Ice Sword or Flame Mantle, or cast Self-Burning) and select Defend while the scroll is highlighted: if you are hit, you'll counter for 9999 DMG to Dragon, Undead or Female enemies.
PERFECT MAGIC SHIELDS BUG (SFC ONLY)
Due to a bug, it is possible to set up a magic shield (MS) that activates 100% of the time against all attacks except those with no attribute (Aiming, Dagger Draw, etc.). Steps to be done in order:
1) Equip Flame Mantle or Ice Sword, then in battle:
2) Cast Water Ball, Dancing Leaves or Illusion Sun.
3) Change the battle environment to one matching the cast magic (Water if Water Ball; Wind if Dancing Leaves; no change needed if Illusion Sun).
4) Cast Reviver, Shadow Servant, Feather Seal or Dragon God. All set.
Notes:
- Squall has a 100% environment change rate so it is easier with Water Ball than with Dancing Leaves.
- If the magic environment changes, Water Ball / Dancing Leaves Perfect MS will not work anymore and you will need to redo steps 2-4. So, obviously, try pairing Water Ball with Shadow Servant (Moon magic does not interfere with Water magic) and Dancing Leaves with either Dragon God or Shadow Servant; otherwise the last spell you cast may change the environment and the set-up will have failed.
- Illusion Sun may be the most efficient Perfect MS: it requires one (or two) step(s) fewer to set up and is sustainable even if the battle atmosphere changes (i.e. once activated it will stay that way until the end of the battle, unless you are in a battle with resets, e.g. Byunei, Destroyer), but it is restricted to self.
- A set-up with Dragon God makes a character virtually unkillable (the Perfect MS will protect LP), with unlimited TP & MP.
- Hence the best set-up is unarguably Illusion Sun + Dragon God.
- In the example below, Paul (Ice Sword, Illusion Sun, Reviver) and Harid (Flame Mantle, Water Ball, Shadow Servant) evade Poison Mist and Pheromone.


REPEATER TECHS 'BUG'
The damage formula of repeater techs (techs that just repeat another tech several times) is incomplete and the referring skill used for the calculation is in fact the one used for the previous action in the turn. It can be the action of a party member or of a (preferably very strong) monster! And this can be planned and controlled to some extent.
Repeater Techs are: Holo Sword (Mirage Blade), Split Body (Doppelslasher), Deadly Spin, Yoyo, Round Slicer, Tri-Shooter (Triple Shot), Continue Shot (Multishot).
This also seem to be the case with Revival Light (Ray of Hope) and Nurseheal (Medicate).
See also the notes concerning the Repeater Tech Dmg Formula.
This is often presented as a bug, but the facts that these few specific formulae already exist in Romancing SaGa 2, and that they mostly remain as-is in the Remasters, point to a feature.
SILVER HAND TRIM BUG
The Silver Hand allows a second attack (except for Sharl) with the one-handed weapon equipped next. This second attack actually squares the damage modifiers from all the usual Formation (x1.25 for spot 1 in Speculation) and SupportLV (x1.39 at max LV) bonuses and Shadow Servant (x2), totaling a max dmg bonus of not x3.475 but of x12.
Also, if the Silver Hand is equipped on Boston (who gets a dmg x2 for his regular attack Trim), and attack with Trim, it happens that the second attack also benefits from this dmg x2 bonus.
Coupling these two bugs allows a whopping x24 dmg bonus (at most) for Boston's second attack.
SWITCH MAIN CHARACTER BUG (SFC ONLY)
By AlexJackson [My Additions between square brackets]
https://gamefaqs.gamespot.com/boards/588634-romancing-sa-ga-3/67711421:


"You have to be in a battle which you can lose without getting kicked to the title screen--i.e. one of the Abyss Gate guardians [Exceptions: Not the 4th Gate battle, not vs. air-borne Byunei. Works also during the Delivery Missions vs. Thieves.] The enemy has to use a multi-target attack which takes your main character's last LP at the same time it wipes out the rest of your party. Also, your main character must not be in the "last" position of the formation (i.e. the one whose commands you select last--usually the bottom-most position on the screen).
If you meet these conditions, the "main character dead" condition (which normally results in a game over, even in the Abyss Gate battles) gets overridden by the "party wiped out" condition, and the game continues with your party being returned to the dungeon entrance. Your main character gets removed from the party just like any other dead character, your other characters all get shifted up and your second character becomes your main character.
There's an even stranger trick you can pull with this bug. Get your entire party down to 1 LP, then fight an Abyss Gate guardian and get wiped out by a multi-target attack [Arakes is perfect for that]. When you reappear at the dungeon entrance, your character will be invisible. In fact, you're now controlling an empty party with zero members! If you get into a battle or visit the subscreen in this state, the game will crash, but you can do other things like visit shops and use Inns that will corrupt memory without outright crashing the game. The possible effects are varied and similar to the Sketch bug in early Final Fantasy 3 (North American SNES) cartridges--you can get items (including dummied items), have glitch characters with impossible stats added to the party, etc. The TAS for RS3 on tasvideos uses this trick to get a powerful glitch character and then warp to some kind of debug room, from which he enters the Abyss. [http://tasvideos.org/Game/snes-romancing-saga-3.html http://tasvideos.org/2839S.html]"
[End of quote]


Notes:
- The easiest place to trigger this bug is probably the Devil King Palace (no mini-boss, teleporters, hit-all attacks if needed).
- Switch Main Character Bug (Alt): This bug can be triggered alternatively with Birdsong or Poison: in both cases, the main character and the enemies must die simultaneously. There are requirements. For Birdsong, your Fire user must have been recruited after your future main character. For Poison, it must be against an enemy that can also Poison your current main character. Those two methods demand some fine tuning, but they can be used in more battles than the wider-known way.
- Your new MC will inherit the name, rank (star/occupation), favorite weapon and dialogues of your previous MC. The ending will be Katarina's 'bad' ending.
- Weird stuff can happen, the worst being the game bugging too much and freezing --> reset.
- If your main character was Thomas, note that you lose access to his relative's house (and to Sara & the business game trigger), as you normally do when Thomas is LP-killed. (You need to close one Abyss Gate for him to come back.) If your MC was Mikhail, you cannot Rule Loanne anymore.
- With this bug you can finally visit Librof with Tatyana! Unfortunately it does not seem to do anything :/
- When you recruit or kick out characters out of your party, cool visual glitches can appear. See the Leonid MC playthrough below for details.
- A Switch MC and 1, 2, 3, 4, 5 Monikas and...
This is initially a Sara MC playthrough. The Switch Main Character Bug was triggered vs Aunas who LP-wiped the party: you get an empty party (game crash if enemy encounter or Select menu) with Monika as a shell. The town music became Ellen's. Your storeroom item counts are glitched. A night at the Inn is fun (hover mouse cursor on pics below). And if you go to a pub you can endlessly kick out of your party some Monikas named Sara (clones of a beautiful girl unleashed upon the RS3 world: could be worse!) but if you press the B button or change your mind, then...!!!!??? --> Watch the video here!


- With this bug you can have Shonen as your MC.
Shonen is a strange case: he is a plot key character but info about him is very scarce (Zo & his brother, expanded in the Remaster version); even though he appears in 5 towns only Sara can recruit him; and at the end he forcibly joins your party out of the blue. He could very well have been a main character (and possibly was at some point).
Shonen-MC Town music is the Jungle theme. After beating one Abyss Lord, you can recruit Sara again (your former MC). After the 4th Gate, the Sara you recruited is forced out and a second Shonen joins you (at a Pub, apparently, you cannot kick him out but can kick yourself out: in fact you kick him out all right and if you go to the Select Menu and leave, a cool & creepy Abyss Shonen appears!). At this point formations start to be a bit glitchy (Formation Menu, Maximus). And when you reach the Abyss for the first time, the creepy black Shonen appears again! At the end of the Abyss, your Sara-Shonen joins Sara for the cutscene but he rejoins your team in the regular check equipment & formation phase (all his items have been unequipped, though). When you enter the last section again, your Shonen gets Katarina's last-liner, and it is time for the last battle, in a regular battle mode (even though Sara is supposed to be your MC), glitched too: when the battle starts a Monica runs alongside your other characters before disappearing outside the screen at the bottom, and after choosing your characters’ actions, you get to choose that of a Julian (Monica) equipped with 4 Salve 1, Punch & a list of 8 Punch (instead of spells, I suppose). For this battle I had only brought Leonid with me and went against the True Destroyer. (Here is the video of an alternate final battle against the Lesser Destroyer.) The ending was interesting too, since Shonen gets Katarina's ending (1): Shonen breaks up with Mikhail, haha. And on the final ship, there are no fewer than 4 Sara-Shonen... All in all, a refreshing and enjoyable playthrough! To conclude here are a few pics from the album of this journey:


The rest of the album of Shonen's Journey:


- With this bug you can also have Leonid as your MC.
Leonid is an interesting character too, with a unique gameplay in RS3 (unremovable unique Abyss magitechs, LP = 0 so he disappears from battle if HP = 0), which puts off many players despite how cool it is to have a vampire earl in your party. Leonid also has an unremovable Dusk Robe so be mindful of the accessories you equip him with, as the Dusk Robe HP regen can be overriden (here is why) and this is important for the Last Battle. Anyway, here we go.
Triggered the SMC Bug in a Sara game. Went to Leonid with an empty party: Leonid joined (no Grail needed!) and became MC, with altered stats. Leonid-MC town music is that of the Devil King Palace Underground section.
After winning the Tournament in Zweig, you can meet yourself in Leonid Castle. With Leonid’s special magitechs, you cannot prevent Yami’s HP regen (played with Leonid solo for most of the game) and need to hit harder than it heals. Leonid luckily sparked Niagara Buster at the beginning of the battle and managed to defeat it with only 2 TP left at the end. Close call. You get the Grail and can recruit a second Leonid. Yeah.
Cool visual glitches. It seems that if you use the SMC Bug, every time you recruit / kick one character your avatar can go into Dark Mode if you enter and leave the Select Menu (glitch 1). Also, after kicking at least one character out of the party, subsequent leaves change the colors of your MC icon (glitch 2). Two examples in video here and here, because it is pretty cool and I wish I could use these sprites! : ). Leonid’s appearance after kicking Snowman is particularly striking and reminds of a Japanese ghost : D
Note: 2x Control Undead on Abyss Lords (or on any valid target - click & scroll down for the list - with 2 attacks, even the Destroyer) with 2 Leonids is only effective for the 2 attacks if a Control Undead happens after the first attack (Control Undead does not cumulate).
Once you seal one Abyss Gate, all the characters you had LP-killed reappear and you can recruit them anew (including Sara and Young Boy for us).
After sealing all 4 Gates, I could simply recruit Herman, but this did not trigger the Maximus Chase. Oh well.
At the end, nothing much out of the ordinary, regular last battle (even though the MC is initially Sara). Katarina’s last-liner and ending (another lovers' quarrel with Mikhail ; ). That’s about it!


The rest of the album of Leonid's Journey:


- With this bug you can have 3 Sharls in your party!
This is pretty straightforward:
・First reach the Talking Door in the Devil King Palace, go to Lance to receive the Royal Ring, trigger the Save Gon quest, retrieve Gon and keep going to reach Arakes with your MC and Sharl (kill Thomas on the way) and be wiped out by a Hit-All attack with your MC at LP=1: Sharl (#1) is now your MC.
・Then start the Nightmare quest by talking to Muse from above her bed. In the dream, you are joined by another Sharl (#2).
・Defeat the Dream Devil and outside you can recruit yet another Sharl (#3). Now, too bad there is only one Silver Hand..! ; P


- And you can also have 3 Fullbrights in your party!
This is also quite simple, although it takes a little bit of time:
・Finish 1st phase of Business mini-game.
・Start the 2nd phase, recruit Fullbright, make him your MC (#1), ideally by being wiped out against a Devil Lord (one of the conditions to trigger phase 3 of the Business mini-game).
・Finish the 2nd phase of the Business mini-game, start the 3rd phase, recruit Fullbright (#2).
・Finish the 3rd phase, recruit Fullbright (#3).


- And who wouldn't want to have a party of 6 Mikhails?
Easy as pie, but the result can be confusing:
・You need to choose Mikhail as your MC at the start.
・Change your MC to anyone. (I took Nora in the example below.)
・Seal one Abyss Gate and trigger Byunei’s attack on Loanne, kick all your companions out of your party, go to see Mikhail in his room, accept and you can recruit him twice! (#1, the one you killed off, and #2).
・Step out of the room, head back in: a new Mikhail is there: recruit him (#3). Repeat to fill your party (#4, #5).
・Change your MC to Mikhail.
・Go back to Loanne to Mikhail's room: another Mikhail is there for you to recruit (#6). And that's a lot of Estocs, Life Canes & Lord armors..


SWITCH MC BUG & BGM
When you use the Switch Main Character Bug, the town music changes depending on your MC! Here is who gets what:
| Main Character | Town BGM |
|---|---|
| (00) Julian | Julian's Theme |
| (01) Ellen | Ellen's Theme |
| (02) Sara | Sara's Theme |
| (03) Thomas | Thomas' Theme |
| (04) Harid | Harid's Theme |
| (05) Mikhail | Mikhail's Theme |
| (06) Monika | Monika's Theme |
| (07) Katarina | Katarina's Theme |
| (08) Leonid | Devil King Palace Underground |
| (09) Shonen | Jungle |
| (0A) Tiberius | Underwater Palace |
| (0B) Wood | Crystal Ruins |
| (0C) Paul | Ice Lake (Ice Galaxy) |
| (0D) Robin | Leonid Castle |
| (0E) Robin (fake) | Field (Loob, Taftan..) |
| (0F) Muse | Great Arc |
| (10) Sharl | Holy King Mausoleum |
| (11) Poet | [Horse-riding Monika] |
| (13) Yan Fan | Operation Pet Retrieval |
| (14) Undine | Foreboding Danger |
| (15) Zhi Lin | Sadness Theme 2, Grieve |
| (16) Herman | [Wind] (Shinon settlers' opening scene..) |
| (17) Fullbright | Gwain's Den |
| (18) Bai Meilin | Opening Title |
| (19) Nora | Dungeon 2 (West Forest..) |
| (1A) Black | Awakening (Vanguard Control Room) |
| (1C) Fairy | Celebration March |
| (1D) Boston | Aurora |
| (1E) Zo | Into War (Pt 2) |
| (1F) Snowman | Into War (Pt 1) |
| (21) Sherbert | [Moaning 1] (Leonid Castle Bedrooms) |
| (22) MilleFeuille | [Moaning 2] (Leonid Castle Throne Room) |
| (23) Candy | [Insect Singing] (Great FakeShow at night..) |
| (24) Crepe | Limit Island |
| (25) Souffle | Rashkuta |
| (26) Bavarois | Xuan Battle |
| (27) Eclair | The Voyage (Sailing after intro..) |
| (28) Tart | [Blizzard] (Road to Leonid Castle..) |
SWITCH MC BUG + CHARACTER RENAME BUG [jp]
There are also potentially very powerful, stat-modifying bugs (but they can also screw you completely) depending on the first character of the name of your main character when coupling with the Switch Main Character Bug; but the Japanese input screen being different, it can only effectively be used in the original Japanese version: http://kaerulabo.web.fc2.com/rs3/bug/jittaika_bughero_data.html.
HERMAN+BLACK BUG
It is usually known that you cannot turn Herman into Black if your defeat Forneus last; but in fact you just cannot get Black if you have a party of 6. If you have a party of 5, a bug occurs and you get to keep Herman AND get Black instead of Shonen/Young Boy. With a party of fewer than 5, Shonen/Young Boy also joins. In these instances, Black joins with default stats & equipment.
(Note that if you use the Switch Main Character Bug to make Herman your main character, if you have a party of 5 or fewer, and if Forneus is not the last Devil Lord when you defeat him, Herman transforms into Black as usual, but another Black is also added to your party!)


LEVEL-UP BUG (SFC ONLY)
This bug allows you to artificially level-up your non-main characters (including your reserve character's SupportLV).
Requirement: You must have recruited between 23 and 26 characters in all.
Then you have to:
1) Kick out all party members (the first character you kick out will not level up).
2) Save your game.
3) Reset your game (L+R+Select+Start).
4) Re-recruit your characters.
5) Repeat.
4 MAGICS FOR 1 CHARACTER [SFC]
The Level-Up Bug can be used to make Fullbright learn 4 different sorts of Magics: teach Fullbright Water & Moon, use the Lvl-Up Bug twice: you get Earth & Sun (which alone can be leveled-up from now on, so for Water & Moon use spells which effect is not related to Magic LV).
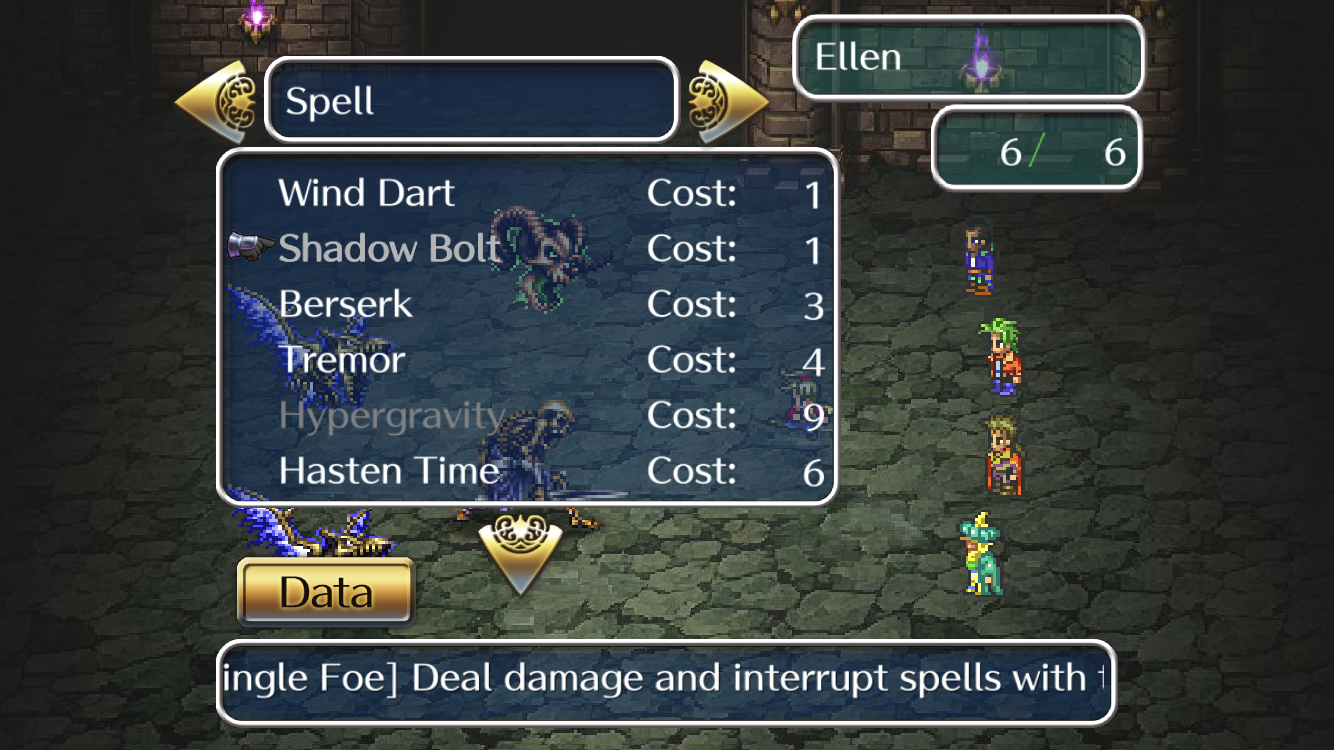
4 MAGICS & 3 OF THE STRONGEST SPELLS WITH THE REVIVER BUG [Remaster]
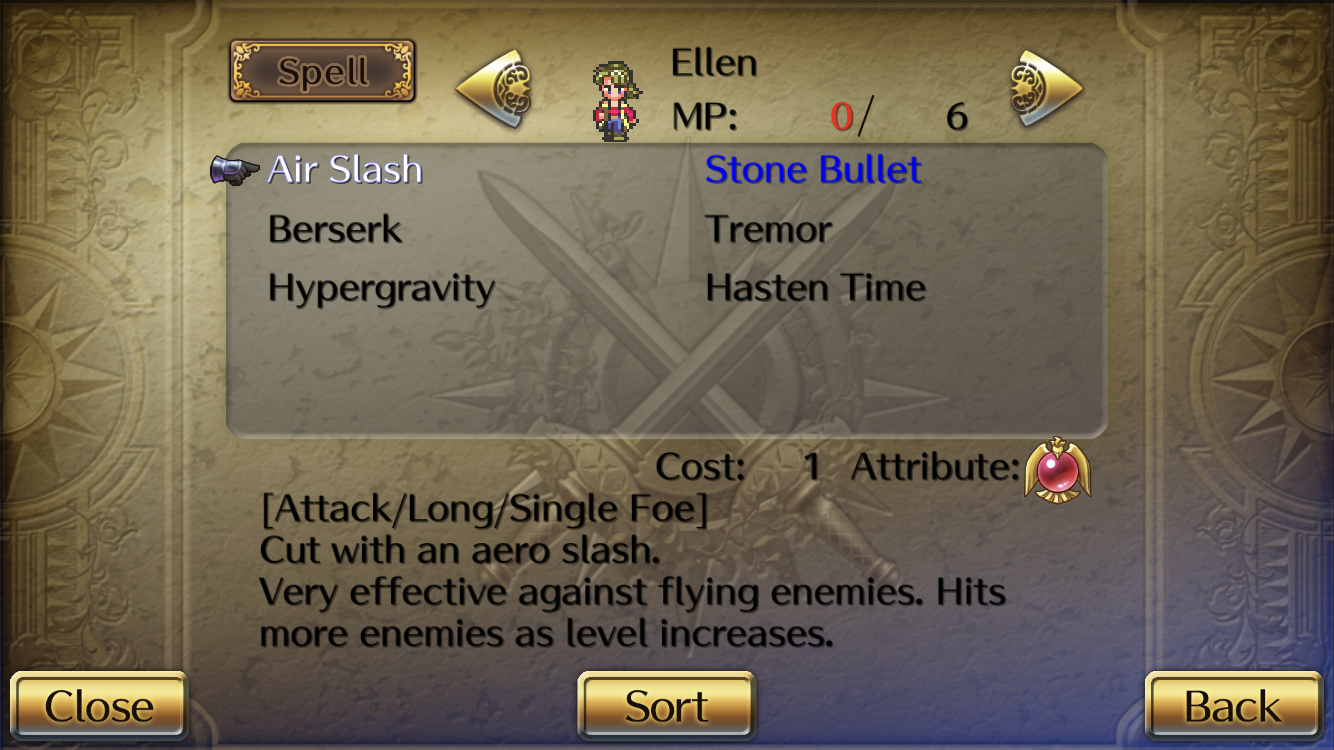
The Reviver Bug: In battle, if you cast the Shucho spell Revive on a character, and if the spell activates (the character dies and resuscitates), this character may forcibly learn Shucho magic and the Air Slash spell. (When Revive activates, the game considers that the Revived character has cast a Shucho spell, i.e. you can gain Shucho or MP at the end of the battle.)
Using this bug, you can have one character with spells from all 4 magic schools, including up to 3 of the Strongest Spells (which you can learn for free from Anna after beating the corresponding Abyss Gate).
0) First you need to close the 4 Abyss Gates! Then you need:
- one character with the Revive spell,
- one target character with Genbu or Byakko spells (learn the Strongest Spell of that magic), without def equipment (we need the target character to die). Heavenly magics (Solar & Lunar) do not interfere with the bug, so you can have one already or learn one later. This bug does not work with characters with unremovable magic (Bai Meiniang, Boston, Charl, Flurry, Leonid).

1) In battle, cast Revive on target character, bring HP to 0 to activate Revive, and kill enemies: sometimes the target character will forcibly gain one Shucho level: wonderful.


2) Go to Anna and learn Strongest Byakko Spell (Hypergravity) if your character had Genbu initially, or the Strongest Genbu spell (Hasten Time) if he/she had Byakko. (There is an overwrite priority order: Soryu > Shucho > Byakko / Genbu: if your character had Soryu at the start, if you try to learn Quicktime, Hypergravity or Reviver, you will lose all your Soryu spells.)


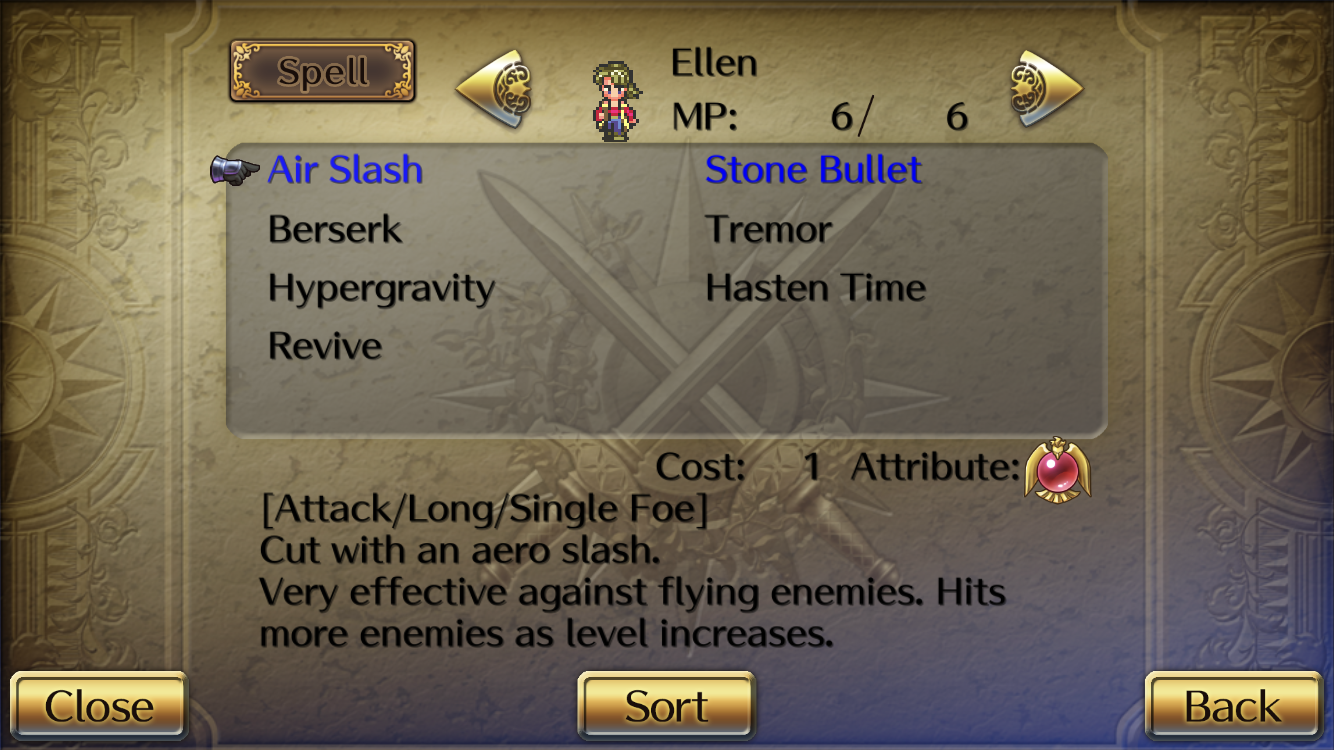
3) Learn Air Slash again with Revive Bug.
(At this point you can learn one Byakko (or alt: Genbu) spell from a magic seller but you will need to relearn Air Slash if you do. If you want more than one spell you will need to relearn Air Slash each time.)

4) Learn Dragon God Descent from Anna.

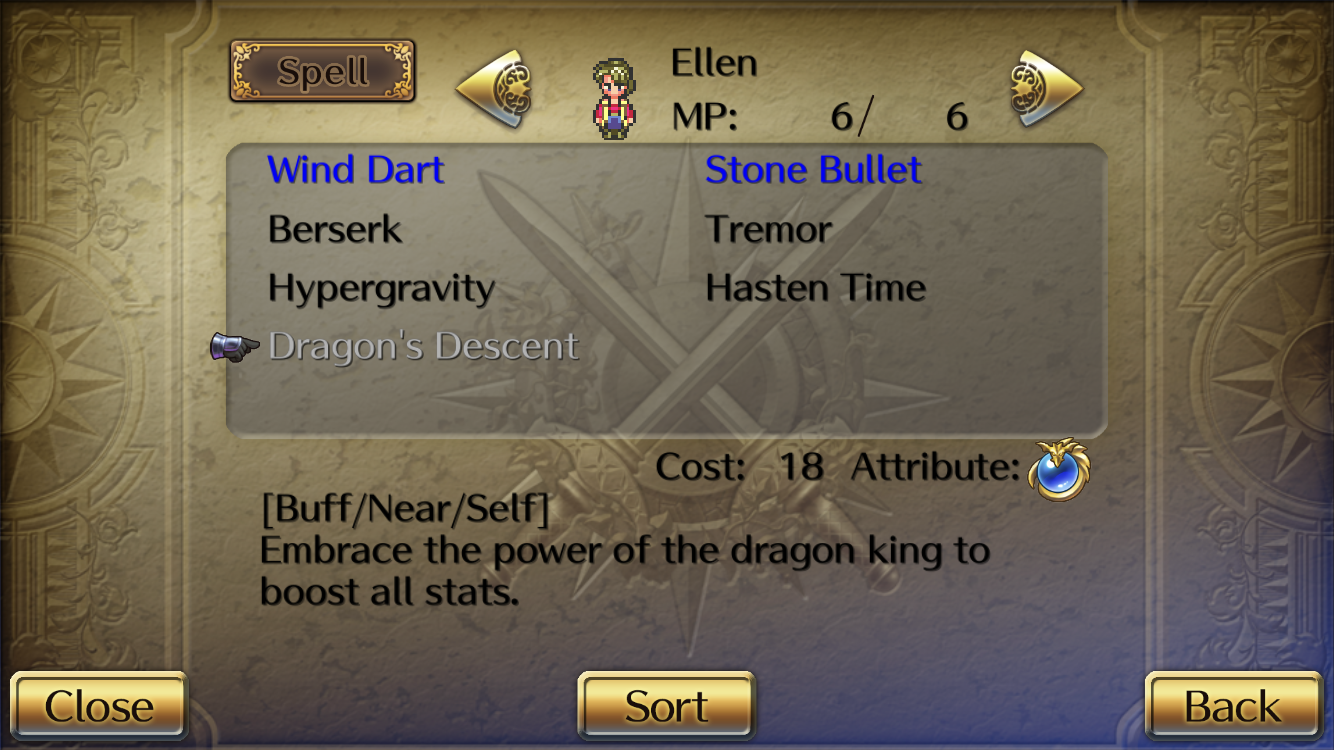
5) Learn Air Slash with Reviver Bug. Now your target character has spells from 4 magics: Soryu (Wind Dart + Dragon God), Shucho (Air Slash), Genbu (spells you had at the start or bought, Quicktime), Byakko (spells you had at the start or bought, Hypergravity).


If you learn Revive at this point, you will lose all Soryu spells (Wind Dart + Dragon God).

Which means that you can only have 3 Earthly Super Spells at any given time:
(Dragon Descent + Hasten Time + Gravity) or (Hasten Time + Gravity + Revive).
Note that Hasten Time can only be used once, even if you have Dragon Descent active (it consumes your effective SP count).
In battle, you can effectively use only one basic Earthly spell (order of priority: Soryu > Shucho > Byakko > Genbu), i.e. Wind Dart if you have all 4 magics. Note that even if you cannot use a spell manually, it can be used by your character in Commander Mode (e.g. Squall if you have Air Slash too).

Magic levels can and will go up if you use the spells (as usual) even though only 2 categories appear in the Select Menu; nevertheless, you will be able to see all your levels after you defeat Oblivion, on the Ending Ship.


ROBIN COMMANDED BUG (SFC ONLY)
In Power Tech Commander Mode, you can make (whichever) Robin use various non-Epee techs with an Epee only!
These techs are: all Spear techs, all Bow techs, Dynamic Hit.
Here is the set-up, as I re-checked it:
1) Weapon: equip only an Epee in the first slot (shields do not interfere).
2) Techs: equip one hit-all Epee tech (Firecracker or Snake Shot) and right below at least 2 of the said non-Epee techs.
As a result, in Power Tech Commander Mode (Robin not taking part in any Ftech), Robin will sometimes use the tech you placed right after Firecracker or Snake Shot in the list. The stats used for damage calculation vary from tech to tech.


Note: You can even equip Firecracker and Snake Shot and put one of the said non-Epee techs below each and Robin will sometimes use these 2 techs. The second hit-all Epee tech need not have 2 non-Epee techs below it; but behavior differs when it is the case and when it is not. More experiments are needed to see how this actually works.


100% SPARK RATE (SFC ONLY)
This incredible video explains how to learn all techs with a 100% spark rate.
https://www.youtube.com/watch?v=i_zRU-nUB3o (redone recently)
NOTE that this is an exploit. It will considerably weaken the interest and (re)play value for people who are new to the game and who do not already know the game inside out. It is not recommended to use this manipulation at all, you have been warned!
Requirements:
- 1 char with Parry (Harid or Paul), spot 2.
- 1 fast character without magic (Fairy) that will spark techs, in spot 1.
- Any other 3 characters to make a 5-member party.
- Where: Fire Fortress (Cerberus) or Kings’ Capital (Asura)
- Items: Golden Bat, the necessary weapons (obviously), items to recover TP (30 times).
- Formation: Speculation (Fairy, Shonen) or Dragon (Herman) or Desert Lance.
1) Vs. Cerberus (SparkLV 24) you can spark techs with a Spark Difficulty of up to 33 (tech not in Spark List) / 32 (tech in Spark List, MP=0 or SP Crown) / 30 (tech in Spark List, MP=1+ and no SP Crown).
For simple/targetable techs (= 2-command-input techs):
Step 1:
Into battle, spot 1: select the attack needed to spark tech(s), spot 2: Parry, the following 3: simple attack, and Run away (leave battle).
Step 2: Save your game.
Step 3: Reset (Start+Select+L+R).
Step 4:
- Keep button A down
- Before back to game keep the direction button down to start battle immediately.
- In battle, Spot 1: Cancel once, Parry: Cancel once, then A down.
Concretely: A down, then B once (cancels attack 1), A down (validates attack 1, validates Parry), B once (cancels Parry), then A down (validates all other actions).
If successful, spot 1 sparks a tech.
Retreat (Run), Save your game, back to Step 1.
To spark hit-all techs (= 1-command-input techs):
Parry not necessary. Spot 1: Cancel once, and 1 other character: Cancel once.
Problem: un-mastered techs pile up in your inventory.
2) To master techs from which no other tech can spark (anymore),
either because no tech can spark from the said tech, or because you cannot spark it against Cerberus.
Needed:
- Big Sword’s Blunt Strike tech.
- Midas Hand. Can be sparked at once with Step 1: Golden Bat, the rest: whatever simple attack, and Step 4: A button to battle, A button down for spot 1, Left D-button down so that you swipe screens 4 times, A button down: Built-in tech sparks.
Step 1: Spot 1: tech, spot 2: Parry, the rest simple attacks (can spark techs).
Then Steps 2-4.
Next turn: Cerberus is Stunned: use Midas Hand to Insta-Kill.
If successful, tech is mastered (and bonus: some techs may have sparked).
This is basically the same as to spark techs, but extra set-up to ensure battle victory.
For hit-all techs, same as to spark hit-all techs + battle victory.
To master techs that cannot be mastered because they can still spark a tech with a Spark Difficulty too high to be sparked against Cerberus.
Step 1: Spot 1: the tech, spot 2: Parry, the rest: Blunt Strike (simple attack).
Step 4: A to get in battle, then: spot 1: A, B, spot 2: A, then one character in spot 3-5 (for example spot 4): Right D-button once, Left D-button to swipe 8 times, and A down for the rest of the characters.
Then kill Cerberus with Midas Hand.
For hit-all techs:
Step 1:
Spot 1: hit-all tech, Parry unnecessary, the rest: Blunt Strike (simple attack).
Step 4: A to get into battle, then spot 1: cancel once, another spot: cancel once (or another spot : cancel once, once screen right, 8 screens left).
3) For the techs that cannot be sparked with Cerberus: Asura.
Preparation: raise Party LV, by defeating Cerberus about 20 times using Spot 1: Midas Hand, Spot 2: Parry, and simple attacks for the rest. And Cancel once for Spot 1, and 1 screen right + 8 left for one character (not the Parry character).
Then head to Ancient Temple Ruins (or Kings’ Capital for Harid) for the Demon enemy that can be an Asura.
Against Asura (spark LV 35), you can spark techs of Spark Difficulty of 44 / 43 / 41.
- Step 1: Spot 1: to spark tech. Spot 5: Parry. Rest: Simple attacks.
- Step 4: A into battle, then Spot 1: Cancel once, and 1 character (except Parry character): 8 screens left.
To spark Tiger Break: No Parry necessary. Spot 1: A, and for the rest: one Cancel once, one 8 screens left.
To master: go back to Cerberus and master techs.
4) For Evade/Counter techs:
Phoenix Dance formation vs. Cerberus.
5) For Beast God Stab:
All characters use Aiming vs Asura.
Of course to do all this from scratch is time-consuming (more than 3 hours) but these steps can be advantageously used for cheat-sparking endgame techs only. The best is still to play the game normally ; )
EMULATOR CHEAT
After a battle is won, you may save during the stat bonus attribution phase, and load the last save to try to get different stat bonuses and/or a (different) item. Repeat ad infinitum. The only thing that you can't change is tech mastery.
HACKS
I do not use hacks; but those interested can browse:
Save State Hacking Guide by Thundergod, Mana Sword, Qing
PAR Stat-Changing Code by Thundergod
Mini Mods for the Game, PAR Codes by Midic
POWER BOOSTING
Tech & Spell efficiency can be boosted thanks to Formations, Items, Battle Environment & your Reserve Character:
1) Formation
Speculation (1 2 3) boosts Slash/Hit/Pierce dmg by 25%, and SPD by 50% (1) and 25% (2 3).
Power Raise (1) boosts Hot/Cold/Bolt/Status dmg by 25% with a SPD penalty (-25%).
Hunter Shift (1) boosts Shot dmg by 25% with a SPD penalty (-25%).
Dragon Form (1) boosts all types of dmg by 25% and SPD by 50%.
Most Kungfu dmg depending on STR & SPD, formations that grant an additional SPD bonus further boost Kungfu tech dmg.
2) Items
The following items grant +25% spell power (non-cumulative):
- All magics: Devil King Shield
- Water: Dolphin Statue, Lobster (armor)
- Sun: Fire (armor, dropped by Enabler)
- Moon: Moonbone, Moon (armor, dropped by Invoker)
See also the Spell Enhancement section.
3) Battle Environment
When a spell (Wind, Fire, Earth, Water only) is used in the corresponding battle environment, there is a +25% power boost.
4) Support
The reserve character's Support LV boosts all party members' Phys/Mag power by a maximum of 39% (at Support LV 50).
EVADE SKILL SPARKING
A few tricks to help learning Evade techs. These work best with 1 character (or make your other party members invisible).
- To learn Screwdriver, have Parry ready, equip with Wonderbangle (protection vs. Spore), Holy King/Matriach's Helm (vs. Mindstare), Hid. Leather/Hydraskin Vest (vs. Poison, in case Parry did not activate, Paralyzed by Imprison & Poisoned by Spore) and Royal Ring (for HP regen), and fight a Mushroom (on its own if possible). Just use Parry and keep the A button pressed until you learn Screwdriver.
- To learn the Evade skills corresponding to enemy hit-all techs (Blade Roll, Random Arrow, Body Hit, Earthquake, Hypnotize), have Parry & Escape Out ready. Find an enemy that uses the tech you want to learn (list in the Evade section). During the first turn cast Escape Out (which, if you have only one character, will force the enemy to defend or use hit-all techs most of the time)(otherwise make everyone invisible), then activate Parry and keep the A button pressed until the Evade skill is learnt.
PROVOKE STEAL
After a successful Provoke Shot (that can make the enemy use random basic physical attacks), it is possible to catch, with Stealing Hands, weapons that you cannot usually catch (because they do not make contact), like the Crypt Elder's Glory Staff or Dobi's Dobi bow (!).
100% INSTA-DEATH
Insta-death attacks are 100% successful when dealt to an enemy already afflicted with Stun, Sleep or Paralyze (the same applies to your characters). This only works on enemies that are not immune to Insta-Death. E.g. you can insta-kill Mukcha/Mukchar, sleeping at Turn 1.
This also works with Quicktime, that stuns all enemies when activated: have a fast character cast Quicktime, and another, slower, use some insta-death attack afterwards (Day Break for example).
Note: In the Remaster Edition, you can couple this with the Silver Glove Insta-Death/Petrify Bug to eliminate an entire group of enemies.
COMPLETE ENEMY SHUT OUT
It is possible to prevent most (if not all) enemy actions: your character in Formation spot 1 must be unable to fight or LP-dead, and other characters must be either invisible (Golden Bat Escape Out or Fire Magic Feather Seal) or unable to fight (down, petrified). It is then possible to damage the enemy using several means (Escape Out, Poison, Dancing Leaf Poisoning, Sara CM Backpack items). See the Gameplay section for other applications of the Invisible Status.
HP & TP REGENERATION
Automatic HP regen at the end of each turn in battle can occur due to items, or to formations.
These two kinds of HP Regen do stack, so you can regen up to 198 HP per turn (max/turn=99 each).
See also the dedicated section on Healing.
・Item-related HP regen
There are two useful items that allow HP regen: Royal Ring and Troll Stone.
In the fitting battle environment (which you can alter by casting spells or using specific techs), elemental items have the same function. Such as: Lake/Lagoon Robe, Boston's Lobster, Firebird/Sucho Armor, White Tiger/Byakko Armore, Moon/Lunar Bone... For the complete list see the Healing Section and for detailed info on each item search the ITEMS section.
The HP regen bonus from items do not stack (Royal Ring + Troll Stone won't give you double HP regen).
In this category also falls HP regeneration granted by magic shields in the appropriate batlle environment.
The formula for item-related HP regen is: (CON + CON Mod)/4 x MaxHP/32.
・Formation-related HP regen
Auto HP regen also occurs if you are in Genbu (Genbu Stance) formation, or if you are in Commander Mode (any formation, but the HP gain differs depending on the formation due to a corrective multiplier, which is 0 for Free Fight/Free for All, 2 for Genbu & Spell/Magic Pyramid, and 1 for the rest).
The formula for formation-related HP regen is: (Support LVL + 10) x Formation Mod + Max HP/16.
(In Commander Mode, dead characters are also revived with 1 HP at the end of each turn, as long as LP≄0.)
There is only one item that allows TP regen: Holy Grail (equips in a weapon slot, like Poet's Fiddle).
Note: There is no MP regen in RS3.
ITEM-RELATED HP REGENERATION PRIORITY ORDER
Among items that allow HP regen in a specific battle environment, there is in fact a priority order:
Accessory > Body Armor > Shirt > Forearm
E.g. if one character has B. Dragon/Soryu Armor (body armor), Bone Ring (forearm) and Moon/Lunar Bone (accessory) equipped, HP regen will only occur in Moon environment.
This can be used to circumvent the penalty associated with the Fake Dusk/Twilight Robe (halved healing power): equip your character with a Moon/Lunar Bone (accessory). Note that this will evidently also prevent HP regen in Abyss environment (HP regen in Moon environment instead).
For the complete list of the HP-regen items see the Healing Section and for detailed info on each item search the ITEMS section.
ITEM COUNTER
A special battle strategy can be built upon the peculiarities of Item Counters.
The 'Item Counters' Ice Sword/Everfrost Blade's Freeze Wall & Flame Mantle's Self-Burning are special counters.
- The power of the counter depends on the character's INT, received damage, and Slash LV / Fire LV respectively.
- The action (attack/tech/spell/item) selected (or the action highlighted when choosing to Defend) may add Attributes to the counter. Counters nullify defenses so it has no direct influence, but depending on the nature of the additional Attribute, Formation bonuses or the battle environment can boost the damage.
- If you have chosen an action (attack/tech/spell/item or the action highlighted when choosing to Defend) that can alter the battle environment, the Item Counter gains this capacity and may change the battle environment.
- If the attack is blocked by a shield, the damage logically decreases; but negated completely (Evade shields), it does not.
- The counter activates even if your Shadow Servant got hit instead.
- Reminder: The Devil King Shield prevents the counter from activating.
A valid stragegy for enemies that have physical attacks can be built upon this:
- You need a character with high INT, high Slash LV & high LP, i.e. The Elephant or Bai Mei Nyang, trained in Sword or Greatsword, with a Phys Def of 0 (there are a number of accessories with 0 Phys Def, like Candy Ring), with the Dragon God and Shadow Servant spells, and equipped with the Ice Sword and Will (shield).
- For your other characters: Golden Bat x4, Holy King Spear for a character with high Pierce LV, and Rune Staff x2 for characters with high Blunt LV.
- Formation: Dragon Form, place your target character in spot 1 (Atk & Mag dmg +25%), a character with good Support LV in the reserve spot.
- Step by step:
Turn 1: Cast Dragon God with your target character, Escape Out with everyone else (if you have Quick Time, it can be cast now by one of the characters who shall Escape Out in turn 2).
Turn 2: Your target character casts Shadow Servant, the rest casts Spell Enhance on the target character and Victory Song.
Turn 3+: The target character either defends (highlight Misty Ice) or casts Shadow Servant, the rest casts Spell Enhance on the target character and Victory Song or heals if hit by hit-all waza. With high LV, 9999 dmg per counter is possible.
DEATH BY POISON
Very simply, it is possible to kill enemies by poisoning them with the Dragon Hit / Snake Blaster spear tech and hide for the rest of the fight (Escape Out or Feather Seal). This can be used for the Insta-Death/Petrify-immune endgame regular enemies that are susceptible to Poison, like Red Dragon or Mantis God.
DANCING LEAF / WATERBALL POISONING
If a character about to cast Dancing Leaf or Waterball is charmed by Dark Wing Destroyer's Evil Whisper, he/she will cast Dancing Leaf or Waterball (Water Column) on the Destroyer, which will thereafter receive Abyss damage at the end of every turn, like your own characters. This can be used to defeat the Destroyer early on (become invisible, wait out, heal when necessary).
Here is a video of a battle vs. the Full Destroyer whose last Dark Wing form is killed only (mostly) by Waterball Poisoning.
Note: This also works in the Remaster Edition.
REMASTER
For additional bugs & exploits on the Remaster edition, see also the Remaster page: Bugs, Glitches & Differences.
UNLIMITED MONEY
You can sell the Royal Ring (2500G) in any shop, buy it back as the Pretty Ring (10G) in the Yamas/Yarmouth Shop, and repeat this operation as many times as you like. (If you buy more than one Pretty/Fine Ring, only one of those will become the Royal Ring in your inventory.) But there is no real reason to use this trick at all.
Note: This trick is capital for RTA playthroughs (you can buy Shadow Servant almost off the bat). So many people actually self-impose a 'No Royal Ring' condition.
SECRET BOW TECH
If a Bow user's status is Blind, the Random Arrow / Rapid Volley tech (2 TP) becomes Inner-Eye Random Arrow / Rapid Volley EX (18 TP, 100% hit rate).
KEEP THE DREAM JEWEL
In Muse's Nightmare, equip Scharl or Muse with the Dream Jewel and LP-kill him or her:
when you wake up, they will still have the Dream Jewel in their inventory.
FIGHT THE ICE GALAXY DRAGON RULER AGAIN
Defeat it but don't take the Ice Sword / Everfrost Blade.
Instead, go back one screen and come back to fight it again
(possibly to spark techs and get the Dragon Spear).
This is the only Dragon Ruler/Lord you can fight as many times as you want.
FULL LP
Defeating an Abyss Lord / Sinistral resets all characters LP to full. Including those who were LP-killed during the battle or out of your party.
WIPED OUT


If your party is wiped out (all characters are unable to fight) by an Abyss Lord / Sinistral (but not if your 4th Gate or if you are solo), you are brought back not to the title screen but at the beginning of the dungeon. Also, if you lose to the Destroyer / Oblivion's last Dark / Void form, you get to see the 'bad' ending where the universe is destroyed.
RECRUITING SHONEN / YOUNG BOY
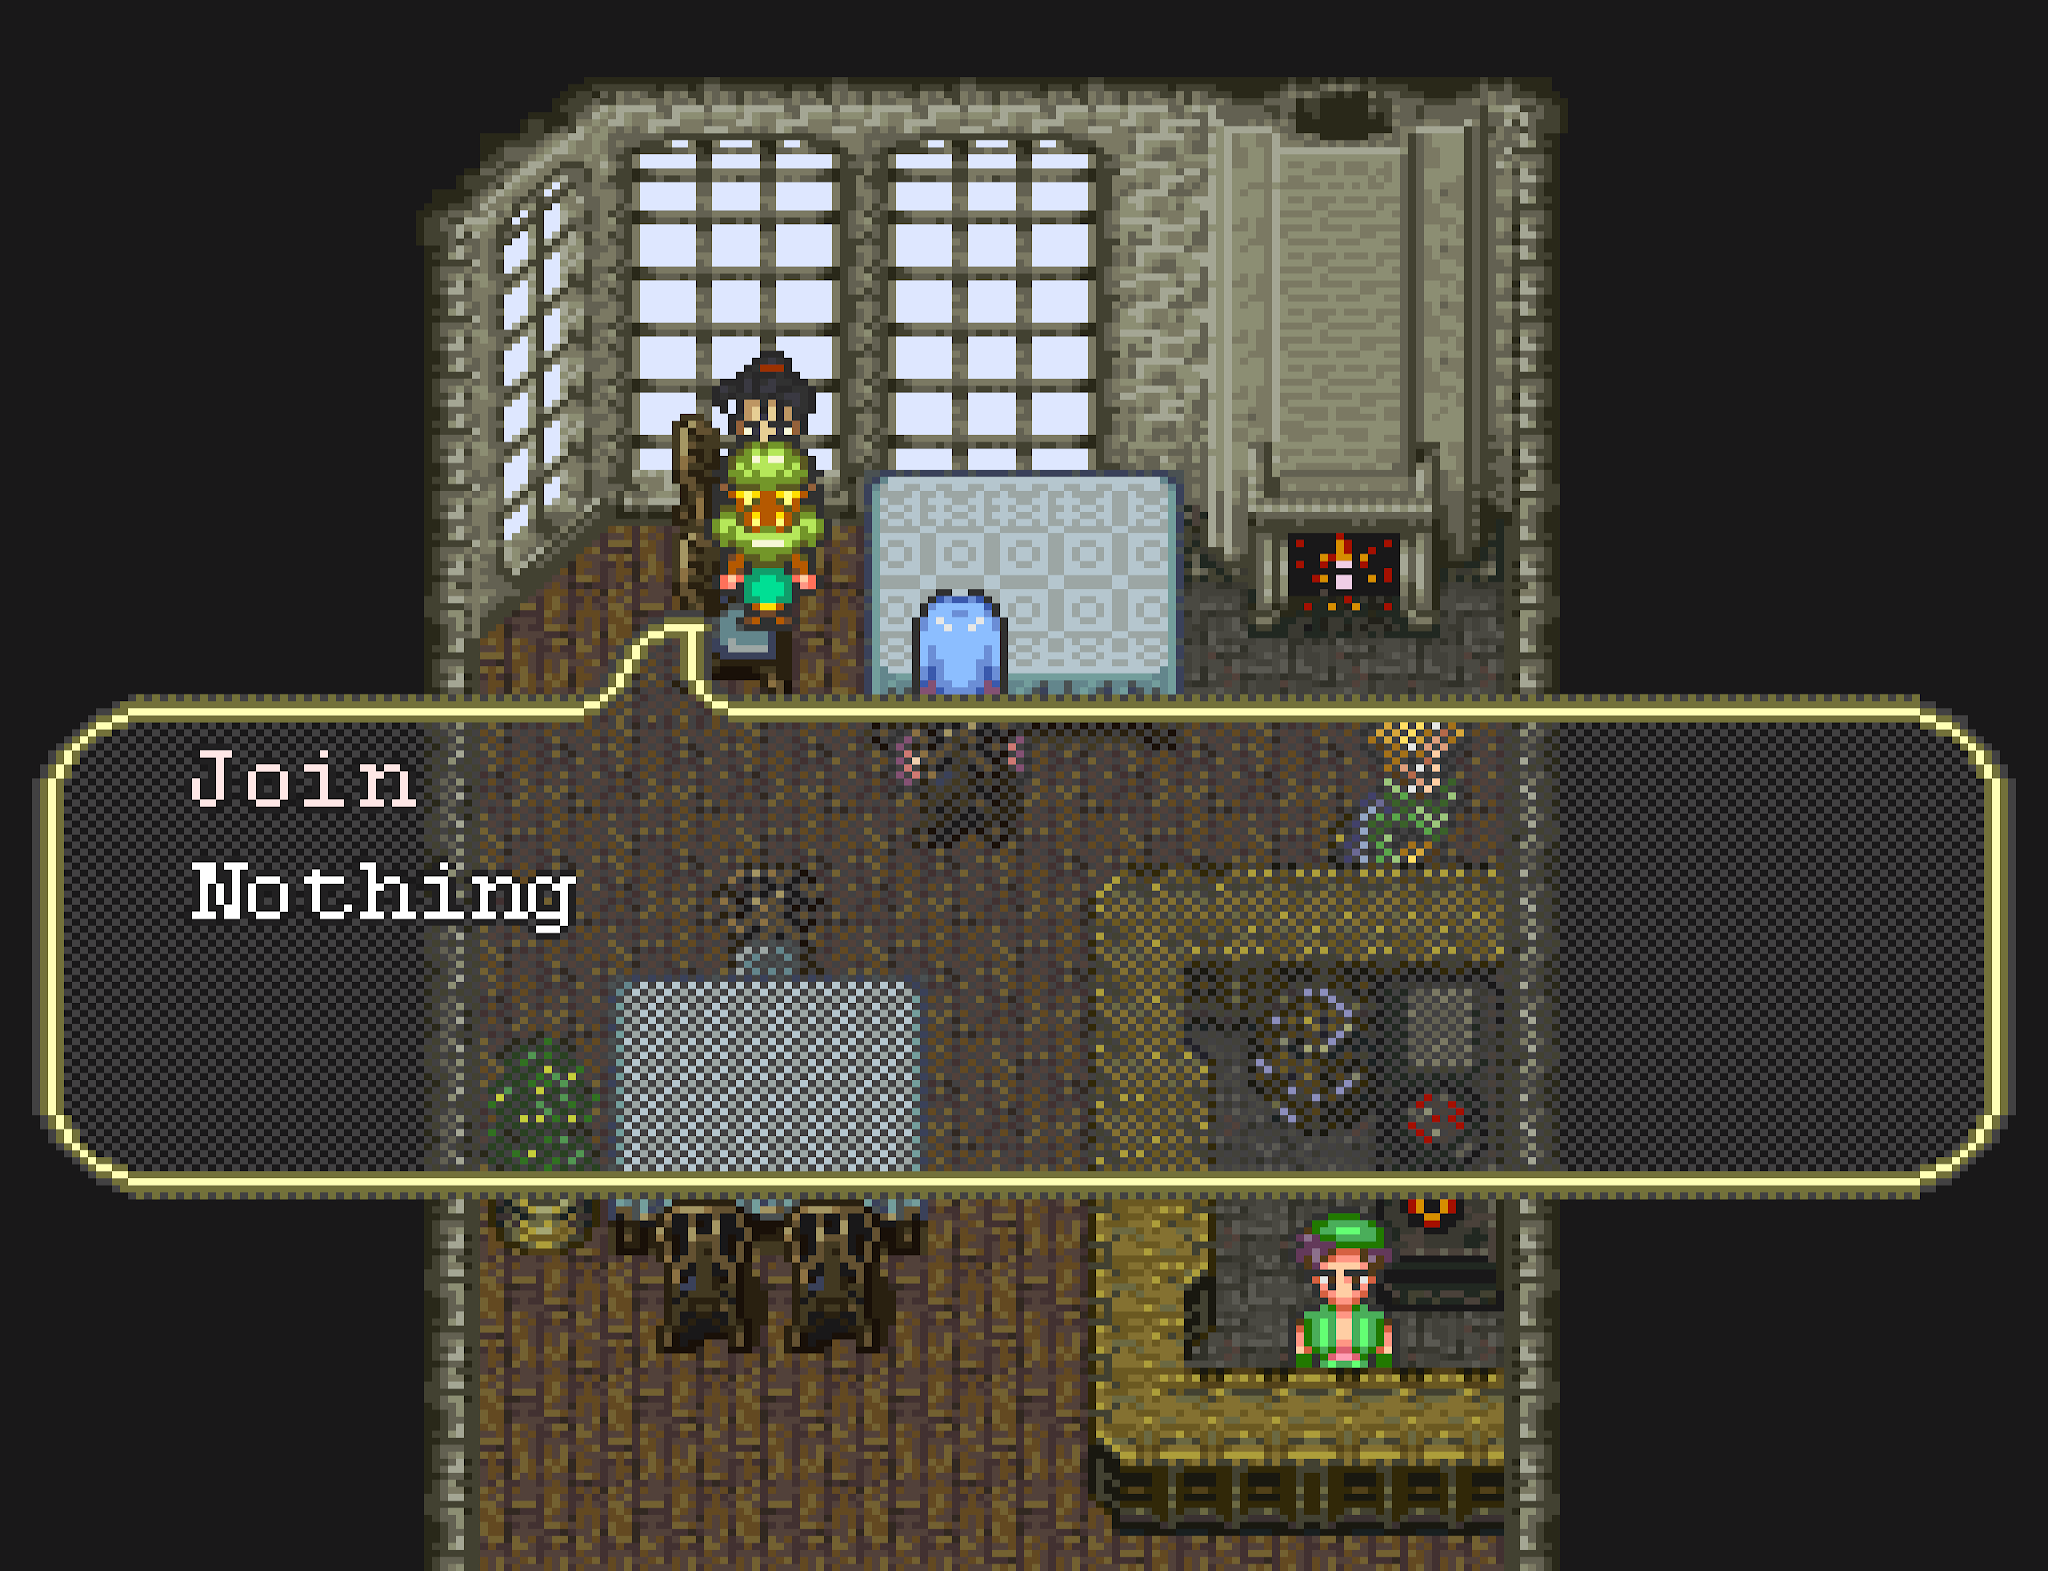

Recruiting the elusive or uncooperative Young Boy (Shonen) is tricky! or impossible, which can be troublesome if you needed him, to wake an elephant when Sarah is absent, for example.. So here are all the various cases:
- If your main character is Sarah, there is no problem, you can recruit him at any time in the pub of the towns of Justerm, Moses/Mahzoz, Podol/Podorui, Yamas/Yarmouth or Zweig. Note that he will leave you after closing the 4th Abyss Gate.
- If your main character is not Sarah, you cannot recruit him under normal circumstances.
Shonen will join you after you close your 4th Abyss Gate if you have a party of 5 or fewer, and you can kick him out and re-recruit him (at his usual pubs) at leisure afterwards. Be careful: if you have a full party, Shonen will not join you at this time and he won't be available for recruiting anywhere. This can be important, because getting Shonen to join is the only way to recruit The Elephant (Zo / Rukh) if you head East for the first time after closing your 4th Abyss Gate.
- Note that Shonen will also forcibly join you (if he is not with you already, that is) after your battle with the Abyss Naga, but at this point you will head into the world of Abyss and cannot go back.
- Note that Shonen can never take part in the last battle, unless you use the Switch Main Character Bug (SFC only).
WHERE THE DEVIL..?
The easiest way to know - if you are not sure anymore - which Devil Lord / Sinistral you have defeated so far, is to go visit Anna in Lance and to ask her about the "powerful spells": the available spells are from the Devil Lords you have already beaten.
AUTO LEVEL UP
In the Crystal Ruins, the Inorganic (Slime) enemies split and reproduce. To 'auto-level up' just stand there and have your keyboard or controller auto- or rapid-fire the A button, go away (your party will fight endless Inorganic enemies) and come back later. (This trick is really superfluous.)
Note: You can also use the Level-Up Bug, with greater effect (it does not level up only one skill).

A FEW GLITCHES
|
Julian Block Master Shield Rush Master Ventriloquist Muse A Shattered Stone in a Dream On Fire! Y, oh Y? Slow-Motion Floating Shonen |
Snowman's Dance Nora, Herman/Black & Bai Meiling A Glimpse of the Hidden On the Handrail We Climb Like a Candle in the Cave Stone Dragon God Zombie Moving Statue Muted by a Car Between a Wall and a Thomas |
Leonid: Death & Counters Voice from the Dead Mikhail Up Up on the Throne Aquatics in the Walls Floating Coffin Hooded Broken Elevator Other Glitches |
・Julian Block Master
During Monika's Intro, in Godwin's Cave, you have to fight an Evil Demon that Face Hits you as soon as you go into battle. Julian saves the day and Parries the attack. But if Julian doesn't have a weapon to Parry (remove it after clearing Podol Cave), he will block the attack with his whole body: this is a special tech 'Julian Block' that you may even master at the end of the battle. Unfortunately, it does not appear in your tech inventory afterwards and you can never use it again.
Note: Supposedly you can also master Snowman's Forever Ice! but I have never managed to (the tech cost must be quite high).


・Shield Rush Master
Some built-in techs (weapon-specific) are readily available, some must be sparked, but none requires mastering.
Nevertheless, you can master Spike's Shield Rush...

・Ventriloquist Muse
In between the Gon & Nightmare quests, and at the start of the Nightmare quest, if you talk to Muse from above, she will say Sharl's lines, and even get out of bed and drink the medicine with (or without) you!


・A Shattered Stone in a Dream
If Muse deals the coup de grace to the Dream Devil with Spirit Stone or Sand of Mars, it 'shatters' without rhyme or reason.


・On Fire!
Upon meeting Aunas, the hair of some Commander-Mode Main Characters is on fire!


・Y, oh Y?
For some unknown reason (which may have to do, IMHO, with Thomas' special Gon quest) you cannot 'Y-exit' your room at the Inn in Pidona.

・Loanne & the Mausoleum of the Holy King in Slow-Mo
When you do not have access to Loanne Castle, talk to the guards while pressing the 'Up' directional button: the movements of all NPCs in town will be slowed considerably. That's about it, haha. This also happens when you flee from your battle with Shadow during the Trial of Hunters and talk to the central maiden (the one that does not transform).


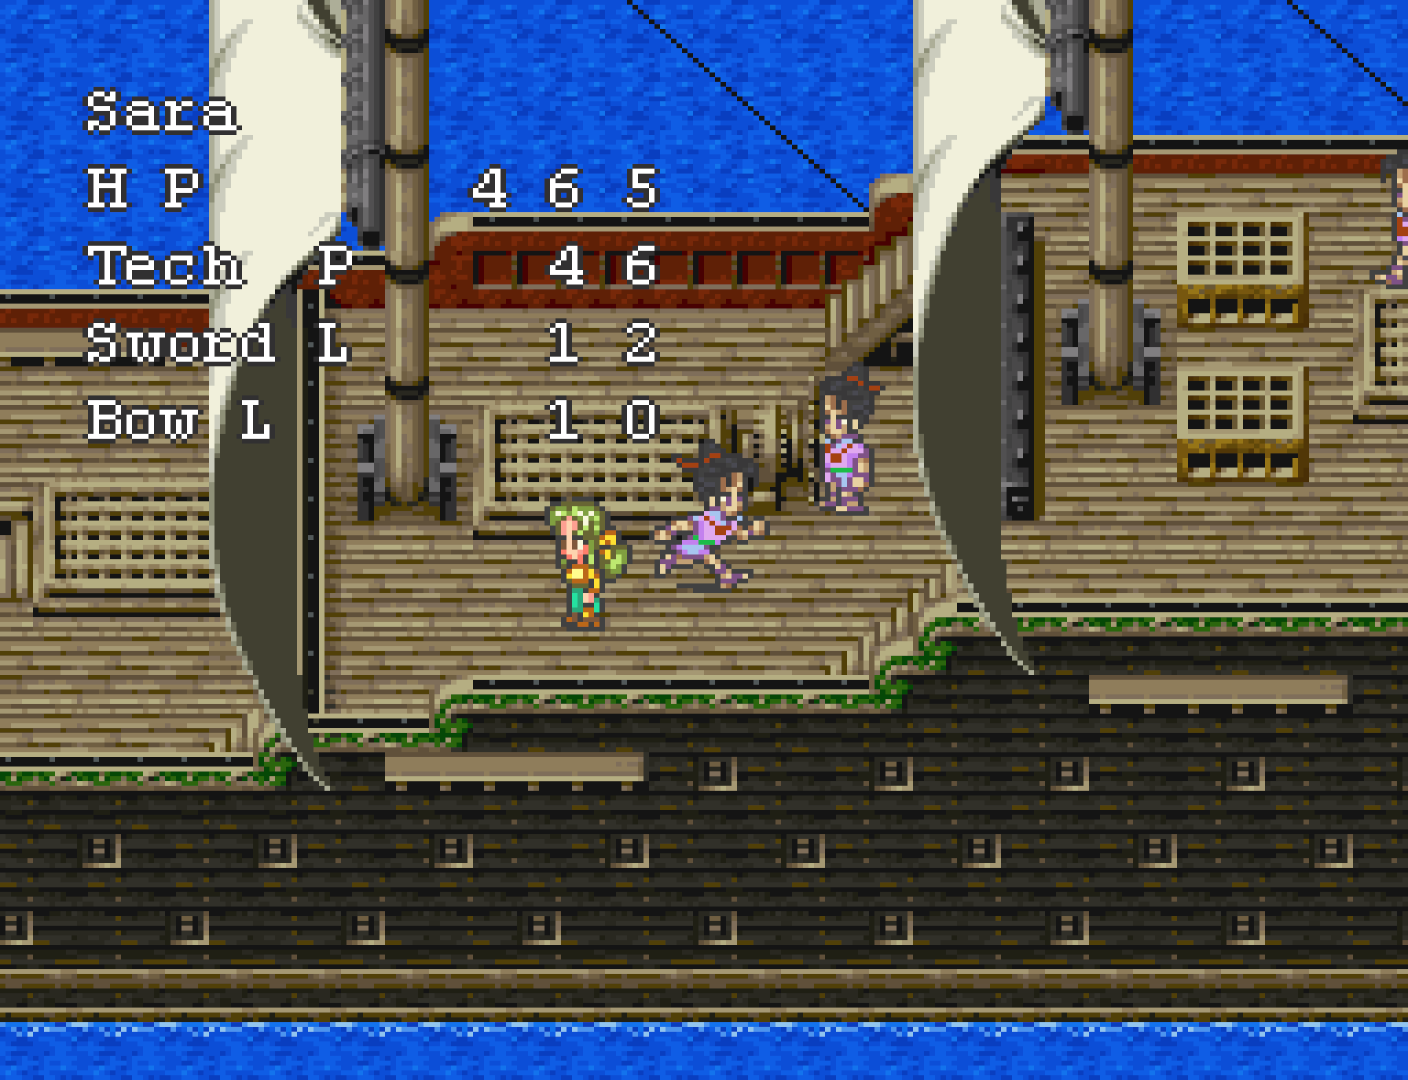
・Floating Shonen
Close the 4th Gate with Sara & Shonen in your party: a floating Shonen and displaced text comparing to the sequence without Shonen.


・Snowman's Dance
Get the Ice Sword & Eternal in the Ice Galaxy, recruit Snowman in Snow Town, try and leave: Snowman requires Eternal Ice to leave town: give it to him. Now press the B button: you'll be back in Snow Town and Snowman will do a glitchy dance! You can also leave town by pressing the X button: Snowman's movements will change, up to going out off screen... This only works this one time.


・Nora, Herman/Black & Bai Meiling
If you meet Nora for the first time with Herman/Black in your party and decide to help her, Herman/Black reacts and makes additional comments (dialogue slightly differs depending on whether you are with Herman or Black). But instead of Herman/Black, Bai Meiling appears out of nowhere and speaks in his stead!


・A Glimpse of the Hidden
On the road from Lance while transporting goods, in the Fire Palace, or in the Devil King Palace, whenever there are enemies hidden behind pillars, if you press the Select button, as you blur out to the Select menu you can see the hidden enemies!


・On the Handrail We Climb
Upstairs the Rotten Sea Ruins, a visual glitch makes it look like your main character is standing on the handrail.

・Like a Candle in the Cave
When you are getting trapped by the Mayor of Kidlanto in the Offering Cave, if you move forward to the next room before the door is completely closed, in the next room you can see the halo of the candles die out before your eyes...


・Stone Dragon God Zombie
In the same turn, have one character be put down (HP=0) then be cast Stoneskin on (ideally vs. several Reaper enemies that would hit the same character with Deathgod Stove first, followed by Stoneskin). After a few turns, the Petrification kicks in: use a Soft to cure the Petrified status: your character is now fully functional with 0 HP and when it takes hits, LP gets damaged instead (this part is similar to Dragon God).


・Moving Statue
In Commander Mode (Phoenix Dance, Spell Pyramid), if a character with a Curved Sword gets Petrified, if you activate the Ftech Nature Moon, the Petrified character will take part in the attack! The same thing happens with Arrow Storm (Hunter Shift).
・Muted by a Car
After leaving the West Forest, the Ancient Cave or the Rotten Ruins (their respective music is playing), if you enter the West Forest and get hit by the Dragon Machine, the BGM goes silent until you change places or battle.
・Between a Wall and a Thomas
If you finish the first phase of the Business Minigame with a party of 6 and Thomas not in your party, after Fullbright's talk you are back in Thomas' room but your main character's icon and Thomas' icon are superposed: go left and you will be stuck in a small space, unable to get out (just press X to leave the house ; ).


・Leonid: Death & Counters
Two glitches involve Leonid 'dying' due to a Counter, with unexpected results:
- If Leonid attacks with Blade Roll, gets Countered and 'killed' (HP=0) due to that Counter, he disappears but another Blade Roll with an invisible user starts on its own, crits and deals over 10 times the damage the first Blade Roll would have dealt.
Note: This also works with Demi-Echo; or for the lower of 2 enemies in a line with Swing, [Leg Sweep] & Tri Shooter; or, instead of Leonid, with any character upon which has been cast Reviver.


- If Leonid attacks with Dancing Sword, gets Countered and 'killed' (HP=0) due to that Counter, an after-image of his defeated self lingers...


・Voice from the Dead
If you LP-kill Wood during the Ice Lake quest, upon completion you will still hear his lines, out of nowhere, from a shifted dialogue window, and after you close it a black square will remain...


・Mikhail Up Up on the Throne
With Mikhail as your main character, while Governing Loanne, after refusing a Mass Combat, press the buttons Up and A: Mikhail climbs on the throne. If you choose to Rest and press Down to access the Ruling Menu again, Mikhail climbs up even higher on the throne - so high that in fact you cannot move from that location anymore! (Press X to leave the Throne Room ; )


・Aquatics in the Walls
In the 120G Treasure Cave (also in Herman's Treasure Cave), there is a chest-trap with Aquatic enemies. Open it, save your game, reset to title screen, load your game. The chest is as new: open it again: the Aquatic enemies will slide downwards, even inside the walls... You can repeat these steps if you feel like it!


・Floating Coffin
If you go to the Holy King's Coffin in the Holy Temple, stand before it and press A, it moves up. Save, reset, load, go behind the coffin: it goes up again, through your character. If you turn around and press A again, it goes even further up! And that is as far as it goes. On the other hand, your character is encased in an invisible space and you must press X to exit.


・Hooded
After 'buying' the robes to enter the Divine Tower, if there is a traffic jam at the door, your character may get stuck and you regain control: you can move about and talk to the people as usual...


・Broken Elevator
If you press the Select button right when you arrive at the upper destination of the elevator in the Divine Tower, and leave the Select Menu, your character (and the elevator, we suppose) will be stopped in mid-air! You can turn left and right, but if you press down you get off correctly. Quite anti-climactic!
Note that if you press Select too early, this screen will repeat (and the music drags on). You can do that again and again.


・Some other glitches are pointed out in the course of the Walkthrough: in Monika's Introduction (Godwin's Cave, when you meet Poet), Thieves' Cave (Paul's 'See ya'), Smart instead of Dragonscale Shield in the Workshop after Mikhail's order from his throne, the existence of the Boston / Limit Island ending even if the island is destroyed, the Shortcut Bug in the Rotten Sea Ruins...
A FEW DETAILS
|
Blinking Flowers The Two Dolphins The 3 Cramp Take a Nap in Mung Village Moving Snowmen The Throne of Loanne Ride the Fairy The Holy King & the Devil King |
Shy Anna Talk to Anna Sleeping Anna And Off Goes Nora Katarina's Return No Select Open the way! The White Stone |
The Crime Scene Don Juliani Katarina Zombie Hen-shin! Gold Magi in Formation! DK Palace & Phantom Maze Weather Forecast |
・Blinking Flowers
In the Holy Temple in Lance, in the Trial of Hunters, there is a blinking flower of various colors in the central beds.
Those are the same colors as the lone flowers in the upper corners of the first room.


・The Two Dolphins
When some characters set off from Mules for the first time, and when you make Vanguard move, you can see a couple of dolphins.
Possibly the same dolphins both times?


・The 3 Cramp
The three monsters guarding the Dolphin Statue are 'interlocked' (they do not act and their names & '3 Cramp' – the Japanese translates as Trilemma or 3-Way Deadlock – appear during the turn, in any mode) as long as you do not kill one of them.


・Take a Nap in Mung Village
In Mung Village Shop, you can tuck yourself into bed! (Approach the bed from above.)

・Moving Snowmen
The first time you reach Snow Town, all Snowmen are supposed not to move.
But if you walk around, you'll notice that the Snowmen do move – when you are not looking (when they are off-screen), haha.


・The Throne of Loanne
The main characters react differently when facing the throne in Loanne Castle.
It is Mikhail's literal work place, and for those close to him it generates uneasy thoughts.
The rest of our crew, on the other hand, seem pretty happy with it!


・Ride the Fairy
Is this a glitch, or a detail? In the Fairy Village, if you fall on a flying Fairy from a higher floor, and move in the same direction she does, you can ride her to infinity and beyond.

・The Holy King & the Devil King
In RS3, the gender of the Holy King & of the Devil King is not explicitly mentioned. (In Japanese 聖王 & 魔王 could point out to males, but the word 王 may also describe the status only, like Sovereign or Ruler in English.) According to Emperors Saga (2012) and Kawazu's Twitter, the Holy King is female (Aurelius – a male name, ahem)(hence the official 2019 translation 'The Matriarch'). Nevertheless, you can see the Holy King from behind in the RS3 Opening sequence, and in a stained glass in the Holy King Temple, and it appears to be a male. Kawazu had apparently already decided at the time, but there either was some miscommunication with the staff, or some conscious choice from the production department to make the Holy King a male given the genre of the game.
The Devil King (named Pygmalion) is a male. His depiction in the Opening sequence is quite different from what the character design artist, Kobayashi Tomomi, had in mind! ☞ see the box of the original game.
In-game, the lore is very scarce. Some characters (including you) can gather their Relics (items) and in the Remaster version, there are a few extra cutscenes of dubious (IMHO) interest.


・Shy Anna
Anna is just a bit shy. If you ask her about herself, her reply changes depending on your main character's gender.


・Talk to Anna
- By talking to Anna you can: learn about the Abyss Gates (see below), learn the Strongest Spells for free (after sealing the corresponding Abyss Gate), get reminded of the CM Multi-Magic Fusion Spells you have already found (in each of the dungeons leading to the Abyss Gates), open the Ice Galaxy, the Phantom Maze [Remaster Only] and incidentally the Storeroom in Lance (in Anna's basement ; ).
- Note that you must talk to Anna about the Gates to trigger: the Water Abyss Gate Quest (Vanguard murder case) and the Fire Abyss Gate Quest (Fire Fortress location). Which also means that you can close the Earth Gate & Wind Gate on your own, without consulting with Anna ; )
・Sleeping Anna
At the end of all things, Anna is finally able to take a nap.
You can see her turn in her sleep. Does her pacing brother prevent her from resting a bit?
(Hover your mouse cursor to see her move.)

・And Off Goes Nora
This is the scene you witness if you go see Nora for the first time with a party of 6.


・Katarina's Return
Katarina is tasked with getting back the Masquerade.
Once you have defeated Maximus and closed one Abyss Gate, you may return to Loanne.
You can even let your hair down again, and trade your bad-ass adventurer looks for your former, nobler attire.
Here are the special sequences of her successful return.


・No Select
You cannot access the Select Menu in Kidlanto 'Harbour' (neither can you in the Remaster).

・Open the way!
At the entrance of the Holy Trials, if you keep speaking to the keepers, they keep moving in whichever direction they (can) go (until they cannot anymore, that is - hover mouse below). This also happens with the soldiers guarding the gates when you have access to Loanne Castle.


・The White Stone
The White Stone in the Rotten Sea Ruins had a lot of people make all sorts of unconclusive suppositions back in the day...
(In the Remaster Edition, instead, there are just regular floor tiles.)

・The Crime Scene
The fated room in Vanguard, before and after the murder, and after the cleaning. Now for rent!
Note: This scene is censored in the Remaster edition.


・Don Juliani
As Julian, have a look around in Loanne Castle and see what people have to say about you!


・Katarina Zombie
When Katarina gets poisoned, her complexion and regained attire do not make her look at her best...

・Hen-shin!
If you flee from your battle with Shadow in the Trial of Hunters, all maiden but one transform in a fiery display into Fairy enemies!


・Gold Magi in Formation!
If you decide to go after Undine, you get to fight Gold Magi (Gold Magus) in her stead, who can use cool Spell Fusion and Multi Magic (Zodiac Fall, Star Virus, and the Enemy-only Cat & Dog).


・Devil King Palace & Phantom Maze
Two rooms of the DK Palace were re-used for the first and last rooms of the Phantom Maze in the Remaster edition.


・Weather Forecast
A storm bringing rain, thunder and lightning to reach Shinon tonight!

VARIA
・ 'Romancing Sa・Ga'?
ロマン (Roman) in Japanese can mean the adventure one has been longing for, or something along those lines (男のロマン, a man's dream-adventure, etc.): instinctively that is what I thought 'Romancing Saga' meant: 'Great Adventure Saga', or something. (Japanese English more often than not does not really mean anything, it just sounds cool to them.)
Now thinking about it, it may also have to do with the old Romances (chronicles & songs), hence the recurring Minstrel, incidentally? Romancing Saga thus meaning sagas (great tales) that are writing themselves as you play them? That would be in the series' spirit, wouldn't it?
I also wonder if the capitalisation 'Sa・Ga' means something, or if it's just for show? (The Japanese title is stylized as サ・ガ in which the dot is usually used to separate transliterated words, for example to separate foreigners' sur/last names.)
One would need to find an interview of Kawazu where he explains what the series title means.
Edit: In fact, most of our suppositions above are plain over-thinking, haha:
- About 'Sa・Ga': It seems that 'Saga' came from the need of a title shorter than 'Final Fantasy' and with a stronger aural impact (like onomatopoeiae in comics). Kawazu doesn't remember who came up with 'Saga', or how. The stylization Sa・Ga / サ・ガ is most likely purely visual (no real meaning except, additionally, to differentiate from Nordic Sagas).
- About 'Romancing': Kawazu remembers that INOUE Nobuyuki came up with it. Kawazu supposes it comes from the title of the movie Romancing Stone: Hihou no Tani (the Japanese title of the 1984 movie The Romancing Stone). In the end he believes it was a good choice. The combination of various elements such as Kobayashi's illustrations or Itou's music ended up creating a 'Romancing' vibe. [As to what a 'Romancing' vibe is or means, that's another question!]
(Sources: Wikipedia [jp], 2015 Famitsu interview of Kawazu, Dengeki Online interview of Kawazu.)
・Group Training Camp
The secret indoor group training screen in the Select Menu.
(Hover mouse to do squat reps.)

・The True Moulin Rouge
When you have mastered the BSword tech Moulin Rouge,
you can attack with its true form: a killer French cancan move.

・Harid's Hot Xmas
25-year anniversary, pandemia or whatnot, Harid decided that he wasn't going to wait any longer to make his move into 2021.

・About
- There are no fewer than 17 shades of black for the backgrounds of the towns & dungeons in the game.
- There are more than 3800 pictures on this site...
AND A FEW QUOTES!


DATA FROM THE SAMPLE CARTRIDGE
Used and unused data from the 1995 Sample/Beta cartridge!