
MINI GAMES
BUSINESS MINIGAME
Note: Business Game Glossary SFC 1995 / Remaster 2019.
BASICS
TRIGGER, PLAY, GOAL


To start your firm and this curious mini-game: after saving Gon, recruit Thomas (left-most room in his relatives' house in Pidona; if you aren't Thomas or do not have him in your party already, that is), talk to the bearded man at the table (Thomas' uncle) then to Fullbright in the right-most room of the same house, and accept twice.
How to play? The game is simple (and very easy, comparing to Mikhail's minigame, but quite repetitive too): talk to undercover Trading Agents around the world (their location in the Trading Agents section below) to open the business mini-game window, in order to purchase as many firms as possible, to allegedly reunite the dispersed firms of the Claudius group, promote fair trade and help save the world (through liberalism & capitalism, leading to world monopoly? yeah, as if, haha - this minigame should be linked to the Greed counter! : D ).

To purchase firms, you must find a trading agent, select Purchase, choose the firm you want to buy, and shift the blue bars in the background completely to the left (if the red bars reach the right side you lose), thanks to Capital (you must put down more money than your opponent, money taken from individual firms, whole groups, or from your own treasury) and Skills (accessible under 'Bargain', skills are gained, mostly randomly, throughout the mini-game, after a successful bid). Between each round, you gain capital (Estimated Earnings) and one of your firms may be the target of a takeover bid (one additional game per round at most).


Strategies:
- Concretely, you simply have to gather more money than your opponent to win the takeover, while being mindful of your opponents' skills (Entertainment/Hospitality, for example, can make you lose if you don't pay attention, even if you are ahead, and you must counter the enemy's Item Isolation/Indep. Project with Make Arrangements/Under the Table). There is no catastrophic penalty for overkilling (i.e. requesting millions when a few thousands only would suffice), because everything pretty much starts anew every round, and overkill is the fastest way to win.
- Start with cheap companies, aiming at some from strong groups if possible (e.g. Jungle Fever, Claudius) until you have a few Skills. Then you could define your targets depending on the Skills and groups that you need or want (see the trading skills trigger conditions & Groups sections).
- Make Arrangements (Remaster: Under the Table) is the most useful skill, although expensive: it lowers the probability of firms leaving you when requesting capital (see the specific sparking conditions in the Trading Skills section). Use it and request capital from your firms repeatedly, in order to spark groups (see the Groups section below to see which firms you need to request capital from), until you can request directly from groups (more money, quicker). It is a necessary skill to counter the firms that use Item Isolation/Indep. Project against you.
- As for Skills, you can use Item Isolation/Indep. Project to spread distrust among your opponent's firms (he will not be able to raise as much money and will lose companies). When you want to prevent him from acting, rather than spamming Smile or whatever, use Make Arrangement/Under the Table if need be and try to spark new groups (a lot of money takes a lot of time to fall on the scales). If you do not want or need to, Fullbright's Speech (once per round) or the Professor's Dance/Jive are efficient.
- Use your 'own money' only when buying rival main firms, for which a lot of cash is needed. When you use your own money, it falls instantly on the scale. It is a huge gain of time / turns to buy the main companies directly (you receive all the companies they own when you win).
- You can sever your ties with your allies, even Fullbright. There does not seem to be any penalty for doing so.
- It is not necessary (and about doubles the duration of the minigame) but during the 2nd Mission, you can buy all companies and leave only Ismael Jewelry (or even buy absolutely everything) to make your life easier in the 3rd mission. World domination through monopolistic supremacy! See the Note of the 3rd mission below for alternative strategies.
- This minigame may take a long time (as long as more than 100 turns if you want to buy all companies). The way to reduce that time is not to take over companies that are already owned by another main company, but buy only self-owned firms, until you can buy the parent companies: you will also gain all the firms they own at the same time, sparing you several turns each time, and possibly reducing the business game playtime by half.


All in all there are 3 missions, which must be completed in order, and at the end of each of which you get a reward from Fullbright.
Note: Stop
You can give up the mini-game at any time by selecting Allies < Give Up in the mini-game menu.
Can be useful if you notice you are stuck (conflicting quests), have had enough or just want to recruit Fullbright.
Note that inbetween missions (until you talk to Fullbright to start the next one), all trading agents revert to their normal NPC selves.
Note on 'Item Isolation/Indep. Project' chance
i.e. your companies' separation probability, i.e. the risk that your companies may leave you when you request capital from them.
The situation is reflected by the color code of the name of your firms:
・Black: 0% All good!
・Blue: 1∼25/128, that is a 1∼19% chance to leave you. OK-ish.
・Yellow: 26∼63//128, that is a 20∼49% chance to leave you. Careful!
・Red: 64∼127/128, that is a 50∼100% chance to leave you! Dire!
・Grey: Too late, gone! :O

MISSIONS
・Mission 1: Collect 100 million G


Goal: Have 100mG in Assets.
Reward: 10k G.
Note (SFC only): The 100 million G will show up as 1o0000m0000.
Here, 'm' doesn't stand for 'million' but for the Japanese 万 'man' 104, and 'o' for 億 'oku' 108.
Hence the notation, odd to our Western eyes.
The minigame starts in Pidona but you can - and probably should - have a look around other towns (see the various Traders' locations) to see what they have to offer: start small, buy cheap companies, and build your way up, buying what you can afford.
Also, you are on your own, this time (you will gain allies in the next round): you can try to buy companies owned by Fullbright too.
The mission will complete when you leave the trading agent's screen with the necessary amount in assets: use this to your advantage to try to go well over: when nearing the target amount, you can possibly go to Librof/Ryblov and buy all Lasaiev Corp/Ryblov Trading's assets, the mother company too, and all you can lay your hands on there, then leave. GJ!
・Mission 2: Defeat the Dophore Group


Trigger: Complete Mission 1, then talk to Fullbright in Wilmington.
Goal: Buy Dophore Corp/Group or Dophore Maritime.
Reward: 10kG.
You start this 2nd mission with allies, from which you can request (sub-par) money.
Buying all you can around the world and unlocking groups you can rely on, you will have to grow solid enough to take on the powerful and aggressive Dophore Group (the shady company that deals in drugs and against which the Robins wage guerilla-war in Yamas/Yarmouth).
There are several ways to go about this mission: see the Note about the 2nd & 3rd missions below.
Note: The ending messages are slighly different depending on whether you acquire Dophore Corp/Group or only Dophore Maritime..
・Mission 3: Break the Abyss Gate Ring


Requirements: Complete Mission 2 and fight one Devil Lord/Sinistral. Then talk to Fullbright in Wilminton.
Impossible to trigger if you have already closed all 4 Gates.
Reward: 10kG. But if you close all 4 Gates, then finish this mission, you get 20kG instead of the regular reward of 10kG. Woohoo.
The core of the Abyss Gate Ring is located at the Divine/Archlord Tower.
You need to buy all compagnies affiliated with the Abyss Ring to win.
Note about the 2nd & 3rd missions:
There are several ways to complete this final business mission - the win condition being that there is no firm affiliated with the Abyss Ring at the end of a turn - and it basically depends on what you did in the 2nd phase:
1) You can play this normally and fairly, meaning that during the 2nd phase you did not buy any of your allies and that you did not try to buy all companies (you can even leave Dophore Corp/Group alone). Then as the 3rd phase begins you will notice that you have gained even more allies (and they will grow) and that the Abyss Ring core is in fact Ismael Jewelry/Gems and Mohammed Trading/Muhammad Imports: buy these two and the 3rd phase usually ends there (two turns). Sometimes, just like the list of your allies can grow, the Abyss Ring can gain members too, like Dophore Corp/Group (what a surprise ; ). If this happens, you just have to buy those companies too until no company with the Abyss Ring mark remains.
2) During the 2nd phase you can buy most or all companies except Ismael Jewelry/Gems: buy it to complete the 3rd phase.
3) If you have bought Ismael & Mohammed during the 2nd mission and if there is no firm in league with the Abyss Ring, you just need to attempt to buy any business to trigger a phase win.
4) You can buy everything in all cities during the 2nd phase. All you have to do to win the 3rd phase if you have world monopoly is to Give Up (R button) against Item Management ('Business Closer' in the Remaster) in Pidona, the only company that you cannot buy. If you think you have bought every company and still cannot complete this, check your info panel to know if you have effectively bought everything: chances are you have forgotten Stanley Pottery (Stanley Porcelain), which requires you to spark the Ceramics group in order to appear. See the Detailed Info & Strategies section below.


Note on the Business Minigame and Remaster NG+:
- Your own money and most bargaining skills carry over.
- Mission 1 can end in 1 turn (just buy anything and leave the screen). Note that you cannot buy Dophore Maritime / Dophore Corp during the 1st phase (they do not appear in Yarmouth business list).
- Mission 2 can end in 1 turn (buy the target company or its parent).
- But then you are in for the most tedious session ever in Mission 3: since your score is low, you do not have access to many businesses, and probably by turn 2 the Abyss Ring will have between 10 and 13 businesses (and it somehow tries to stay around 10). Now begins a game of cat & mouse because the Rankings are bugged (they do not display all active businesses). After you have had enough of going painfully from town to town, just buy everything that is not an ally (you can buy your allies too if you want but buying the rest already takes an inordinate amount of time). Having to replace one monopoly by another in order to save free trade and the world, somehow does not make sense to me, but what do I know ; ) Anyway in the end you will stumble on that last elusive Abyss business (better sooner than later, I hope for you).
- Business bug: Sometimes businesses have negative values for one turn: if you try to buy one and put money on the table the bar does not move: just make it move with bargaining skills (e.g. Wind of Change) and the firm is yours.


TRADING AGENTS
 AKE/ACHE Woman in the top-left house (normally makes Life Potions) |
 DIVINE TOWER/ARCHLORD TOWER The stationary blue-moustached fat man (offers you robes during the Maximus Quest) |
 FARCE/FAROS Barman in the Pub, ask for Info |
 GREAT ARC/GREAT ARCH Right-most woman sunbathing on the beach |
 JUSTERM Man on the Docks (normally takes you to Kidlanto) |
 KIDLANTO/KYRDLUND The Mayor, in his house (top-right) (normally triggers the Algernon Quest) |
 LANCE Walking moustached man in the Shop (from the Goods Delivery quests) |
 LIBROF/RYBLOV Woman top right at the table, upstairs in the Pub |
 LOANNE Woman walking around in the Pub |
 MOSES/MAHZOZ (NORTH) Man in the storeroom, top-left house |
 MULES/MYULES Woman with long blonde hair and armor walking around in town |
 PIDONA The bearded man at the table in Thomas' relatives' house (Thomas' Uncle) |
 PODOL/PODORUI The Magic Seller, top-left house |
 STANLEY Old man at the table in the bottom-left house |
 VANGUARD Young sailor in the Pub |
 WILMINTON/WILMINGTON Little girl in plain clothes walking on the overpass, North in town |
 YAMAS/YARMOUTH Woman in the house (middle-left) before the docks |
 ZWEIG Man at the table in the top-right house |
TRADING SKILLS
These are the Bargaining Skills (かけひき技) you can spark during the Business Minigame.
Note (SFC only): Here too, the numbers in-game appear in the Japanese counting system where M = Man (not Million) = 104. Hence, e.g., the price for 'Use Fast Horse' given as 5M in game, is 50,000G (noted 50k in the table below).
The official translations, if different, are after the Japanese.
| Name | Cost | Description | Learn |
|---|---|---|---|
| Smile スマイル | 0 | Bar speed +1. Used mainly to prevent your opponent from acting. | Randomly after a successful acquisition or defense. |
| Small Present ささやかなプレゼント Modest Gift | 1k | Bar speed +4. | Acquire a company with 'Craft'. |
| Image Down イメージダウン Smear Campaign | 7k | Spread false rumors about your opponent. Usable once per day. When the next day comes, rival's speed -6. | Randomly after an acquisition attempt if you own a company with 'Books' or 'Pub'. |
| Style of Era 時代の風 Winds of Change | 100k | Share your vision and move everyone's heart. Bar speed +5. | Acquire Mohammed Trading/Muhammad Imports. |
| Talk of Justice 正義を説く Advocate Justice | 1 | This skill randomly shifts the bar (mostly largely) either in your favor or greatly in your opponent's favor. | Randomly after a successful acquisition or defense. Or randomly after an acquisition attempt if you own a company with 'Pub'. |
| Use Fast Horse 早馬を使う Stallion | 50k | Speeds up the delivery of your orders, effectively halving the waiting time between command inputs. Very useful. | Acquire a company with 'Horse'. |
| Spread False Info ニセ情報を流す Misinformation | 100k | Slows down the opponent's actions. Doubles your opponent's waiting time between command inputs. | Randomly after an acquisition attempt if you own a company with 'Publication' or 'Pub', or Messana Caravan or Shinon East Trade/Sinon Trading. |
| Entertainment おもてなし Hospitality | 10k | On the next day, bar speed +64. Usable only once per day. | Randomly after an acquisition attempt if you own a company with 'Pub'. |
| Fullbright Speech フルブライト演説 | 30k | Fullbright will eventually come (it may take a long time) and make a speech that shifts the bars greatly in your favor. 33% success chance. | Randomly after an acquisition attempt if you are in alliance with Fullbright and have 16+ points. |
| Discussion みんなと相談する Company Meeting | 2k | Resets the waiting time between command inputs (Use Fast Horse gets cancelled too). | Randomly after a failed acquisition or defense. |
| Cool with Ice クールアズアイス Ice Breaker | 0 | Cools down the owner's mind. Item market price doubles (?) & slows down bar movement. | Acquire Waldo Team/Ward Corps or Eric's Firm/Eric Shipping. |
| Set a Barrier せきを立つ ('Leave your Seat') Stand Up | 0 | Pretend to give up in order to negotiate. Halves item market price (?) & speeds up bar movement. | Acquire Mohammed Trading/Muhammad Imports. Or randomly after an acquisition attempt if you have accessed the minigame through the Divine/Archlord Tower trading agent, or own Macintosh Maritime. |
| Item Isolation 物件独立工作 Indep. Project | 50k | Causes the opponent's companies to distrust him. 5% increase in the separation probabiblity of their companies. | Randomly after an acquisition attempt if you own any of the following companies: a company with 'Pub', Cobal/Kobal Company, Vanguard, Pidona Bank, Eric's Firm/Eric Shipping, Dophore Co./Group or Fullbright & Co. |
| Make Arrangements ネマワシ Under the Table | 1000k | Raises your companies' trust in you. Halves the separation probabiblity of your companies. Used to allow repeated capital requests to groups & companies. | Randomly after an acquisition attempt if you own any of the following companies: a company with 'Wheat', Raphael Corp/Trading, Fullbright & Co., Lasaiev Co./Ryblov Trading. |
| Professor's Dance 教授のダンス Professor's Jive | 10k | May greatly shift the bar in your favor. Or just a little. | Acquire Professor's House/Hall. |
ADVANCED
CONFLICTING QUESTS & EVENTS
Arranged from Metastase's https://gamefaqs.gamespot.com/boards/588634-romancing-saga-3/69764481 with additions:
The business mini-game has the highest gold profit margin in the whole game (3x 10kG at least).
One of the (very moderate) difficulties of the business mini-game is reaching and unlocking all trading agents without screwing other quests:
Activating the business mini-game overrides NPC main functionality and two of them are quest-givers (the Mayor in Kidlanto/Kyrdlund, the man walking in Lance shop).
Another conflicting case (SFC only) is the robe-giver outside the Divine/Archlord Tower (the quest overrides the mini-game: he won't be a trading agent but offers you robes): if you started the Maximus Quest before you finish the 3rd part of the Business game, you won't be able to complete the mini-game.
Also, if you shipwreck in Monika's Introduction, you cannot access Podol/Podorui and its Trading Agent anymore,
and if Thomas is LP-dead you cannot access the Trading Agent in Pidona.
In a nutshell:
- Do the Algernon & Transport Goods quests before activating the minigame, or inbetween missions, or after completing the minigame.
- Complete the 3rd phase before starting the Maximus quest. (This bug was corrected in the Remaster.)
- If your main character is Monica, do not marry, but elope! (This may be more profound than it looks, haha.)
Note about recruiting Fullbright: You can safely recruit Fullbright (if you want him) inbetween missions (kick him out and talk to him to start the next mission) and during the 2nd and 3rd missions (you cannot recruit him during the 1st), or after completing the minigame. (You can also refuse to help Fullbright or give up the minigame altogether if you don't care about it, and recruit Fullbright.)
DETAILED INFO AND STRATEGIES
by Midic http://www.gamefaqs.com/boards/588634-romancing-saga-3/51702521?page=0:
[Quote starts]
"Claudius Group:
The Claudius group, who you're allegedly supposed to be reuniting in the first phase of the game (but really you just need 1.0000m), contains 7 members, most of whom belong to other powerful groups (for additional profit boosting), so collecting them all can give you a pretty nice core group, even if Claudius is only in the upper-middle tier as far as potential value is concerned. Sadly, you don't win anything special for getting them all. The 7 members of the Claudius group (as well as their locations and other potential groups) are :
Ned's weavers (Vanguard) (Textile, Carpet, Loob Textile) Cost:500m-1000m
Hans Corp (Pidona) (Farm Tools, Messana Workshop) (you start with this)
Messana Bent Farm [Pidona) (Marma Messano) (you start with this)
Farce Ship Build (Farce) (Iskal Water Transport, Ships) Cost:8m initially (shows as 10m). Eventually balloons to 1000m-2000m.
Stanley Pottery (Stanley) (Ceramics) Cost:1200m-1500m.
Stephen Brewery (Lance) (Wine) Cost:20m-30m within the first few turns. Eventually 100m or more.
Zweig Caravan (Zweig) (Land Caravan). Cost 600m-1200m
6 of the 7 members are rather easy to acquire, but the 7th, Stanley Pottery is a bit tricky. Stanley Pottery only appears when you discover the Ceramics group. As this is one of the harder to find groups, you could go through an entire game and not even realize that there _is_ a Stanley Pottery. To find Ceramics, one must acquire Philip Studio (in Justerm) and/or Farce glass and repeatedly request capital from them until the group appears. One could also add Demander Pottery (Wilmington) or Naj Raster (Divine tower), but getting and retaining ownership of these and staying under the 100 mil limit is probably impossible in the first phase of the game.
Philip Studio is initially unowned, but will eventually be bought by Eric's firm. At earlier stages in the game before Eric's firm grows large, it should be no trouble to take it away from them. Note however that Philip Studio apparently lacks the technical expertise to keep operating, so unless you want its value and productivity to drop to 0, you'll need to acquire several other companies with the "skill" attribute. Farce glass is not initially visible, but once you buy a few things in Farce and raise your trust levels, it should become available. Owning Philip Studio and/or 5+ members of Claudius also seem like they might cause it to appear earlier, but I haven't really been able to confirm this to my satisfaction.
Businesses not appearing in this game (including the 8th Claudius group member):
The addresses 7EFA49XX to 7EFA68XX store the list of which companies the player owns. Each company is represented by a single bit (1 = you own, 0 = you don't). If you set these values to FF (all 8 bits to 1) the companies represented by the bits show up in your ownership list. Note however that you can't set all of them at once or you won't be able to view your assets (I guess it can't handle displaying such a long list). Close to half of these companies never appear in the game. Things that got cut out include the fairy village, Dophore Drug (wow, shamelessly blatant), a number of companies in the eastern lands (which don't actually trading minigame contacts), and Loanne silk (8th Claudius group member and dealer in Raw Silk, a commodity not present in the game). Sadly, finishing the first stage of the trading mini-game with the 8th Claudius member still doesn't get you anything. Finally, note that setting these bits doesn't actually do everything that would be involved in a legitimate change of ownership, such as removing the company from the ownership list of whoever had it before. Thus, you probably don't want to actually try playing the game after messing with this list.
Powerful trading groups:
The most potentially powerful group in the game is Quiet Sea Workshop, which consists of 9 members, 3 each in Vanguard (weapons, paper, ship), Yamas (weapons, paper, ship) and Wilmington (studio, pottery, ship). The amount of capital this group delivers in one request could approach 10.0000m, which is practially enough to buy any of the top firms in the game. However, although you might find 1 or 2 of the members unowned, to get the others you would have to argue with Macintosh Maritime, Fullbright, and Dophore, basically gutting their core possessions. So, the act of acquiring the group essentially demonstrates that you have absolutely no need for it.
The other top tier groups are:
Iskal Water Transport (Iskal Water Works, Farce Maritime, Farce Ship build, Lance Studio, Eifel Iron ore, Lance Timber, Lance paper mill, Farce Fortress)
Ships (Shipyards in Vanguard, Yamas, Wilmington, Farce, Pidona, and Mules)
Pidona Workshop (Messana Textile, Pidona Paper, Leonardo Weapons, Michalangelo studio, Hans Corp, Pidona State Ship)
Naj Hot Blood (Abdul Cotton, Naj Weavers, Hassan Wool, Gessia Carpet, Naj Raster, Elbul Coffee, Hamal Salt)
Ceramics (Philip Studio, Farce Glass, Stanley Pottery, Demander Pottery, and Naj Raster).
Both Ships and Ceramics are quite difficult to acquire in their entirity, but are still pretty nice even as partial groups. It isn't too hard to complete Pidona Workshop or Iskal Water Transport during the first phase of the game. Of course at that point, you should be well over the 100 mil limit, but the first phase doesn't actually end till you quit out of the Finance minigame screen, so you can keep buying stuff after 100 mil, you just can't switch to another town and buy stuff there. In fact, if you want to complete either group, you'll probably want to buy lance paper mill/Messana textile during the first phase, because Fullbright and Lassief become your allies in the second phase and they tend to own those two companies at that point. Also note that Farce fortress has an unusually high chance of abandoning you, requiring 4 'make arrangements' prior to the first capital request, rather than the usual 2. Since the fortress is not exactly the most productive asset, it might not be worth the headache of keeping ahold of it.
The actual goal of the 2nd stage of the trading game is not to defeat Dophore Corp. It is to buy Dophore Maritime (Although most people probably just try to buy Dophore Corp, which also works). Dophore Maritime has in addition to its "Water Transport" business, the business of "Moving Company", which I assume is a Japanese euphemism for Evil Drug Smuggler. If you buy Dophore Maritime, it loses its "Moving Company" attribute and you are told "This will stop Dophore's bad deeds.", at which point you can exit the trade screen and be sent back to Wilmington and Fullbright to collect your 10K. It is realistically possible to rush through the first phase of the game, head to Wilmington to start the second phase, and buy Dophore Maritime on the very first turn (which could lead to a slightly starchier abyss ring in the 3rd phase).
Most obscene potential profit margin: Pubs. Although their listed "value" tends not to get above 30m, if you get enough highly productive food/drink producers, their profits can skyrocket to 20x their listed value. Don't expect to see this immediately however. But, since acquisition of most of the trading skills seems to require you to own at least 1 pub, you should buy one early on anyway.
Best buy: Pioneer society (Loanne). Costs under 20m initially. Member of 2 groups you start with members in (Farm tools and Gourmet Loanne) and the Loanne workshop group as well, their skill and patron attributes can help productivity of other businesses, value can skyrocket to 10-20x purchase price, and per round income can reach 4x value. Man, those Pioneers can do everything. The Shinon kids are probably actually rejects from this bunch: "Listen you lazy louts, if you can't do it right, why don't you run off and do something easy like save the world from the Demon lords of the abyss or somethin'."
There are several triggered events in the trading minigame:
"Shinon begins grazing of horses" - triggered by you buying a horse producing company elsewhere. Results in B. Shinon Pasture starts producing horses as well.
"Lance discovers apple wine." - triggered by you having score 33+ on turn 25 or beyond and owning Stephens Brewery. Results in Stephen's brewery gaining the product "apple wine". Lance land trans will also become your ally at the same time (guess they like your wine?).
Appearance of Stanley Pottery - discovery of Ceramics group.
Appearance of Seahawk (Fat Robin's pub) - Won't appear even if Yamas trust=100, seems to require a score in the 60ish range (?).
Fullbright the hog:
Unlike most of the major firms, the Fullbright firm doesn't really seem to have a particular type of product/group they want to focus on, rather they seem to want to own 1 or two items per city. Although Fullbright is mostly passive during the first part of the trading game, between parts 1 and 2, he will buy everything on his hit list that you don't already own. He seems to target things that aren't likely to be of much value on their own, but are very valuable as part of the support infrastructure of other groups/companies. Of course, he doesn't actually have the other assets necessary for his acquisitions to be worthwhile, but they are things that the player might have interest in. Maybe he's trying to piss off the player and provoke them into buying him out so he can have a desperately needed vacation. Of course, he does seem to target companies that have a strong association with story characters (you can bet he'd be after the Fairy village if it had been left in the game.) Anyway, here's his hit list (or most of it) in case you're like me and want to buy these things first, just to annoy Fullbright.
Yohanes siblings & Lance Paper mill (Lance)
Seahawk (Yamas)
Vanguard Times
Waldo Team (Justern)
Craftsman Virginia (Kidlanto)
Champ Elysees & Pioneer Society (Loanne)
Buying without putting down cash:
I've found several methods of buying companies without putting down any cash or spending anywhere near the actual market value of the item.
The first involves freezing the trade bar's movement, then using skills to bump it over to your side without giving it any actual velocity in either direction. The skill 'cool with ice' reduces the bar's movement potential in either direction. But, if the bar is already moving, it will only slow down a little, if at all. However, should something change the direction of the bar's movement, it would only have a little potential momentum in the new direction and so would only move very slowly. If you use 'cool with ice' 4 or 5 times, it can pretty much freeze the bar's movement. Eventually, passage of time, large sums of additional money, or use of various skills will unfreeze the bar, although adding an additional 'cool with ice' every so often will keep this from happening for quite a while. Till it unfreezes, you can do pretty much whatever you like and the bar will just sit there. What you would like in this case is to spam the skill 'professor's dance', which moves the bar a small amount in your direction and also possibly increases the bar's potential movement slightly (maybe). After 10 or 20 or whatever professor's dance, the bar will reach the end and you'll be the new owner of whatever you are bidding for.
However, for all this to happen, you first need to briefly change the bar's direction of movement. So, after your 4 or 5 cool with ice, you need to use the entertainment skill, which at the start of the next day will cause the bar to start moving in your direction, regardless of how much money anyone has bid. This alone would be enough to get you the company for free, even without 'cool with ice', except that any additional money bid, or use of any bar altering skill will cause it to swing back in the direction it would otherwise be going. In theory it would be possible to use entertainment alone to buy companies for free, except that the AIs all seem to keep a cash reserve to throw down and stop this from happening. Anyway, for entertainment to kick in and help freeze the bar, you need to get through the first day. To do this, you need there to be as few skills used as possible. You see, while the text for a skill use is being displayed, time is not passing, even though the bar is still moving. If neither you nor the AI take any actions, the next day will roll around within a few seconds, but if you are both spamming skills as fast as you can, the bar will likely hit the edge of the screen and you'll lose before you get going. So, you need to minimize skill use and if possible use 'spread false info' to slow down the AI.
Unfortunately, although professor's dance works on all but a few small (and generally female operated) companies, many of the really big companies, such as Dophore, Fullbright, and Mohammed are immune to 'cool with ice' and/or entertainment, which means that, although you can use this trick to buy their subsidiaries, you can't buy out the parent corp and get everything at once.
Also of note is that the 'discussion' skill seems to work like 'cool with ice', but to a lesser degree. It might even be possible to pull this trick off using discussion (though I haven't seriously tried). Speaking of discussion, all those independent companies that like to spam discussion are actually helping you in a way, because they are giving you longer to come up with enough cash to buy them out. Of course, they're also dragging out things once you actually get the money down, but since taking more than 1 day for a buyout doesn't seem to do anything, this is just annoying and can be dealt with via use of your handy fast-forward key (emulators are neat.)
Oh, and if you were wondering where to get these skills, 'professors dance' is acquired by buying professor's house in Zweig. 'Cool with ice' comes from buying Eric's firm or Waldo Team in Justerm. None of these companies will appear until you have built up a substantial degree of trust by owning companies in the cities and by raising your score. The Justerm ones are quite difficult to make visible during the first phase of the game. Waldo team becomes owned by Fullbright between the first and second phases, and although Eric's firm starts out rather small, it is likely to end up in the top 5 companies if left alone long enough.
The second method of buying without paying is simpler and can be summed up as "spam 'Style of Era'". The 'Style of Era' skill shifts the velocity of the bar slightly in your favor. If it is moving in your rival's direction, it will slow down. If it is stopped, it will start moving in your direction. If it is moving in your direction, it will speed up, although 'style of era' alone won't get it going really fast. However, if your rival drops some more gold on the stack, or if skills such as 'Item isolation' are used, you'll lose your 'style of era' momentum and have to spam it some more. Also, if your rival throws down enough cash, or after the first day is over, 'style of era' loses its effectiveness. So, remember what I said above about trying to make sure time passes and you reach the second day? Now you do the opposite. You don't slow your opponent down and in fact you hope they have fast horses. You want somebody's skill to be going off constantly so that time never passes and that 2nd day never comes. Since 'style of era' is a rather expensive move, you may not want to use it once you get the bar moving nicely in your, but use anything that doesn't cost you momentum. However, you may need to use 'item isolation' a lot in order to limit the rival's ability to throw down more cash, even though it does cost you your momentum. I've yet to find a company that is immune to 'style of era', although with its 10m cost, using it on small fry could be a waste and it might be simpler to just pay cash even for larger companies. You certainly should have no lack of cash at this point, because 'Style of Era' is acquired from buying Mohammed trading, meaning that even though you might not be paying cash for everything, you probably could if you wanted to.
Finally, note that Style of Era can function in place of entertainment in the 'cool with ice' trick, allowing you to freeze the bar immediately instead of having to hold on for a day."
[End of quote]
GROUPS
Here are all the groups found in the game, their constituting companies and where to purchase them.
In bold, the most powerful groups.
Between square brackets, companies that only appear as data, not in the final version of the game.
Official group names (2019), if different from Mana Sword's translation, are found after the Japanese.
For the official translation of the company names, see the Firms section.
| Groups | Firms (Place) |
|---|---|
| Sugar さとう | Tropical Sugar (Great Arc) Ake Beet Farm (Ake) Messana Sugar (Pidona) |
| Tea and Coffee お茶とコーヒー Tea & Coffee | Garter Tea (Wilminton) Zweig Tea (Librof) El Bul Tea (Loanne) Aurora Coffee (Ake) Elbul Coffee (Divine Tower) |
| Wine 酒 Liquor | Yamas Beer (Yamas) Moses Wine (Moses) Zweig Wine (Librof) Messana Wine (Pidona) Farce Wine (Farce) Stephen Brewery (Lance) Zweig Beer (Zweig) Loanne Wine (Loanne) |
| Horse 馬 Horses | Loob Shepherd (Vanguard) Hassan Wool (Divine Tower) Zweig Pasture (Zweig) B. Shinon Pasture (Shinon) |
| Fur 毛皮 Pelts | Lance Fur Shop (Lance) Federick Fur (Justerm) Michael Fur (Podol) Waldo Team (Justerm) Nils, Hunter (Kidlanto) Elijah, Hunter (Podol) |
| Lumber 木材 | Southern Timber (Great Arc) Ake Timber (Ake) Zweig Forestry (Librof) Lance Timber (Lance) Peter, Woodcutter (Kidlanto) Sergi, Woodcutter (Podol) El Bul Forestry (Loanne) |
| Iron 鉄 Steel | Loob Iron Mine (Vanguard) Eiffel Iron Ore (Lance) Borg Iron Ore (Kidlanto) Fuber Iron Ore (Mules) |
| Gold and Jewels 金と宝石 Gold & Gems | Ismail Jewelry (Divine Tower) Elizabeth Jewelry (Podol) Shinon Money Mrkt (Shinon) |
| Potion ポーション Medicine | Zweig Potion (Zweig) Mandola, Hunter (Podol) Magician Guild (Moses) |
| Textile 織物 Textiles | Ned's Weavers (Vanguard) Moses Robes (Moses) Naj Weavers (Divine Tower) Messana Textile (Pidona) Matruda Fabric (Justerm) Loanne Weavers (Loanne) |
| Carpet じゅうたん Carpets | Gessia Carpet (Divine Tower) Ned Weaver (Vanguard) Matruda Fabric (Justerm) |
| Ceramics セラミックス | Demander Pottery (Wilminton) Naj Raster (Divine Tower) Stanley Pottery (Stanley) Farce Glass (Farce) Philip Studio (Justerm) |
| Paper 紙 | Vanguard Paper (Vanguard) Yamas Paper Mill (Yamas) Pidona Paper (Pidona) Lance Paper Mill (Lance) Adams Paper (Mules) |
| Farm Tools 農具 | Librof Farm Tool (Librof) Lance Studio (Lance) Pioneer Society (Shinon) Zweig Corp (Zweig) Hans Corp (Pidona) |
| Weapons 武器 | Smith Weapons (Vanguard) Dophore Weaponery (Yamas) Charles Studio (Wilmington) Leonardo Weapons (Pidona) Lance Studio (Lance) Zweig Weapon Store (Zweig) Loanne Studio (Loanne) |
| Ships 造船 Shipbuilding | Vanguard Ship Build (Vanguard) Yamas Ship Build (Yamas) Wilminton Ship Build (Wilminton) Pidona State Ship (Pidona) Farce Ship Build (Farce) Garfield Ship Build (Mules) |
| Hotel ホテル Hotels | Hotel Byron (Wilminton) Hotel Valentine (Great Arc) Hotel Librof (Librof) Pidona Hotel (Pidona) Hotel Le Marle (Farce) Loanne Hotel (Loanne) |
| Info 情報 Information | Vanguard Times (Vanguard) Art Bookstore (Pidona) Yohannes Siblings (Lance) Professor's House (Zweig) |
| Manma Mesano マンマ・メッサーナ Mama Messano | Messana Bent Farm (Pidona) Farce Farm Assoc (Farce) Messana Sugar (Pidona) Messana Wine (Pidona) Farce Wine (Farce) Raphael Corp (Pidona) Pidona Water Prod (Pidona) Farce Fisheries (Farce) |
| Growing Northland 大いなる北の大地 Northern Lands | Yamas Flour Mill (Yamas) Lance Farm (Lance) Stanley Farm Assoc (Stanley) Yamas Salt Mine (Yamas) Yamas Sheep Guild (Yamas) Stanley Pasture (Stanley) Yamas Beer (Yamas) Gordon fisheries (Justerm) |
| Blessing of the West Wind 西風のめぐみ Western Foodstuffs | Garter Tea (Wilminton) Colombo Fisheries (Wilminton) Moses Grain (Moses) Moses Wine (Moses) Moses Pasture (Moses) Moses Fish (Moses) O Connor Fisheries (Vanguard) |
| Zweig Stomach ツヴァイクのいぶくろ Zweig Cuisine | Zweig Flour Mill (Zweig) Zweig Beer (Zweig) Zweig Salt Mine (Zweig) Zweig Pasture (Zweig) Zweig Hall (Zweig) |
| Gourmet Loanne グルメ・ロアーヌ | Loanne Flour (Loanne) Carson Farm (Shinon) Loanne Wine (Loanne) El Bul Tea (Loanne) B. Shinon Pasture (Shinon) Wilson Fisheries (Mules) Champs Elysees (Loanne) Pioneer Society (Shinon) |
| Messana Textile メッサーナ織 Messana Fabrics | Messana Textile (Pidona) Pidona Cotton (Pidona) Nikita Farm (Librof) Cotton Fields (Great Arc) Adamsky Pasture (Librof) Stanley Pasture (Stanley) |
| Loob Textile ルーブ織 Louv Fabrics | Ned's Weavers (Vanguard) Moses Robes (Moses) Loob Shepherd (Vanguard) Yamas Sheep Guild (Yamas) [Moses Silk] Moses Pasture (Moses) |
| Loanne Textile ロアーヌ織 Loanne Fabrics | Loanne Weavers (Loanne) [Loanne Silk] Johnson Cotton (Mules) B. Shinon Pasture (Shinon) Zweig Pasture (Zweig) |
| Messana Workshop メッサーナ工房 | Michelangelo Studio (Pidona) Leonardo Weapons (Pidona) Messana Textile (Pidona) Pidona State Ship (Pidona) Pidona Paper (Pidona) Hans Corp (Pidona) |
| Quiet Sea Workshop 静海工房 Calm Sea Workshop | Vanguard Ship Build (Vanguard) Yamas Ship Build (Yamas) Wilminton Ship Build (Wilminton) Smith Weapons (Vanguard) Dophore Weaponry (Yamas) Charles Studio (Wilminton) Demander Pottery (Wilminton) Vanguard Paper (Vanguard) Yamas Paper Mill (Yamas) |
| North Sea Workshop 北海工芸 | Waldo Team (Justerm) Nils, Hunter (Kidlanto) Federick Fur (Justerm) Matruda fabric (Justerm) Philip Studio (Justerm) Catherine studio (Justerm) Carpenter Noel (Kidlanto) Craftsman Virginia (Kidlanto) |
| Zweig Workshop ツヴァイク工房 | Zweig Weapon Store (Zweig) Borg Iron Ore (Kidlanto) Peter, Woodcutter (Kidlanto) Zweig Corp (Zweig) Professor's House (Zweig) |
| Loanne Workshop ロアーヌ工房 | Garfield Ship Build (Mules) Loanne Studio (Loanne) Loanne Weavers (Loanne) El Bul Craft (Loanne) Adams Paper (Mules) Pioneer Society (Shinon) |
| Iskal Water Transport イスカル水運 Iskar Marine | Iskal Water Works (Lance) Farce Maritime (Farce) Farce Ship Build (Farce) Lance Studio (Lance) Eiffel Iron Ore (Lance) Lance Timber (Lance) Lance Paper Mill (Lance) Farce Fortress (Farce) |
| Librof Blue Sea リブロフの青い海 Ryblov Blue | Librof Flour (Librof) Zweig Wine (Librof) Zweig Tea (Librof) Adamsky Pasture (Librof) Nikita Farm (Librof) Urazami Fisheries (Librof) Librof Farm Tool (Librof) Shehela Sad (Librof) Hotel Librof (Librof) |
| Naj Hot Blood ナジュの熱き血 Naj Fervor | Naj Raster (Divine Tower) Gessia Carpet (Divine Tower) Naj Weavers (Divine Tower) Hassan Wool (Divine Tower) Abdul Cotton (Divine Tower) Hamal Salt (Divine Tower) Elbul Coffee (Divine Tower) |
| Land Caravan 大陸キャラバン Mainland Caravan | Waldo Team (Justerm) Zweig Caravan (Zweig) Shinon East Trade (Shinon) Mohammed Trading (Divine Tower) |
| Claudius クラウディウス | Hans Corp (Pidona) Messana Bent Farm (Pidona) Farce Ship Build (farce) Stanley Pottery (Stanley) Stephen Brewery (Lance) Zweig Caravan (Zweig) Ned's Weavers (Vanguard) [Loanne Silk] |
| Wonder Tours ワンダーツアーズ | Cobal Company (Ake) Devil King Palace (Pidona) [Cave Temple] Zweig Battle Arena (Zweig) |
| Podol Thousand Night ポドールイ千の夜 Podorui Nights | Sergi, Woodcutter (Podol) Aricia, Musician (Podol) Elijah, Hunter (Podol) Michael Fur (Podol) Elizabeth Jewelry (Podol) Mandola, Hunter (Podol) |
| Jungle Fever ジャングルフィーバー | Aurora Coffee (Ake) Ake Beet Farm (Ake) Ake Timber (Ake) Ake Spice (Ake) Cobal Company (Ake) Southern Timber (Great Arc) Twilight Peppers (Great Arc) |
FIRMS
Note: Each of your (and your opponent's) companies has a set 'separation/independance probability' value when the acquisition/defense attempt begins. Specifically, this initial value varies, depending on the firm, between 0 and 26/128, with a majority set to 3/128, and increases by a value set between 1/128 and 25/128, with a majority set to 12/128, each time your request capital from them. This simply means that some firms require more Make Arrangements than others before this value goes back to 0 (i.e. to make their name go from red/yellow/blue back to black in your list). I did not think that these exact values (further modified when the rival firm uses Item Isolation) capital enough to be mentioned in the table below. I also did not include the susceptibility / immunity to Trading Skills of each firm (they are ALL susceptible to Item Isolation but logically it only works if it is a parent company). Note that some firms do not appear immediately (you have to buy other companies in the city, have more points, or discover groups).
There are 160 companies in all, including yours!
The 'Groups' column lists the groups that you have a chance to spark when requesting capital from them.
See the Groups section for more info.
If different, the official translation (2019) is below the Japanese.
See also the Remaster Business Glossary.
| Company Name | Business Attributes | Groups |
|---|---|---|
| VANGUARD | ||
| Loob Shepherd ルーブのひつじかい Louv Shepherds | Wool, Horse | Horse, Loob Textile |
| Ned Weaver ネッドのルーブ織工房 Ned's Weaving | Wool Clothes, Carpet | Textile, Carpet, Loob Textile, Claudius |
| Good Fellows グッドフェローズ | Pub, Amusements | |
| Vanguard Times バンガードタイムズ | Caravan | Info |
| Vanguard Paper バンガード製紙 | Paper | Paper, Quiet Sea Workshop |
| Loob Iron Mine ルーブ鉄鉱 Louv Ore & Mining | Iron | Iron |
| Smith Weapons スミスウェポンズ | Weapons, Skill | Weapon, Quiet Sea Workshop |
| O Connor Fisheries オコンネル水産 O'Connell Fisheries | Fish | Blessing of the West Wind |
| Vanguard Ship Build バンガード造船所 Vanguard Shipyard | Ship, Skill, Cost | Ships, Quiet Sea Workshop |
| Macintosh Maritime マッキントッシュ海運 | Water Transport | |
| Vanguard バンガード | Cost, Bank, Architect | |
| YAMAS / YARMOUTH | ||
| Yamas Sheep Guild ヤーマス牧羊ギルド Yarmouth Ovines | Wool, Cattle | Growing Northland, Loob Textile |
| Yamas Beer ヤーマスビール Yarmouth Beer | Beer | Wine, Growing Northland |
| Yamas Flour Mill ヤーマス製粉所 Yarmouth Flour Mill | Wheat | Growing Northland |
| Yamas Paper Mill ヤーマス製紙 Yarmouth Paper | Paper | Paper, Quiet Sea Workshop |
| Yamas Salt Mine ヤーマス塩鉱 Yarmouth Salt Mine | Salt | Growing Northland |
| Dophore Weaponery ドフォーレ武器工場 Dophore Weaponries | Weapons, Skill | Weapons, Quiet Sea Workshop |
| Yamas Ship Build ヤーマス造船所 Yarmouth Shipyard | Ship, Skill, Cost | Ships, Quiet Sea Workshop |
| Dophore Maritime ドフォーレ海運 | Water Transport, Moving Company | |
| Dophore Corp ドフォーレ商会 Dophore Group | Land Transport, Bank, Architect | |
| Seahawk シーホーク | Pub, Amusements | Growing Northland |
| WILMINTON / WILMINGTON | ||
| Garter Tea ガーターティー Garter Teas | Tea | Tea and Coffee, Blessing of the West Wind |
| Demander Pottery デマンダ陶器 Demanda Porcelain | Ceramics | Ceramics, Quiet Sea Workshop |
| Hotel Byron ホテルバイロン | Hotel, Cost | Hotel |
| Colombo Fisheries コロンボ水産 Columbo Fisheries | Fish | Blessing of the West Wind |
| Wilminton Ship Build ウィルミントン造船所 Wilmington Shipyard | Ship, Skill, Cost | Weapons, Quiet Sea Workshop |
| Charles Studio チャールズ自由工房 Charles Woodshop | Weapons, Artifacts, Skill | Weapons, Quiet Sea Workshop |
| Fullbright Firm フルブライト商会 Fullbright & Co. | Water Transport, Bank, Architect | |
| MOSES / MAHZOZ | ||
| Moses Wine モウゼスワイン Mahzoz Winery | Wine | Wine, Blessing of the West |
| Moses Grain モウゼスグレイン Mahzoz Grains | Wheat | Blessing of the West |
| Moses Pasture モウゼス牧場 Mahzoz Ranch | Wool, Cattle | Blessing of the West, Loob Textile |
| Moses Fish モウゼスフィッシュ Mahzoz Fishmonger | Fish | Blessing of the West |
| Moses Robes モウゼスローブ Mahzoz Robes | Wool Clothes, Skill | Textile, Loob Textile |
| Garter Caravan ガーターキャラバン | Land Transport, Architect | |
| Magician Guild マジシャンギルド Magician's Guild | Patron, Potion | Potion |
| GREAT ARC / GREAT ARCH | ||
| Southern Timber サザンティンバー | Lumber | Lumber, Jungle Fever |
| Tropical Sugar トロピコシュガー Tropico Sugar | Sugar | Sugar |
| Cotton Fields コットンフィールズ | Cotton | Messana Textile |
| Twilight Peppers トワイライトペパーズ | Spice | Jungle Fever |
| Hotel Valentine ホテルバランタイン | Hotel, Cost, Amusements | Hotel |
| AKE / ACHE | ||
| Aurora Coffee オーロラコーヒー | Coffee | Tea and Coffee, Jungle Fever |
| Ake Beet Farm アケさとうきび農場 Ache Sugarcane | Sugar | Sugar, Jungle Fever |
| Ake Timber アケ木材 Ache Lumber | Lumber | Lumber, Jungle Fever |
| Ake Spice アケスパイス Ache Pies | Spice | Jungle Fever |
| Cobal Company コバルカンパニー Kobal Company | Land Transport, Architect, Amusements | Wonder Tours, Jungle Fever |
| DIVINE TOWER / ARCHLORD TOWER | ||
| Abdul Cotton アブドゥル綿花商会 | Cotton | Naj Hot Blood |
| Hassan Wool ハッサン羊毛商店 Hassan Wools | Wool, Horse | Horse, Naj Hot Blood |
| Naj Weavers ナジュ織工房 Naj Weaving | Cotton Clothes, Wool Clothes | Textile, Naj Hot Blood |
| Gessia Carpet ゲッシアじゅうたん Gessiah Carpets | Carpet, Skill | Carpet, Naj Hot Blood |
| Naj Raster ナジュラスター Naj Lusterware | Ceramics, Artifacts | Ceramics, Naj Hot Blood |
| Mohammed Trading ムハンマド貿易 Muhammad Imports | Landtransport, Silk Clothes, Spice | Land Caravan |
| Elbul Coffee エルブールコーヒー El Bourg Coffee | Coffee | Tea and Coffee, Naj Hot Blood |
| Ismail Jewelry イスマイル宝石 Ismael Gems | Gems | Gold and Jewels |
| Hamal Salt ハマール塩取引 Hamar Salt Trade | Salt | Naj Hot Blood |
| LIBROF / RYBLOV | ||
| Zweig Forestry トゥイク林業 Tuisku Forestry | Lumber | Lumber |
| Librof Flour リブロフ製粉場 Ryblov Milling | Wheat | Librof Blue Sea |
| Zweig Wine トゥイクワイン Tuisku Winery | Wine | Wine, Librof Blue Sea |
| Urazami Fisheries ウラジミール水産 Vladmir Fisheries | Fish | Librof Blue Sea |
| Adamsky Pasture アダムスキー牧場 Adamski Ranch | Wool, Cattle | Messana Textile, Librof Blue Sea |
| Nikita Farm ニキータ農場 Nikita Farms | Cotton | Messana Textile, Librof Blue Sea |
| Zweig Tea トゥイクティー Tuisku Teas | Tea | Tea and Coffee, Librof Blue Sea |
| Shehela Sad シェヘラザーデ Scheherazade | Pub | Librof Blue Sea |
| Hotel Librof ホテルリブロフ Hotel Ryblov | Hotel, Cost, Amusements | Hotel, Librof Blue Sea |
| Librof Farm Tool リブロフ農具工房 Ryblov Farm Tools | Farm Tools, Artifacts, Skill | Farm Tools, Librof Blue Sea |
| Lasaiev Corp ラザイエフ商会 Ryblov Trading | Land Transport, Bank, Architect | |
| PIDONA | ||
| Hans Corp ハンス商会 Hans Trading | Farm Tools | Claudius, Farm Tools, Messana Workshop |
| Messana Wine メッサーナワイン Messana Winery | Wine | Wine, Manma Mesano |
| Messana Sugar メッサーナシュガー | Sugar | Sugar, Manma Mesano |
| Pidona Water Prod ピドナ水産 Pidona Fisheries | Fish | Manma Mesano |
| Pidona Cotton ピドナコットン | Cotton | Messana Textile |
| Messana Textile メッサーナ織工房 Messana Weaving | Cotton Clothes, Wool Clothes | Textile, Messana Textile, Messana Workshop |
| Pidona Paper ピドナ製紙 | Paper | Paper, Messana Workshop |
| Leonardo Weapons レオナルド武器工房 Leonardo Weaponry | Weapon, Skill | Weapons, Messana Workshop |
| Michelangelo Studio ミケランジェロ工房 Michelangelo Works | Artifacts, Architect, Skill | Messana Workshop |
| Raphael Corp ラファエロ商会 Raphael Trading | Cattle | Manma Mesano |
| Pidona State Ship ピドナ国営造船所 Pidona Shipyard | Ship, Skill, Cost | Ships, Messana Workshop |
| Messana Caravan メッサーナキャラバン | Land Transport | |
| Alfonso Maritime アルフォンソ海運 | Water Transport | |
| Pidona Bank ピドナバンク | Bank, Architect | |
| Vincent ヴィン・サント Vin Santo | Pub | |
| Art Bookstore アルド書房 Ald Books | Books, Caravan, Amusements | Info |
| Exhibition Office 見せ物小屋事ム所 Show of Wonders | Amusements, Patron | |
| Pidona Hotel ピドナホテル | Hotel, Cost | Hotel |
| Devil King Palace 魔王殿 Archfiend Palace | Cost | Wonder Tours |
| Messana Bent Farm メッサーナベント農場 Messana-Bent Farms | Wheat | Claudius, Manma Mesano |
| Item Management 物件始末屋 Business Closer | ||
| FARCE / FAROS | ||
| Farce Wine ファルスワイン Faros Winery | Wine- | Wine, Manma Mesano |
| Farce Farm Assoc ファルス農協 Faros Agriculture | Rice, Wheat, Cattle | Manma Mesano |
| Hotel Le Marle ホテル・ラ・マーレ Hotel La'Mare | Hotel, Cost, Amusements | Hotel |
| Farce Glass ファルスグラス Faros Glass | Glass, Mirror, Artifacts, Skill | Ceramics |
| Farce Fisheries ファルス水産 Faros Fisheries | Fish | Manma Mesano |
| Farce Ship Build ファルス造船 Faros Shipyard | Ship, Skill,2 Cost | Ships, Iskal Water Transport, Claudius |
| Farce Maritime ファルス海運 Faros Maritime | Water Transport | Iskal Water Transport |
| Farce Fortress ファルスとりで Faros Fort | Skill | Iskal Water Transport |
| STANLEY | ||
| Stanley Farm Assoc スタンレー農協 Stanley Agriculture | Wheat | Growing Northland |
| Stanley Pasture スタンレー牧場 Stanley Ranch | Wool, Cattle | Messana Textile, Growing Northland |
| Stanley Caravan スタンレーキャラバン | Land Transport, Architect | |
| Stanley Army スタンレー軍団 | Skill | |
| Stanley Pottery スタンレー陶器 Stanley Porcelain | Ceramics | Ceramics, Claudius |
| LANCE | ||
| Lance Fur Shop ランス毛皮商店 Lance Fur | Fur, Fur Coat | Fur |
| Lance Farm ランス農場 Lance Farms | Wheat | Growing Northland |
| Stephen Brewery ステファンブルワリー Stefan Brewery | Beer, Apple Wine | Wine, Claudius |
| Lance Timber ランス木材 Lance Lumber | Lumber | Lumber, Iskal Water Transport |
| Lance Paper Mill ランス製紙工場 Lance Paper | Paper | Paper, Iskal Water Transport |
| Lance Studio ランス工房 Lance Workshop | Weapons, Farm Tools, Skill | Farm Tools, Weapons, Iskal Water Transport |
| Eiffel Iron Ore アイフェル鉄鉱 Eifel Mining | Iron | Iron, Iskal Water Transport |
| Iskal Water Works イスカル水運 Iskar Maritime | Water Transport | Iskal Water Transport |
| Lance Land Trans ランス陸送隊 Lance Transport | Land Transport, Architect | |
| Yohannes Siblings ヨハンネス兄妹 Johannes Ink | Patron, Books, Skill | Info |
| JUSTERM | ||
| Federick Fur フレデリック毛皮加工 Frederic Furs | Fur Coat | Fur, North Sea Workshop |
| Matruda Fabric マチルダ織物 Matilda Fabrics | Wool Clothes, Carpet | Textile, Carpet, North Sea Workshop |
| Gordon Fisheries ゴードン水産 | Fish | Growing Northland |
| Philip Studio フィリップ工房 Philip Workshop | Glass, Mirror, Artifacts, Skill | Ceramics, North Sea Workshop |
| Catherine Studio キャサリン工房 Catherine Workshop | Artifacts | North Sea Workshop |
| Eric's Firm エリック社 Eric Shipping | Water Transport, Architect | |
| Waldo Team ウォード隊 Ward Corps | Fur, Land Transport | Fur, Land Caravan, North Sea Workshop |
| KIDLANTO / KYRDLUND | ||
| Peter, Woodcutter 木こりのペーター Peter Woodcutting | Lumber | Lumber, Zweig Workshop |
| Nils, Hunter ハンターのニルス Nils Hunting | Fur | Fur, North Sea Workshop |
| Carpenter Noel 木工職人ノエル Noel Woodworks | Music Instruments, Artifacts | North Sea Workshop |
| Craftsman Virginia 工芸家ヴィルジニー Virginie Crafts | Artifacts | North Sea Workshop |
| Borg Iron Ore ボルグ鉄鉱 Borg Mining | Iron, Skill | Iron, Zweig Workshop |
| ZWEIG | ||
| Zweig Flour Mill ツヴァイク製粉場 Zweig Milling | Wheat | Zweig Stomach |
| Zweig Beer ツヴァイクビール | Beer | Wine, Zweig Stomach |
| Zweig Pasture ツヴァイク牧場 Zweig Ranch | Wool, Cattle, Horse | Horse, Loob Textile, Zweig Stomach |
| Zweig Potion ツヴァイクポーション Zweig Potions | Potion | Potion |
| Zweig Salt Mine ツヴァイク岩塩鉱山 | Salt | Zweig Stomach |
| Zweig Weapon Store ツヴァイク武器工房 Zweig Weaponry | Weapons, Skill | Weapons, Zweig Workshop |
| Zweig Caravan ツヴァイクキャラバン | Land Transport | Land Caravan, Claudius |
| Zweig Maritime ツヴァイク海運 | Water Transport | |
| Zweig Corp ツヴァイク商会 Zweig Tools | Farm Tools, Music Instruments, Artifacts, Architect | Farm Tools, Zweig Workshop |
| Zweig Hall ツヴァイクホール Zweig Wholesale | Pub | Zweig Stomach |
| Zweig Battle Arena ツヴァイク武闘会 Zweig Combat Guild | Patron, Amusements | Wonder Tours |
| Professor's House 教授の館 Professor's Hall | Patron, Skill, Books | Info, Zweig Workshop |
| PODOL / PODORUI | ||
| Sergi, Woodcutter 木こりのセルゲイ Sergei Woodcutting | Lumber | Lumber, Podol Thousand Night |
| Aricia, Musician 楽器職人アリョーシャ Alyosha Music | Music Instruments, Artifacts | Podol Thousand Night |
| Elijah, Hunter ハンターのイリヤ Illya Hunting | Fur | Fur, Podol Thousand Night |
| Michael Fur 毛皮仕立屋ミハイル Mikael Tailoring | Fur Coat | Fur, Podol Thousand Night |
| Elizabeth Jewelry 宝石商エリザベータ Elizaveta Jewels | Gems | Gold and Jewels, Podol Thousand Night |
| Mandola, Hunter マンドラゴラハンター Mandrake Hunting | Mandrake | Potion, Podol Thousand Night |
| MULES / MYULES | ||
| Johnson Cotton ジョンソンコットン Jason Cotton | Cotton | Loob Textile |
| Adams Paper アダムズ製紙 | Paper | Paper, Loanne Workshop |
| Fuber Iron Ore フーバー鉄鉱 Fever Mining | Iron | Iron |
| Wilson Fisheries ウィルソン水産 | Fish | Gourmet Loanne |
| Garfield Ship Build ガーフィールド造船所 Garfield Shipyard | Ship, Skill, Cost | Ships, Loanne Workshop |
| Mules Maritime ミュルス海運 Myules Maritime | Water Transport | |
| LOANNE | ||
| Loanne Wine ロアーヌワイン Loanne Winery | Wine | Wine, Gourmet Loanne |
| Loanne Flour ロアーヌ製粉場 Loanne Milling | Wheat | Gourmet Loanne |
| El Bul Tea エルブールティー El Bourg Teas | Tea | Tea and Coffee, Gourmet Loanne |
| Loanne Weavers ロアーヌ織工房 Loanne Weaving | Cotton Clothes, Wool Clothes, Skill | Textile, Loanne Textile, Loanne Workshop |
| El Bul Forestry エルブール林業 El Bourg Forestry | Lumber | Lumber |
| El Bul Craft エルブール木工 El Bourg Lumber | Music Instruments, Artifacts | Loanne Workshop |
| Loanne Studio ロアーヌ工房 Loanne Workshop | Weapon, Skill | Weapons, Loanne Workshop |
| Loanne Firm ロアーヌ社 Loanne Transit | Land Transport, Architect | |
| Champs Elysees シャンゼリーゼ Shanze Lize | Pub | Gourmet Loanne |
| Loanne Hotel ロアーヌホテル | Hotel, Cost, Amusements | Hotel |
| SHINON (LOANNE) / SINON | ||
| B. Shinon Pasture シノンベント牧場 Sinon-Bent Ranch | Horse, Wool, Cattle | Gourmet Loanne, Horse, Loob Textile |
| Carson Farm カーソン農場 Carson Farms | Wheat | Gourmet Loanne |
| Pioneer Society 開拓者協会 Settlers Association | Patron, Farm Tools, Architect, Skill | Gourmet Loanne, Farm Tools, Loanne Workshop |
| Shinon Money Mrkt シノン金取引所 Sinon Gold Exchange | Gold | Gold and Jewels |
| Shinon East Trade シノン東方貿易 Sinon Trading | Land Transport | Land Caravan |
Notes on Firms and Groups
- Regarding translations: Mana Sword confused two names and aggregated them: ツヴァイク (Zweig, as in the town ツヴァイク) and トゥイク (Twick, as in トゥイクティー or トゥイクワイン or トゥイク林業), both translated as 'Zweig', which explains why Zweig Tea, Zweig Wine & Zweig Forestry (in fact 'Twick' in those three instances) are not located in Zweig but in Librof. (In the Remaster: 'Tuisku', which is a very unlikely translation.) *** Waldo (from 'Waldo Team' in Justerm) is in fact the recruitable character ウォード (Wod/Ward), translated by Mana Sword as Wood in the rest of the game. *** Ake Beet Farm (Ake) cultivates not Beets but Sugar Cane (アケさとうきび農場). *** In Justerm, Matruda Fabric most likely belongs rather to Matilda or Mathilda (マチルダ), and Federick Fur to Frederik (フレデリック). *** Art Bookstore (Pidona) is a bookstore all right but it might not deal in art books but rather be owned by a certain Aldo (アルド). *** Pidona Water Prod is in fact a Fishery (ピドナ水産). *** Vincent (Pidona), which is a Pub, is most likely Vin Santo (ヴィン・サント), named after an Italian wine. *** The Growing Northland group is simply The Great North (大いなる北の大地). *** The Wine group is in fact, of course, the Alcohol/Liquor (酒) group (to include beer ; ). *** B. Shinon Pasture (Shinon) is in fact Shinon Bent Farm (シノンベント牧場), belonging to Thomas' family. *** O Connor Fisheries (Vanguard) is rather O'Connell's (オコンネル水産). *** In Librof, Urazami Fisheries is in fact Vladimir's (ウラジミール) and Shehela Sad, Scheherazade (シェヘラザーデ). *** Naj Raster (Divine Tower), as part of the Ceramics group, is more likely to be a Luster (ラスター as in lusterware). *** Demander デマンダ (as in Demander Pottery) and Garter ガーター (as in Garter Tea & Garter Caravan) are geographic names (Demanda Mts. & Garter Peninsula, not explicitly mentioned in the game but both in the 1995-96 guidebooks). *** In Podol, 'Aricia, Musician' is more likely Aliosha and a musical instrument craftsman (楽器職人アリョーシャ), Elijah rather Iria (イリヤ), Michael rather Mikhail (ミハイル), 'Sergi, Woodcutter' rather Sergei (セルゲイ), Elizabeth rather Elizaveta (エリザベータ) and 'Mandola, Hunter' in fact a Mandragora (Mandrake) Hunter (マンドラゴラハンター). *** Fuber Iron Ore (Mules) is most likey Hoover's (フーバー鉄鉱). *** El Bul Craft (Loanne) is more specifically a carpenter (エルブール木工). *** エルブール (translated by MS as El Bul or Elbul) is possibly: Elbourg. And マンマ・メッサーナ (translated as Manma Mesano) likely: Mamma Messana.
- Interestingly, people & company names roughly reflect a geographical localisation not foreign to our current world map (and not without a good sense of humour too): Anglo-Saxon in the West & Center (Ned, Good Fellows, Seahawk, Smith, O'Connell, MacIntosh, Garter, Charles, Johnson, Adams, Hoover, Wilson, Garfield..), Latin-based in the Middle (Michelangelo, Raphaelo, Leonardo, Alfonso, Aldo, Le Marle, Stephane, Eiffel, Champs Elysees..), Germanic & Scandinavian in the North (Zweig, Johannes, Frederik, Matilda, Erik, Peter, Nils, Borg..), Russian & Eastern-European in the North-East (Sergei, Aliosha, Iria, Elizaveta, Mikhail..) with emigrates in Librof (Lasaiev, Vladimir, Adamski, Nikita..) which is also at the border of the Middle East (Scheherazade), Arabic-Semitic in the Middle-Eastern deserts (Abdul, Hassan, Mohammed, Ismael, Hamal..), Mongol and Chinese in the East (as data only, in Mung: Temujin, Timur; and Xuan & Huang Cities: names related to Chinese astrology & geomancy).
- The groups that exist as data but do not appear in the final version of the game are: Coffee, Spice, Gold, Huang Food, Huang Astronomy Weaving, Rashkuta Workshop, Xuan & Huang Workshops. There were also supposed to be Trading Agents (or at least companies based) in Snow Town, Fairy Village, Rashkuta, Mung Village, Xuan City & Huang City.
MIKHAIL'S MINIGAME


Mikhail's Minigame entails 2 parts which are intertwined:
- Ruling Loanne: raise Loanne's Economic Assets, Diplomatic Prestige & People's Welfare through public spending & taxation.
- Waging War (Mass Combat): at fixed or random intervals, you will be asked or forced to fight army battles.
Mikhail's Minigame is accessed by sitting on the Loanne Castle throne.
First talk to Shadow in your room to resume your duties if you were out adventuring.
This Minigame can be difficult: be sure to Save inbetween turns.


RULE LOANNE
BASICS
By Kagon http://shrines.rpgclassics.com/snes/rs3/ruling.shtml [with Remaster additions]:
[Start of Quote] "The Ruling Minigame is an entirely menu-driven system. You have a box on the bottom of the screen that displays the people's current situation. The menu appears to the left and has the various choices.
Status Screen:
People [Populace] - Status of the People of the country. It ranges from Worst to Best. At Worst, you may not tax your people at all! The more you tax people, the lower their status becomes. The people's status will recover towards Average in time, albeit a long time... [...]
Assets [Industry] - Overall economy of the country. Ranges from Lacking to Perfect. The higher your assets are, the more money you receive from taxing.
Prestige - How other countries see you. Prestige is improved through both battles and Diplomacy.
G left [Funds] - The amount of money left in your treasury.
Various Menus:
Military - The Military menu controls both the War Game and your Blacksmith production.
Military Menu Options (Each costs 50 kg):
Soldiers [Mercenaries] - Hire Mercenaries for your next battle.
Tactics [Tactics R&D] - Research new tactics for the next battle.
Weapons [Weapon Dev.] - Research new Weapons for Blacksmith production.
Armor [Armor Dev.] - Research new Armor for Blacksmith production.
Domestics - This controls both the People's Status and the Economy
Domestic Menu Options:
Social [Social Policy] - Improves the condition of the People.
Assets [Industry] - Increase the Loanne's Assets.
Diplomacy - Controls the Prestige of the country.
Diplomacy Menu Options:
Weak Power [Low Power] - Justerm, Stanley, Lance
Average Power [Average] - Vanguard, Yamas, Farce
Great Power [Full Power] - Zweig, Pidona, Divine Church
Tax [Taxes] - Increase treasury by taxing the people. (Note: the lower the People's condition, the lower the amount of money you gain.)
Tax Menu Options:
Low [Light Tax] / Medium [Average] / High Tax [Heavy Tax] - Gain a small / medium / large amount of money."
[End of quote]
RULING STRATEGIES
By Metastase https://gamefaqs.gamespot.com/boards/588634-romancing-saga-3/68705618:
[Start of quote]
"For the ruling mini-game, the gist is to stabilize Loanne economy and the best way to do it is through "very low assets" investments and taxation cycles, but you can't lose any war battle or expend that Gold anywhere else until it's stable. Provided you don't lose, here's the cycle:
6 x very low Asset: 90K gold left
Low tax: 300K gold
2 x very low Asset: less than 10K gold left.
Medium tax: ~420K gold
2x very low Asset
Medium tax: ~450K gold
3x very low Asset: <10K gold
Medium tax
2x very low Asset: Asset level now Perfect. People should be at the lowest levels of "Poor". 20-40K gold in treasury (may vary slightly, not sure why)
Now you should do the following over and over and over:
1. If the people value is "Poor" and you have put all the money into social that you can, tax high, and put that money into social.
2. If the people value is "Anguished" and you have put all the money into social that you can, tax medium and put the money into social. When you bring your People to "Average" before taxing, you may start expending Gold into military development and Diplomacy.
If you lose Gold anywhere during this cycle, just remember you can grab the batches of 10k from Thomas Business/Company/Trading mini-game (so you can fill the coffers directly), you can manipulate Greed to grab more Gold from [some] quests [(see the Money Management section)], sell things while holding 10k or you can do random battles, to raise People status (but it takes a LOOONG time). Zweig tournament Gold prize does NOT overflow into Loanne coffers though."
[End of quote]
Note: Mikhail's Remaster NG+
In NG+, Mikhail can withdraw money from the bank representative by using a Card from a previous playthrough but in fact you withdraw from the current Loanne treasury: this WILL screw up your ruling minigame fund management and force you to refill your coffers.
Note: The Ruling Game and Mikhail's Endings / Prestige & Diplomacy
By Midic https://gamefaqs.gamespot.com/boards/588634-romancing-saga-3/51702521?page=0 [with my additions]:
[Start of quote]
"Which ending Mikhail gets depends only on Prestige, you don't need to max happiness, which is an exercise in masochism. Prestige starts at 100 and maxes at 255. If you fight and win all the army battles except the Byunei invasion and Illusion battles, you should have 206 prestige. You need 192 prestige [= Prestige at about Strong or better] to be declared duke, 240 to be declared king [= Prestige at Best or nearly].
The amount of prestige you get from diplomacy seems to depend on how much prestige you already have [...]. If you've fought and won many army battles (or possibly only 3 or 4, not sure where the cutoff is), a 100K diplomacy investment will net the maximum reward, 16 prestige and 12 happy. 12 happy is also the amount a 150K social investment nets you. Hopefully you can see the way to make an easy 150K here."
[End of quote]
Note that, unfortunately, Prestige ending requirements do not match Prestige ranks so the only way to be sure that you have fulfilled the condition you are aiming for is to be one Prestige rank above, i.e. at least Strong for Duke and Best for King.
All numeric values in the Ruling Minigame are hidden, so this is of little help, but here are the breakdowns corresponding to all ranks (Populace/Industry/Prestige): Worst 0 | 1-49 | 50-99 | 100-149 | 200-254 | 255 Best

DETAILED ANALYSIS & STRATEGY
by Midic http://www.gamefaqs.com/boards/588634-romancing-saga-3/51702521?page=0:
[Start of quote]
"The people's happiness ("People") value you see when Mikhail is sitting on his throne is essentially a gold figure between 0 and approximately 3200K gold. [Note that it is actually stored as a 2 bit integer between 0 and 65535. Each point in this value represents 50 gold. The address is 7EF4E5 and 7EF4E6.] The happiness starts at 1280K gold (25600). Under 10K is displayed as "Worst". Up to about 600K is anguished, each additional 600K increases the level from poor to average to satisfied, etc. (Note that I haven't worked out the exact cutoff point between categories).
For each investment in diplomacy (whether 100K or 300K or 10000K), the people value goes up by about 50K gold (+1025 to be exact).
For each investment in assets (regardless of amount), the people value goes up by about 75K gold (+1536).
For each "very low" investment in social (costing 150K gold) the people value goes up by 153,600 gold (+3072).
I don't have exact figures for anything but "very low", but I've done enough tests to determine that any greater expenditure in social will be less efficient and put less gold that you spent into the people value. This applies to asset spending too. In other words, never ever ever spend money on social or assets except at the very low level. [150k gives +12 but 300k only gives +22.] Unless of course you feel a need to throw away a few hundred thousand gold, in which case you could just give the money to the Puppenheim mercenaries who have a heck of a beer budget.
Also, For every battle against monsters you win, you also have a small chance of the people value increasing by 12800 gold (+256). This increase randomly occurs at the end of the battle at the same time as your random HP/TP/JP/skill boosts. Since the boost is random, replaying a battle from which you got a boost would not only give you a different set of stat bonuses, but probably not give you a people value increase. I have been unable to determine whether factors like battle difficulty alter the odds of an increase happening, but at the time I was testing it, the odds seemed pretty low, like maybe 1 in 50, which could mean you'd need to fight 2400 or so battles to raise people from "worst" to "poor" (Ouch!). This is the only way I'm aware of for your economy to improve from "passage of time".
Investments in the military category don't seem to directly affect the people value.
When you collect taxes, it removes some of the money from the people value. The amount removed is 20% for low tax, 40% for normal tax and 80% for high tax. Some portion of the money that was removed is then deposited in your treasury. The amount of the taxed money that you actually receive is a function of the pre-tax people and asset levels. I.e., if you have happy people and lots of assets, your taxation is more efficient. At the start, with people "average" and assets "lacking", you only get about 30% of the amount that was removed from the people value. However, if you have "perfect" assets and "poor" or better people, you can get 100% of the collected amount (or maybe a teeny bit less at the lower end of "poor"). With a high enough people value, it might be possible to get a 100% return with less than "perfect" assets, but I don't actually know for sure. Unlike asset/social spending, it is okay to use any of the taxation levels (you can still get 100% return).
It requires 15 "very low" investments (2250K gold total) in assets to raise the value from "lacking" to "perfect". Keep in mind also that you are getting half the money sent back into the people value as well.
Also note that while it does not seem to be possible to get more than 100% efficiency from taxation, the "very low" social investment actually puts more money into the people value than was spent. 3600 gold more to be exact. So, once you reach a state of 100% taxation efficiency, you can tax your people, put the money into social spending, and come out with slightly more money than you started with. Repeat this cycle and eventually you come up with enough money to do anything you please. Well, except you can't pocket the money and spend it on your party (embezzlement apparently hasn't been invented yet).
It is actually possible to reach this state of economic efficiency with your starting cash. However, you have just barely enough money to do it and any extra expenditures could easily reduce the amount of gold in the system below that necessary to reach a sustainable state. You really can't afford to spend anything on military, diplomacy, or lose any to various invaders. You'll probably have to fight a few army battles, but you'll need to win them all and without any purchased tactics or hired mercenaries. Through trial and error I've managed to work out _a_ sequence of moves that will get to that state. With better knowledge of the taxation efficiency formula or just a lot more trial and error, it _might_ be possible to find a slightly better sequence, but maybe not, and for me, this one is "good enough". Anyway, here goes:
6 x very low asset: 90K gold left
low tax : 300K gold
2 x very low asset: less than 10K gold left.
medium tax: ~420K gold
2x very low asset
medium tax: ~450K gold
3x very low asset: <10K gold
medium tax
2x very low asset: asset level now perfect. People should be at the lowest levels of "poor". 20-40K gold in treasury (may vary slightly, not sure why)
At this point, you can finally afford to say yes and pay 10K to that annoying soldier who keeps popping up asking if you would like to go get ambushed by assorted monsters and the Librof army...er I mean he asks if you'd like to simulate the real battle. Prior to this, even that 10K loss could screw you up and you still can't afford 50K for a military expenditure, or loss of any of the 100K military battles.
Now you should do the following over and over and over:
1. If the people value is "poor" and you have put all the money into social that you can, tax high, and put that money into social.
2. If the people value is "anguished" and you have put all the money into social that you can, tax medium and put the money into social.
This should lead to cycle where you alternate between "poor" and "anguished" state. The theory behind this loop is that you want to do most of your taxation with almost all the cash in the people value, rather than in your treasury (higher people means less % loss of taxes). However, because you can only move money out of the treasury in blocks of 150K, after a high tax and spend sequence you end up with enough of the system's total gold to lower the people value considerably and thus probably your taxation efficiency. If you were to tax low, the amount brought in wouldn't break down well into 150K chunks and would leave you still at anguished. However, medium tax brings in an amount that leaves you with less over after you pay out all the 150Ks, bringing things up to "poor" again.
After a few of these cycles, you should notice that the amount of leftover gold in your treasury is gradually creeping upward. If it's dropping steadily, you must have lost some money somewhere and will have to give up until you can find some more cash somewhere (note that your gold level varies depending where in the cycle you are, so don't confuse this with the amount of gold in the whole system decreasing). However, if all goes well, your gold should eventually rise to 150K and you can make an additional social expenditure each cycle. Now, once you've done all possible social spending, people should always be "poor", rather than alternating between "poor" and "anguished". At this point you can just go with high taxes all the time (other levels should also work just fine if for some reason you'd rather collect taxes 2x-4x as often). After you generate another 300K gold or so, you should be substantially above the 100% mark and be getting 20K+ per taxation cycle. You can probably safely start making a few military expenditures and such, though I generally wait till I get the pre-tax people level up to "average" so that I have a nice buffer to protect me from overspending.
Prestige and Diplomacy:
Prestige will go up with winning army battles. You can also spend money on diplomacy to raise your prestige, however, you can only spend money once on each city. So if you spend 100K on Justern, you can't later go back and spend 200K more. Each city offers 3 diplomacy options. The second option gives 2x the prestige that the first gives and third option gives 3x the prestige of the first. However, all cities give exactly the same prestige from a particular option. So, spending 300K on a minor power is the same as spending 3000K on a medium power or 30000K on a major power. If you win all the army battles, it will require 10 levels of diplomatic spending to get "perfect" prestige. This means 300K to each of the minor powers and 1000K to a medium power. Or you could spend 9000K on medium powers and 100K on a minor power, but that would be...stupid. You don't need perfect prestige to get Mikhail's best ending, so if you lost a few army battles, you can still get it without painfully acquiring enough gold to go for the medium and major powers. Actually, it would take horribly long to get 10000K, so I suggest you pretend those options aren't even there unless you're a masochist or have a cheat code(see below).
Treasury:
When you start the game, your treasury is listed as having 990K gold. It actually has 1000K gold and the game is quite capable of displaying this value, but a slight glitch in the way it converts gold into K gold means that you'd need to throw in at least 1 additional gold coin for it to show as 1000K. In addition to taxation, you can increase your treasury by having your party sell things in a shop when you already have 10,000 gold. Also, the overflow from the 10,000 gold Fullbright gives you for each phase of the Thomas trading minigame will end up in the treasury. However, the overflow from the 10K Zweig tourney prize (as with most other sources of money) does not seem to reach the bank, so spend all your money before entering. You can't take the money back out of the treasury, so if Mikhail wants more than 10K gold readily available, he needs to stash equipment in the warehouse for later sale (I think I once got 150K gold this way, near the end of the game). The treasury is stored as a 4 byte integer starting at 7EF31C. If you don't want to muck with all this stuff and don't mind cheating, the following 4 codes will give you 50,000K gold in treasury: 7EF31C80 7EF31DF0 7EF31EFA 7EF31F02
Note that if you turn the code off, the value will be truncated to 10,000K, which means that although there are 20000K and 30000K options to diplomacy, you would never be able to get at them otherwise. Also note that Mikhail's treasury is stored at the same place in memory as the other characters' gold in bank value. Thus this code would give them 50,000K in bank."
[End of quote]
WAGE WAR
The second part of Mikhail's Ruling Mini-Game: he must wage war against various foes to protect Loanne and reinforce his position.
Two armies meet on the battlefield, with various Formations and Tactics at their disposal.
Mikhail can randomly learn up to 2 formations or tactics after most battles.
Additional Formations can also be bought from the throne (50kG each): randomly attributed, once between each battle. (Which Formation you get can be manipulated by Saving, buying, loading Save, getting down from then up on the throne, Saving, buying again if not happy with what you got, etc.) This is completely optional. Not buying anything is actually a great help to understand the game better (some Tactics like Intel are quite broken, in the OP sense of the word).
You can also buy Mercenaries (& Defense for one battle) for the next battle for 50kG. They are a great help towards the end.
There are 10 Mikhail-only Mass Combat campaigns (SFC: one, vs Byunei's Monsters, is bugged and replaces another campaign if triggered and possible), the first two being also in Harid/Khalid's scenario. There are also 2 additional Army Battles for everyone.
SFC only: Note that if you don't care about ruling Loanne and are in a warring mood, it is possible to do Mass Combats only: just sit down / stand up on the throne repeatedly (each count as one turn) and army battles will come to you uninterruptedly. [This does not work in the Remaster edition.]
BASICS


During each Mass Combat Preparation, you can choose to 2 Formations and 5 Tactics (Fwd Attack cannot be removed) to be used in the coming battle(s). Before each battle you will have to select one of your two Formations and cannot change it after the battle has started.
Each Troop has different stats (offense, defense & push/rush power), which are altered by Formations, Tactics & Morale.
You can get new Formations & Tactics after winning a Mass Combat.
They come under the following categories: Tactics of Attack (Atk), Super General Tactics (Atk Spe / Courageous), Tactics of Defense (Def), Tactics of Iron Wall (Def Spe / Ironwall) or Unusual Tactics (Special / Surprise).
Learning new Formations & Tactics (F/T) is pretty straightforward.
After winning a Mass Combat, you get one F/T as a reward:
- if you spent more time attacking than defending, it will be from the 'Atk' category.
Additionally, if you have killed all enemies, you get a second F/T from the 'Atk Spe/Courageous' cagegory.
- if you spent more time defending than attacking, it will be from the 'Def' category.
Additionally, if none of your soldiers were killed, you get a second F/T from the 'Def Spe/Ironwall' category.
Back Water/Full Force is a Special/Surprise Formation. To learn it you need to spend most of the battle by the right-most edge of the field and win there.
You can also buy some Formations & Tactics from the throne (Military, 50kG, only one randomly inbetween campaigns).
Special: If you buy troops for the Librof/Ryblov campaign (Soldiers, 50kG), your sieging troops will have one extra Tactic. Also, the Divine Church campaign allows you to buy Defenses for your walls (Military Special, 50kG).
Notes:
- In the tables below, the number between brackets after Tactic Name is number of times you can use the said Tactic.
- In Mana Sword's translation, most abbreviations are easy to understand. Bot stands for Bottom, Bwd for Backward, Frm for Form(ation), W for Weak, S for Strong (except for 'Recvr Frm S' where S means Speedily).
- The names from the official 2019 Remaster translation, if different, come after the Japanese.
Formations
| Name | Get | Description |
|---|---|---|
| Straight 縦列陣形 Column | Default | Army in one straight line. Good mobility & charge. |
| Def Wave 防壁の波陣 | Default | Army in 2 lines, Def up. |
| Atk Wave 攻撃の波陣 | Atk | Army in 2 lines, Atk up. |
| Gush Wind 疾風陣 Aero Wedge | Atk | Arrow-shaped, very fast movement, strong pushing power. |
| Strong Atk 強撃陣 Last Ditch | Atk Spe | High attack power but the army moves slowly. |
| Back Water 背水の陣 Full Force | Special | Highest attack power but the army moves very slowly. |
| Wave Shield 波状盾の陣 Vee Shield | Def | Army in 2 lines, protects the Commander. |
| Top Charge 上翼突撃の陣 Echo Top | Military | Calvary lined up behind the front row at the top. |
| Bot Charge 下翼突撃の陣 Echo Btm | Military | Calvary lined up behind the front row at the bottom. |
| Middle Chrg 中央突破の陣 Echo Ctr | Military | Cavalry at the front and center of the formation. |
| Three Waves 三波状陣 Three Wave | Military | Army in 3 lines (offensive, defensive, pushing). |
Tactics
| Name | Get | Description |
|---|---|---|
| Fwd Attack 前進攻撃 Forward Attack | Default | The army moves forward and attacks. |
| Move Back 全軍後退 All Withdraw | Default | The whole army moves back. Regains morale. |
| All Defense 全軍防御 All Guard | Default | The whole army defends. |
| All Charge (1) 全軍突撃 | Default | The whole army charges forward. Morale up. Enemy morale down. |
| Retreat 全軍退却 All Retreat | Default | Your army retreats. You lose the battle. Never use this! |
| F Row Chrg (1) 前列突撃 Front Charge | Atk | The front row charges forward. Morale up. Enemy morale down. |
| B Row Chrg (1) 後列突撃 Rear Charge | Atk | The back row charges forward. Morale up. Enemy morale down. |
| F Row Fwd 前列前進 Front March | Atk | The front row moves forward. |
| B Row Fwd 後列前進 Rear March | Atk | The back row moves forward. |
| Spd Atk Fwd (4) 速攻前進 Swift March | Atk | The army moves forward very quickly while attacking (light). |
| Fwd Atk S (4) 強撃前進 Fierce March | Atk | Powerful but slow attack forward. |
| Retreat Attack (4) 後退攻撃 Withdraw Attack | Atk | Move back slowly while attacking (strong). |
| Top Attack (4) 翼攻撃 | Atk | The upper half of the army attacks. |
| Bot Attack (4) 下翼攻撃 Bottom Attack | Atk | The bottom half of the army attacks. |
| Cmd Charge (1) 前列防御 Command Charge | Atk Spe | The Commander charges forward while the army defends and recovers morale. |
| Explde Team (1) 爆裂部隊 Bomb Squad | Atk Spe | Part of the army charges forwards and explodes after a countdown. |
| 2 Row Exchg 前二列後退 Dual Front Swap | Def | Changes the first row with the 2nd or 3rd rows (for Three Waves) |
| Defense S (1) 全軍防御 強 All Guard+ | Def | The army stands ground, very high defense. Morale decreases. |
| F Row Def 前列防御 Front Guard | Def | The front row defends; their morale decreases. The back row regains morale. |
| F Row Exchg 前列後退 Front Swap | Def | Replaces the front row with the second. |
| Recover Frm (3) 陣形回復 Form Boost | Def | Army reforms, no defense, then morale is fully restored. |
| Recover W (3) 統率回復 弱 Lead Boost WK | Def | Recovers some of the troops' morale. |
| Retreat Def (4) 後退防御 Rear Guard | Def | The army moves back slowly with high defense. |
| Spd Atk Bwd (4) 速攻後退 Swift Withdraw | Def | The army moves backward very quickly while attacking (light). No defense, morale up. |
| Spd Atk Exc (4) 速攻交代 Swift Swap | Def | The army quickly rotates the first and second rows. |
| F Row Def 前列死守 Front Guard | Def Spe | Front line defends to the death: very high defense, morale decreases. Back row morale up. |
| Pray Rain (1) 雨ごい Rainmaker | Def Spe | Causes rain to fall dropping morale on both sides. |
| Recvr Frm S (2) 陣形回復 速 Form Boost QK | Def Spe | Army quickly reforms, then morale is fully restored. |
| Recover S (1) 統率回復 強 Lead Boost ST | Def Spe | Morale is fully restored. |
| Split Atk (1) 分断作戦 Divide & Conquer | Def Spe | Your army's front line jumps behind the enemy's front line and attacks for high damage. |
| Intel L 1 (1) 情報操作L1 Info Leak L1 | Military | Forces your enemies to use Fwd Attack. Cost: 100 units. |
| Intel L 2 (1) 情報操作L2 Info Leak L2 | Military | Forces your enemies to use All Defense. Cost: 200 units. |
| Intel L 3 (1) 情報操作L3 Info Leak L3 | Military | Forces your enemies to stand still. Cost: 300 units. |
| Intel L 4 (1) 情報操作L4 Info Leak L4 | Military | Forces your enemies to Retreat. Cost: 400 units. |
| [Confusion / Intel L 5] (1) [情報操作L5 ?] | [Military] | [Confuses the enemy. Cost: 500 units.] Bugged. |
| Smoke (1) 煙りぜめ Smoke'Em | Military | A smoke screen causes the enemy to go back to their side. |
| Decoy (1) おとり作戦 | Military | Forces the enemy to use All Charge. |
| White Flag (1) 偽りの白旗 Perfidy | Military | Tricks the enemy into dropping their weapons: enemy attack power down. |
| Archer Throw (4) 弓兵部隊 Bow Squad | Soldiers (vs Librof) | Archers shoot at the troops manning the catapults on Librof city walls. |
| Rock Team (1) 投石部隊 Trebuchet Squad | Military Special (vs Div Church) [Remaster: Military] | Drops rocks on the enemies after 3 seconds. |
Notes
- Two different Tactics with 2 different names in Japanese are translated as 'F Row Def' in Mana Sword's version. One is a regular defense tactic (前列防御) while the other is a special defense tactic and offers a better defense (前列死守). [This was not corrected in the Remaster version, both tactics having been translated as 'Front Guard', oops..]
- Confusion / Intel L5 (情報操作L5): bugged. It seems that on SFC even if you learn it you cannot equip it, and on Remaster you cannot learn it.
- While in Preparation for the next army battle, you may notice that your title changes (Commander, Leader...) depending on your actions in the previous battles.
- Remaster NG+: Mass Combat Tactics carry over. Use NG+ to get a whole arsenal of Tactics by playing Mikhail’s Introduction and by buying some through R&D, then load your save in a NG+, repeat. Note that after you have bought all R&D Tactics, if you try to buy one more, the game freezes and you have to reset, oops..
Notes
By Midic http://www.gamefaqs.com/boards/588634-romancing-saga-3/51702521?page=0
[Start of quote]
"If you pay 100K to make Puppenheim, Edwin, or the highwaymen go away, they will come back asking for another 100K in a very short while. If you fight them and lose, you will pay 100K, but they will stay gone. You can lose any of the 3 battles of the "Training Exercises". Losing either of the first two will remove armored infantry/cavalry from your lineup in the third. Losing the third just costs you the tactics you would have gained. Losing any subsequent battles in the sequence, including "lure army from swamp", "take city", "defend city", or "chase divine church into desert" will end the whole Librof battle sequence early, although you may get prestige/tactics from the battles you won. Winning every single battle will also earn you 500K gold. This is probably the best alternative if your economy got screwed up from overspending or losing one of the 100K battles.
There is an obscure "Monsters in the Swamp" battle that is easy to miss. After you clear at least 1 abyss gate, this battle will (probably) overwrite the next battle you try to fight. So you might be told that you are being threatened by Puppenheim, go into combat, and discover instead of a bunch of guys on a plain in Gush Wind formation, you are facing a pack of flying blue things over a swamp. If the "overwritten" battle was Puppenheim/Edwin/Highwaymen, it will get pushed onto the next battle you fight, scrambling that up too. If the battle is pushed onto one of the Librof sequence battles, the sequence will generally end, even if you win the battle. The only exception is the "training exercise". If the first battle you fight after beating an abyss gate guardian is the "training exercise", instead of fighting 3 battles with goblins and zombies and the librof army, you will only fight the single blue flying swamp monsters battle. Next time you go upstairs to talk to clone, you will be told about how the enemies that ambushed the practice have been identified as the Librof army, just as if you had fought the normal 3 battles. This will activate the next battle in the sequence and everything will go just fine. Then, leave and enter the room again and you will be told "Byunei's Lair Located on Mount Taftan." This is the only way Mikhail can unlock the Mount Taftan mists other than by teaming up with Gwayne and killing Byunei that way (which will also unlock the lair.) If Mikhail already fought all the other army battles, there will be nothing for this battle to overwrite and thus he won't be able to get the message about Mount Taftan. Also note that if Mikhail actually loses the flying blue swamp monster battle, he will end up at the gates of Loanne, fending off a large pack of monsters, the only time an army battle can get the rest of the party involved. The blue swamp monster battle can also overwrite the final "illusion" battle, but since that battle can only appear after all abyss gates are closed, it won't help you get to Byunei. Actually, I'm not quite sure if winning/losing the "illusion" battle has any consequences (no need for the tactics you could win), although I suppose prestige might be affected.
Okay, to put all that another way, you should either complete the Librof sequence before you close an Abyss Gate or not even start it. You probably should also complete all possible non-Librof battles before closing an Abyss Gate. If you don't want to fight Byunei by riding Gwayne, you should leave at least 1 army battle unfought (preferably the Training Exercises). Of course, if you are going to use Gwayne, be sure to talk to the man on Vanguard about the small village, _before_ you move Vanguard (when he no longer will talk about it.)
Each type of soldier in the army battles has an ability to do damage, an ability to take damage, movement speed, pushing power, holding (ability to avoid being pushed) power, and morale. Whatever formation you put them in can affect all of these statistics. Thus, the difference between "Defensive Wave" and "Attack Wave" is not just in which row your cavalry starts out. A soldier in a Defensive Wave will take less damage because of its strong defense, but in an Attack Wave, the same soldier would be able to do more damage. Also, Attack Wave moves slightly faster. From the descriptions, I get the impression that different rows in different formations might have different statistics, but I'm not at all sure how this works, especially when formations get scrambled or during some sort of row exchange. The statistics are further affected by whatever tactics one chooses to use. If the tactic causes troops to flash red, they'll definitely be damaging the enemy. If troops flash blue, they'll take a lot less damage. However, my impression is that troops in defensive mode do very little if any damage to the enemy (it's more for delaying and wearing down morale.) Also, bonuses definitely vary from tactic to tactic. For example, some particular group of soldiers on "Front Row Charge" might be able to push their way out of a swamp and shove the enemy soldiers right off the screen. If they were using "All Charge", they might find themselves stuck in the swamp till they drown. In other words, "Front Row Charge" has much greater pushing power. Of course, "All Charge" has the potential to involve soldiers from the back rows, who might add their push to the front row and even things up a bit. What exactly are the bonuses the various formations and tactics give to stats? Actually I have no idea. I'm just wavin' all this stuff around because it's not very noticeable till you've played a lot of battles."
[End of quote]
BATTLES
Mass-Combat Victories increase your Diplomatic Prestige.
You also get 500k at the end of the Divine Church campaign.
Act 1: Mikhail vs the Goblin King
Act 2: Mikhail vs Baron Godwin
For the first two battles, see Mikhail's Introduction.
Note: This minigame is difficult: be sure to save between each turn on the throne.
Act 3: Mikhail vs the Pupenheim Mercenaries [Pappenheim]
You are threatened into giving 100k (which you cannot afford anyway) or suffer battle. Battle it is (Prestige +1).
Strangely, the Mercenaries are very susceptible to Back Water/Full Force: they keep alternating between Spd Atk Fwd/Swift March and Retreat Atk/Withdraw Attack (even though they could just push you out of the screen in a couple of seconds with their Gush Wind/Aero Wedge formation), then All Charge you (reply with your own): most of the time you should kill them all before they push you out. You get 2 Offensive Tactics with this. Victory: Prestige +10.


If you don't have Back Water or choose not to use it, be careful not to touch the enemy while he uses Retreat Atk.
Act 4: Mikhail vs Edwin
Another threat! from an imaginary brother of Godwin! as if! (Prestige +1).
This is a tough battle. Edwin uses a very effective pattern: Wave Shield: F Row Chrg - (3 units lost:) 2 Row Exchg - F Row Chrg - All Charge if wounded. In the second wave you have to face an aggressive line composed of mainly cavalry in the middle and very fast units at the bottom. It is possible, with luck, to push most of the army out of the screen with a Straight/Column formation (it needs to be fast and not too strong for the 2 Row Exchg to occur as late as possible, ideally on the very left side of the screen; Spd Atk Fwd/Swift March to push and Intel/Info Leak to counter the Edwin-less troops' All Charge make things very easy). Another way is to kill most of the troublesome units (e.g. with Explde Team/Bomb Squad and the right timing). Victory: Prestige +5.


Act 5: Mikhail vs the Highwaymen (3 battles)
Loanne is being threatened. Again. This time, the Highwaymen (probably the same as those used by Stanley for guerilla against Farce/Faros) are growing strong in the Northern forest. Their generals are Bunny, Fox & Bear – which sound more like some Professor's pets! What sort of bandits are they, I wonder? (Prestige +1).


1) vs Bunny [Rabbit]
No special trap in this battle, quite standard. Use the general Wargame strategy, everything should be OK. Bunny Rabbit flees quite quickly.
Reward: only one Tactic. Victory: Prestige +5.


2) vs Fox
If you advance past the middle of the battlefield, you will be ambushed by bowmen and lose a substantial amount of your troops. So don't, haha. (Or do cross the middle line once only, and beat them on their side.) Instead, lure the enemy to your side of the field by Moving Back/All Withdraw (Retreat Atk/Withdraw Attack can be useful) and counter-attack with a fast formation (they Move Back when you do). You can also have them do something else while you counter-attack (with Intel/Info Leak 1 or 3).
Reward: only one Tactic. Victory: Prestige +5.


3) vs Bear
Bear uses an interesting combination of Split Atk/Divide & Conquer (the enemy's front line jumps over yours)(if you have two! hehe) & B Row Chrg/Rear Charge (his cavalry, at the rear until now, attacks). Be careful not to be overwhelmed by the fragile but very fast units at the bottom, or the slow but tanky units at the top. This battle can be difficult. Victory: Prestige +5.


Note: For the 3 previous combats vs. the Bandits, a combination of Back Water/Full Force coupled with Retreat/Withdraw Atk (and possibly some bombing for the last mission) means easy wins with minimal losses.
Act 6: The Training Exercises (3 battles) [Large-scale Military Drills]
This series of battles costs 10kG to start (Prestige +1) and if you refuse it will come back every 5 throne actions.
The Preparations at the start will be for the 3rd battle only.

1) vs Goblin Prince
Imposed Formations & Tactics.
The Goblin Prince is just slightly better than the Goblin King (it Moves Back/Withdraws to regain morale). Regular Wargame strategy. All Defend, Fwd Attack when they Move Back (not to give them time to recover)(they regain morale while advancing too), repeat until they All Charge, All Defend, your All Charge, should do it. Slight variants sometimes.
Note: No reward.


2) vs Tommy Zom [Zombie Tommy]
Imposed Formations & Tactics.
Zombies everywhere. They have no morale, a very high attack, and can decimate your troops in seconds. All Defend until they turn their backs on you, then Fwd Attack. Repeat until they are close to the edge, then Attack Fwd. If they are far left enough, with luck, you can push they off the screen faster than they kill you. Sometimes it is a very quick battle, but sometimes they never retreat close enough to the edge and you are lost in a hopeless attrition war. ALT: Every time they retreat, hit them in the back with a fast formation (Straight can do), withdraw to your side when they attack and All Defend, repeat. This can be long-ish..
Note: No reward.


3) vs ?????
At the rendez-vous point of your three armies, you are attacked by an unknown army!
This is a very regular, pretty anti-climatic battle: enemy in a Def Wave, switches rows from time to time. You can beat them with any formation and the default Tactics. Fast formations speed this up.
Victory: Prestige +10.


Act 7: Mikhail vs Librof/Ryblov (3 battles)
At some point after the Training Exercises you must leave the throne (maybe take a walk outside for a change, go complete a few quests possibly?) and come back and talk to Shadow in your room once or twice to learn that the unknown enemy from the Training Exercices has been identified: it was Librof/Ryblov.


Starting the Librof/Ryblov campaign costs 10kG (Prestige +1). If you refuse, the dialogue will come back later, until you accept.
3 battles with an additional Preparation phase after battle 1.
1) vs Vlad's March Block [Vlad's Swap Guard]
Careful: just by being in the swamp your troops (and the enemy's too) lose HP.
You need a fast formation to get in and out of the Swamp rapidly. This battle is, twice, a touch-n-go: reach the enemy, retreat to your shore of the swamp (exactly) and hold your ground, the first row dies, the second comes (this is tougher), same strategy. You don't need anything special beside a fast formation. Of course, any Tactic that forces the enemy to break pattern considerably helps (Intel/Info Leak, Decoy). Victory: Prestige +10.


2) vs Razad's City Block [Lazare's Castle Guard]
Now you lay siege to Librof/Ryblov! You get to Prepare for the next two battles.
Ideally, you need at least one fast formation.
First you are before the walls and the city gate. Fast formation for this battle.
You need to Fwd Attack into the gate for quite some time.
Catapults will throw stones at you (heavy damage if hit). The enemy is kind enough to tell you where they are aiming: 1 is right, 2 is middle, 3 is far left (by the gate). You evidently need to avoid the stones (and ideally All Def when the countdown reaches 1).
If you have bought mercenaries for this campaign, you will have one extra Tactic (Arrow Throw/Bow Squad: shoot when your troops are right in the middle of the field) that allows you to shoot at the troops manning the catapults (replaced by soldiers from the enemy's army below).
After a while, announced by some taunting (there is a lot of talking during this siege!), a Rain of Stones (All Defend).
After another while hitting the gate, the enemy gets out and charges at last. Defeat them the usual way.
Victory: Prestige +10.


3) vs Byahl's Bot Charge [Bayard's Echo Btm]
You possibly need a formation with a high attack power here (to compensate) or a fast formation (to overwhelm). Fast is always easier, because a slow formation might get you pushed out of the screen. Twist: the commander at the bottom is actually a fake: the real commander is hidden at the top. 2 possibilities as how this battle may play out:
- You may kill (inadvertantly) the real commander first, and be surprised how easy this battle was. Good job. If you know where to look, use a formation with the Commander at the top: All Def, and simply use Cmd/Command Charge to kill the real commander only.
- If you kill the fake commander first (who was just asking for it with the initial F Row Chrg/Front Charge), Vlad comes out on the open and uses a White Flag/Perfidy tactic that decreases your attack. Follows a F Row Exchg/Front Swap and All Charge that you must tank or counter. Intel/Info Leak & al. (if you have them) always work nicely to counter troublesome enemy orders.
Victory: Prestige +10.


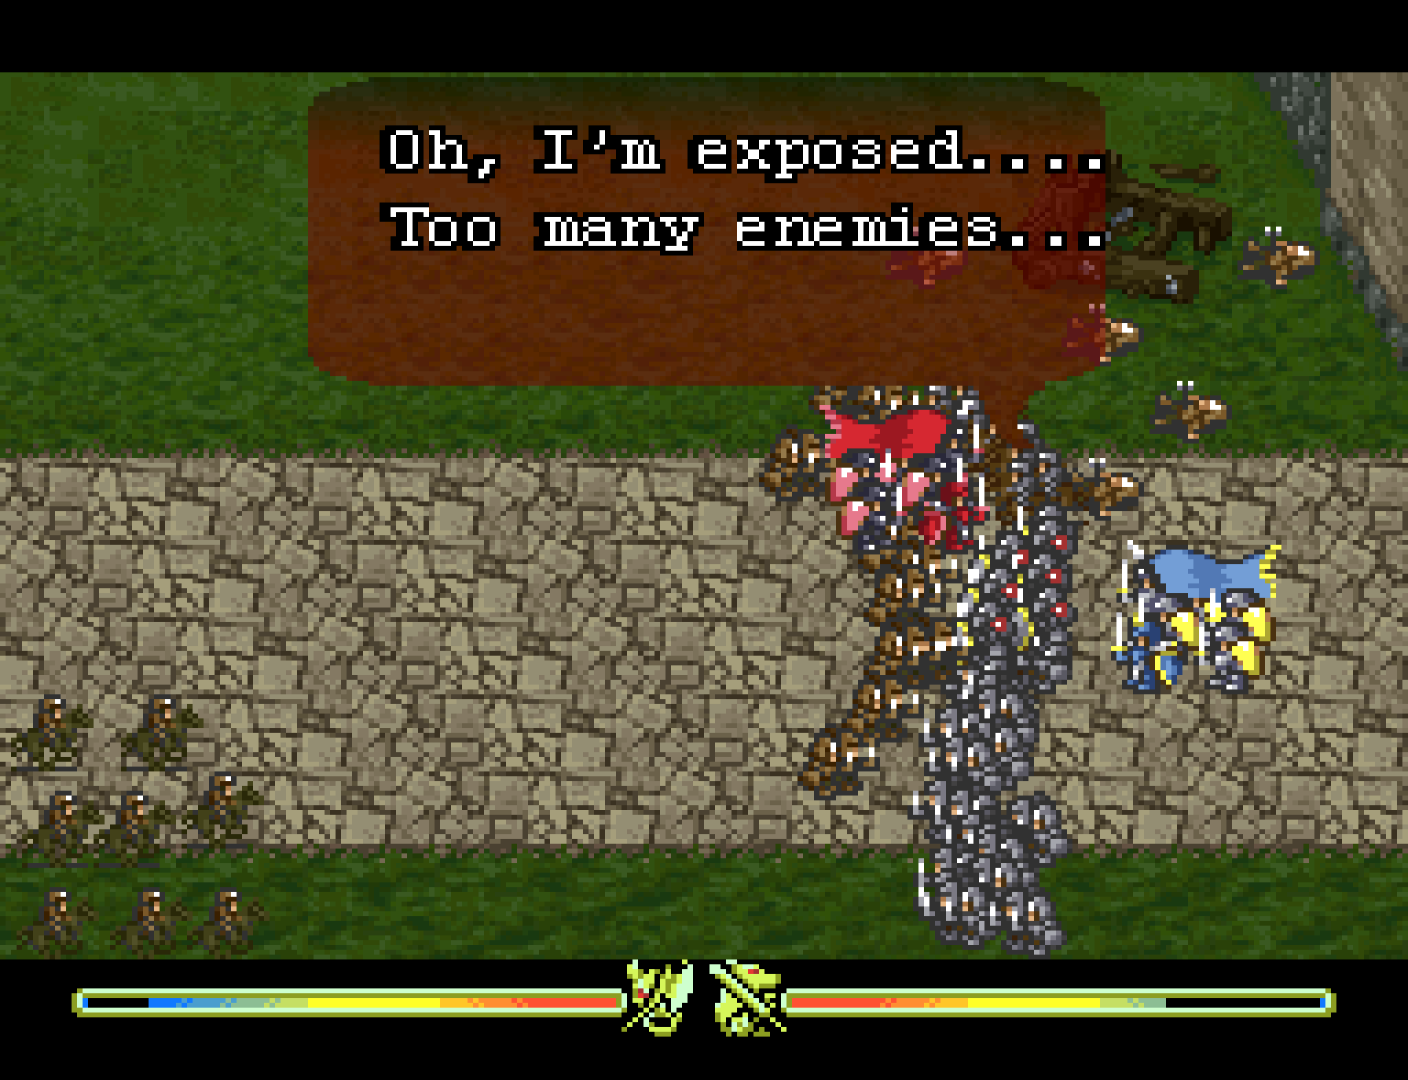


At the end, you are asked whom to leave in command of the Librof garrison (for the next battle):
- Bradley, balanced (Fwd Attack, Move Back, All Defense, All Charge, F Row Exchg, Recover Frm)
- Collins, fast (Fwd Atk, Spd Atk Fwd, All Defense, Spd Atk Exc, Recover S, Recover Frm S)
- or Patton, charge (Fwd Attack, R Row Chrg, B Row Chrg, All Charge, All Defense, Recover W).
Any can do. But the next battle will be very difficult without buying mercenaries, which you should do.
Act 8: Mikhail vs the Divine Church/Order (3 battles)
Now it's the turn of the Divine Church (because Tiberius is an old, irredeemable, warmongering fanatic).
Librof/Ryblov, now yours (hehe), is in need. You have to spend 10k to go help (Prestige +1; but if you refuse now, this campaign is gone forever).


1) vs Garibaldi's Atk Wave
Enemies snuck into Librof/Ryblov Castle and lowered the gate: you must hold the opposing army until all intruders have been killed (you get updates on the situation). You fight with the general you chose at the end of the Librof/Ryblov sequence. Buying defenses (and possibly mercenaries) is recommended. Preferably Def Wave.
The enemy will use in turn Fwd Atk S/Fierce March, always trying to keep their morale in the blue (Move Back), and at the 3 invaders left countdown: F Row Chrg/Front Charge, B Row Chrg/Rear Charge, All Charge & Recover S/Lead Boost ST.
You should tank their attacks (All Defend, Attack Forward when they Move Back). Use Rock Throw/Trebuchet to gain time only after there is 1 invader left and they come down hard on you (the enemy will Move Back and All Defend to protect themselves). Careful, the rocks will target the middle of the battlefield (stay back and defend).
Victory: Prestige +10.


2) vs Acute's Def Wave [Acuto]
You can Prepare for the next battle at this point.
Fast formation recommended (Gush Wind/Aero Wedge, or Straight/Column even).
Uphill battle. Gush Wind/Aero Wedge, Spd Atk Fwd/Swift March & Intel/Info Leak L3 make all battles all too easy.
If you don't have those, in a Straight/Column formation: All Defend, Fwd Attack as far as possible when they Move Back, use Morale-type Tactics (e.g. B Row Chrg/Rear Charge, or Pray Rain/Rainmaker followed by some Recover) and push forward (Fwd Attack, Defend if they F Row Exchg/Front Swap). Your mercenaries at the bottom should kill the Commander and the rest of his troops All Charge.
Victory: Prestige +10.


3) vs Sharl's Div Church (3 Waves) [Charles' Divine Order]
Zero Morale for everyone this time! (Unequip Morale-type Tactics).
Fast formation here too. Be sure to have Move Back/All Withdraw equipped. Possibly Wave Shield/Vee Shield, Spd Atk Bwd/Swift Withdraw.
Fwd Attack and push until they use Believers (suicide bombings), Move Back, and repeat. After the 2nd Believers, they launch a useless Believers Attack (being Morale-based). Kill the Commander and they will retreat.
Victory: Prestige +10.


This campaign is deemed a frank success and you gain 500kG (most welcomed!).
Act 9: Mikhail vs Byunei/Buné's Monsters (Devil Leader's Evil Beings) [Devil Leader's Monster Horde]
You must close one Abyss Gate for this battle to occur.
You also must have some other Mass Combat battle left unfought: it is bugged and overwrites the next battle (preferably the Training Exercises?). [Bug corrected in the Remaster edition.]
Note [SFC only]: If you have already fought all army battles until now, this Mass Combat won't occur, but you can still choose how you want to fight Byunei/Buné. Only 2 options for Mikhail:
- If you want to ride Gwayne, go to Mt. Loob, meet Gwayne and talk to it.
- If you want to go through Mt. Taftan & Byunei/Buné's Lair, first you must kill Gwayne. Then when you come back to your room (in out in), Shadow will tell you that Byunei/Buné's Nest has been located: you can now pass the mists at the top of Mt. Taftan.
See the Walkthrough for details about either option.


This battle can be tough. You must face a swarm of blue flying units that do not tire (except when they attack you) and are unaffected by the swamp. They will try to keep their morale as high as possible. If you move back far right, they will attack. They only have one visible Tactic (All Charge) but they can also fully restore their depleted morale with some silent Tactic (telepaths, I suppose), so be careful.
One way to do this is to stay on the right (Straight/Column formation will do), lure them (Move Back/Withdraw) and meet them there (they will try to push you out of the screen), use Explde Team/Bomb Squad if available, All Charge, Fwd Attack.
Another way to defeat them is to use Gush Wind/Aero Wedge, wait on your side until they move back to regain Morale, then quickly move across the swamp (Spd Atk Fwd/Swift March if available), use All Charge after theirs, and push them out of the screen. Timing is everything. White Flag/Perfidy can help.
Victory: Prestige +10.

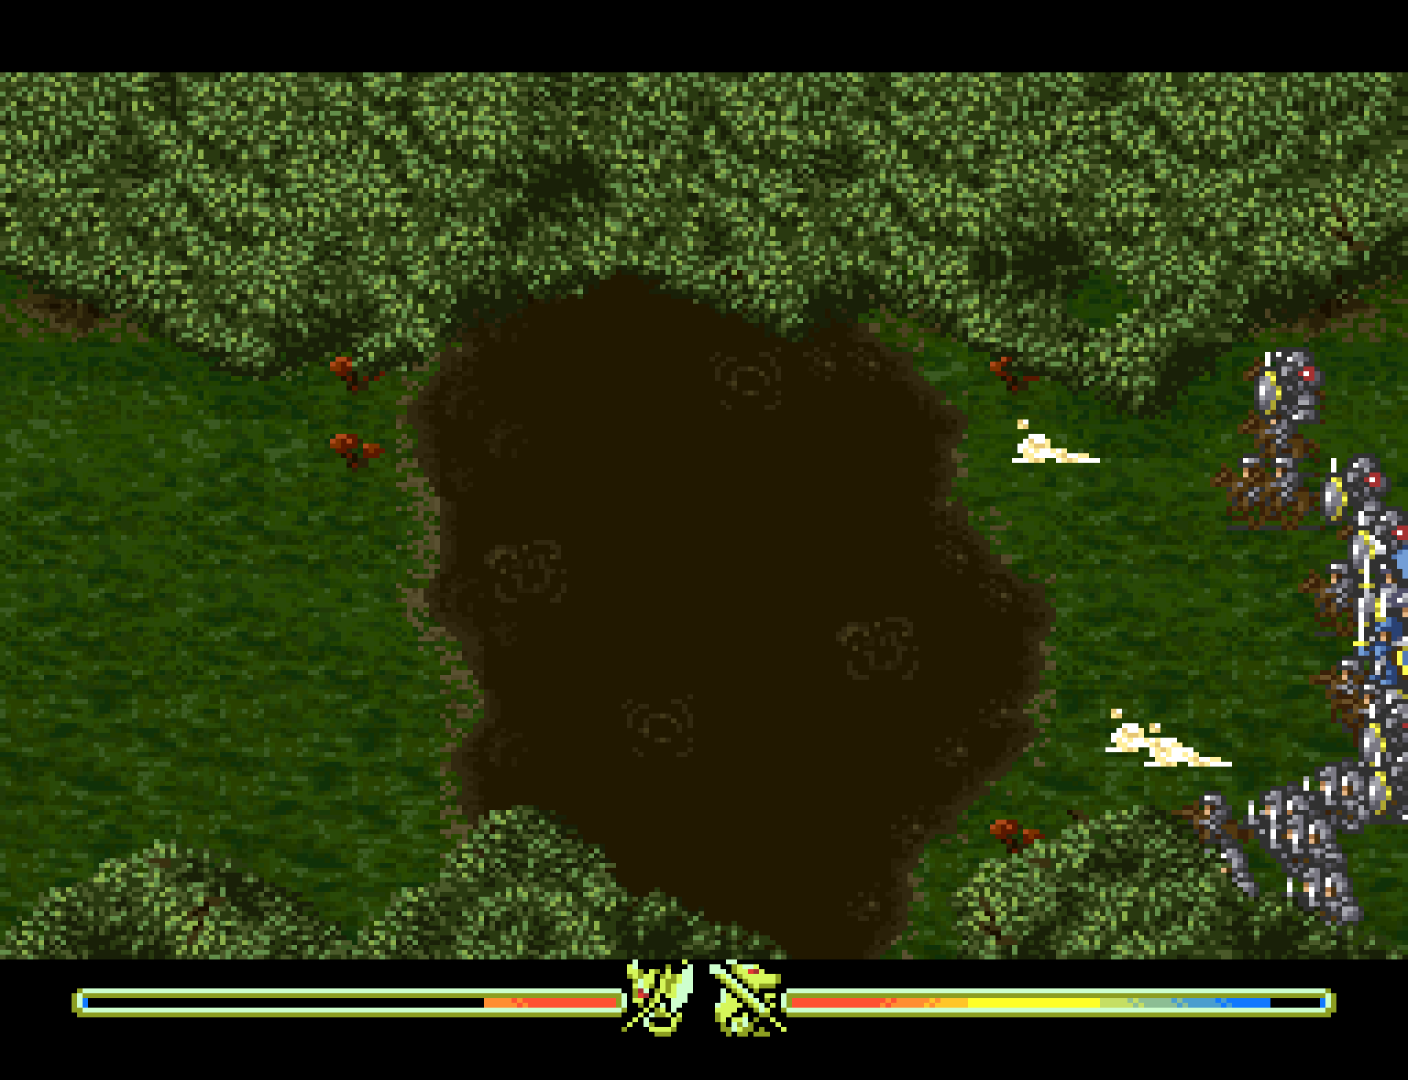


If you lose this army battle (on purpose or not ; ) you (and your friends) decide to stand up to Byunei's army on your own!
You must fight 3 regular battles against 1) Byu Spirit x1, 2) Byu Spirit x3, and 3) Byu Spirit x5.
This is the only place you can meet Byu Spirit (Byunei's Spirit). Pretty well hidden if you ask me (you have to lose a bugged mass combat event), she can Counter, Charm & Mass Stun (Step) you. Unfortunately, she does not drop anything and have rather a low Flash LVL. Oh well.
You cannot prepare for this battle, but then again they are not particularly strong, and you have just defeated a Devil Lord/Sinistral in order to close an Abyss Gate, so it should be comparatively very easy.


Act 10: Mikhail vs the Abyss Monsters (Bonaparte's Illusion) [Bonaparte's Terra Form]
After closing all 4 Abyss Gates, upon sitting on your throne you are challenged by monsters from the Abyss.
They have a very troublesome skill: Illusion. It can change the battlefield into a desert, a swamp or a mountain pass (from previous battles). One way to do this is to use this change to your advantage. They also have several morale-boosting tactics (Recover S/Lead Boost ST, Recvr Frm S/Form Boost QK, B Row Chrg/Rear Charge, All Charge) and their troops are strong.
First they send out the blue flying units. If your troops reach the middle, Illusion calls forth a swamp and they all attack. On the other hand, if you stall and/or kill the blue units, your find yourself in the desert and at some point the (very strong) slimes attack. If they move back and all defend, be careful: it is a trap to lure you into the swamp (coming next). The last illusion (before coming back to the ruined city) is the battlefield from Divine Church II.
One possibility is with Straight/Column or some high-attack formation (even Back Water/Full Force): try killing the flying units early (affect their morale, or high attack tactic) and use the swamp by standing ground at the shore and afterwards when it is gone (Defense S/All Guard+, and/or morale-type tactics to counter the enemy's, Spd Atk Fwd/Swift March if pushed, Cmd Chrg can challenge the commander and make the rest easier to kill). If available, any Intel/Info Leak is, as always, valuable.
Of course, if you have and use Gush Wind/Aero Wedge, Intel/Info Leak L3, Split Atk/Divide & Conquer and Spd Atk Fwd/Swift March, it all ends in a few seconds..
Victory: Prestige +20.


And congratulations! that was the last battle specific to Mikhail (and not an easy one).
Now with all those battles, your Prestige should be Strong (100 initial + 138) and only need 2x 100K to Weak Powers to reach Perfect.

Mass Combat for Everyone
In his Introduction, Harid/Khalid leads the charge in Mikhail's first two army battles.
There are also two additional Mass Combats, available to all main characters:
- One is optional: Farce/Faros vs Stanley or Stanley vs Farce/Faros, accessible at any time.
- The other is compulsory: Pretense Attack vs Yan Youchun/Yang Yuchun, when your party sneaks into Huang City.
ADVANCED DISCUSSIONS
Arranged from https://gamefaqs.gamespot.com/boards/588634-romancing-sa-ga-3/53365875
[Start of Quote]
midic:
I'll post some stuff that I never got around to posting, because it is incomplete and thus of limited value. But it may help.
Formation Stats:
| ID | Formation | att1 | att2 | def1 | def2 | move1 | move2 |
|---|---|---|---|---|---|---|---|
| 00 | Straight | 55 | 0 | 50 | 25 | 0 | 100 |
| 01 | Wave Shield | 60 | 0 | 90 | 35 | (0?) | 80 |
| 02 | Def Wave | 60 | 0 | 90 | (35?) | 0 | 80 |
| 03 | Attack Wave | 70 | 0 | 50 | 25 | 0 | 90 |
| 04 | Top Charge | 60 | 0 | 55 | 25 | 20 | 100 |
| 05 | Bot Charge | 60 | 0 | 55 | 25 | 20 | 100 |
| 06 | Mid Charge | 70 | 0 | 50 | 25 | 25 | 100 |
| 07 | 3 Waves | 60 | 0 | 90 | 35 | 0 | 70 |
| 08 | Gush Wind | 68 | 0 | 38 | 25 | 35 | 100 |
| 09 | Strong Attk | 70 | 0 | 40 | 25 | 0 | 25 |
| 0A | Backwater | 85 | 0 | 50 | ?? | 0 | 10 |
- att2 seems unused, at least by the formations I checked. The only reason I know its purpose is that when I set it up way high, it behaved more or less like att1.
- I think that def1 is defense while defending and def2 is defense while not defending, but this is pretty tentative.
- move1 and move2 both involve how fast the unit goes, but move1 has a strong random element to it, so formations that have move1 will become disordered and spread out more quickly.
Unit Stats:
| Unit | maxHP | maxAtt | maxDef | move |
|---|---|---|---|---|
| Infantry | 128 | 36 | 35 | 4 |
| ArmorInf | 128 | 35 | 45 | 3 |
| Cavalry | 128 | 50 | 30 | 7 |
| Fanatic | 128 | 42 | 30 | 4 |
| Leader | 255 | 50 | 45 | 4 |
| BlueFlier | 128 | 55 | 30 | 7 |
| DinoRider | 128 | 55 | 30 | 7 |
| PurpMist | 128 | 54 | 30 | 7 |
∗
I actually think rather poorly of the RPG classics web page's army game advice. Here's why:
- Relying on 1 Tactic runs contrary to the concept of winning with whatever Tactics you happen to have available, which is really more in the spirit of the minigame. Also without cheating, it's sort of hard to ensure that you have all the right Tactics.
- Pushing the other guy off the screen is really hard to do and is not the kind of strategy I would recommend to a novice (with one exception which I'll mention below).
- Gush Wind is actually a very weak, fragile formation, so you need a pretty hefty set of supporting tactics and you need to use them right if you want to win.
- I actually think the key move in the guy's strategy is not Gush Wind, but iIntel L1. Running your opponent off the screen in 5 seconds works a lot better if you can keep them from doing anything effective during those 5 seconds.
Here's some tips:
- Winning the Goblin and Godwin battles without losing any men and with sufficient decimation of the other side should net you 2 tactics from each battle. The most reliable way I've found to win the Godwin battle involves using the "Straight" formation and your initial starting tactics to push Godwin off the edge of the map. This is possible basically because Godwin is a moron, try it in any other battle and your puny worthless straight formation will get owned. Anyway, having 4 extra tactics/formations should give you something useful in the other battles, which gives you a better shot at winning multiple tactics from those battles as well.
- It is possible to get through all the army battles except the Illusion and Byunei battles without leaving the castle. Playing a whole bunch of games simply to fight army battles is a good way to get good. Also a lot of fun.
- Although a few of the buyable tactics like Intel L1 are pretty useful, I usually play without buying tactics not just because I'm a cheapskate (er, I mean I'm frugal), but because I find the winnable tactics are more useful.
- There are many different combinations of tactics that will win each of the battles without too much difficulty, so odds are you have what you need to win, you just have to figure out how to use it.
- The forest bandits are timid. A scary, powerful looking formation like S. Attack or Backwater will put them on the defensive, even though a good rush would push you off the screen. Those two formations are a bad idea in most other battles because the other side will do just that. Actually it is possible to win any battle with any formation, even those two, but backwater in city siege or vs. Divine church explode team is only for masochists.
- The bandits in forest 2 would be happy to throw themselves upon your spears if only you used an offensive tactic that didn't have the potential to march you into their archer ambush. In other words something that can make your guys flash red without sending them to the other side of the screen. Conversely, they would be happy to stand on the defensive while your leader charges over and single handedly pushes a quarter of their force off the screen. Moral of the story, guys who flashed blue do pretty much no damage except to morale, guys who flashed red will do damage, but can also take damage. Guys who didn't flash either color are sort of in the middle, though I've notices that "Recover form S." seems to pack a fairly decent punch.
- The bandits in forest 3 are weaker than their numbers would indicate because a large portion of their force consists of those jogger ninja demon thingies who are only good for pushing things off the screen, but die really easily. I mean really, is the track team the best bunch to be sending at your foes? This is why buying mercenaries isn't really helpful in most battles, because the jogger guys seem to be the most common type.
- To avoid getting pushed off the screen in the sandy hill battle, it helps a lot if you use a tactic that allows some of your force to be defensive and thus hold ground, while some are attacking and thus dealing damage. Note that contrary to what you would expect, the enemy charging down the hill at you is at a considerable combat disadvantage, so plowing into them without first draining their morale will result in your guys doing much better than they would in other battles. This is probably not enough to keep a gush wind formation from being trashed however. Its defensive power is so weak that you really have to wreck the foe's offensive ability.
- Although a lot of things are just morale drainers, the White Flag tactic actually appears to lower the foe's attack power stat by something like 30%. This effect appears to be permanent unless other tactics restore attack power. I know nothing about any tactics that would do this, or any other tactics which would cause stat up or down effects. Something I never got around to looking into.
- Split Attack is actually my favorite tactic, mostly for the sheer coolness of the move. It is only really devastating in a couple of battles. Actually, I tend to use it when I shouldn't and screw myself up 'cause laughing at your enemies as your army jumps over them is just so awesome.
- My second favorite move is B. Row Forward. IMO it is the most powerful tactic in the game. Really, it's practically broken. The vast majority of battles can be won using primarily (or sometimes only) this tactic, often without losing any men. Yea, you're probably saying "haha, funny joke." This is good, because it means you won't actually try to use B. Row forward unless you get desperate and thus you will have more fun trying to win with other tactics and you will end up being a better player. This is also why I am not going to explain why B Row Forward is so powerful. Figure it out yourself if you really have to know.
- As you've probably noticed, Split Attack is a great way to get across the swamp and convince the Librof army to give up their defensive stance. Explode Team also works. Failing that, you basically need to send the smallest possible force forward, lure the enemy front row into coming after you, withdraw back to your side and do what they were gonna do to you which is sit at the edge of the swamp and laugh while they try to claw their way out of the quicksand. Or, you could try the gush wind thingie. Good luck with that.
Dark RPG Wizard 06:
Gush Wind works very well here, and this is from personal testing before RPGClassics even did their page. While your suggestions do work quite well, the reason why I like Gush Wind is because IT GETS YOUR ARMY OUT OF THE SWAMP. It's the same reason why I like Gush Wind so much against the Seige in the castle, because it gets your army out of range of the catapults.
I tend to also pack Recover Form and use it when necessary, which is the other part of not getting Gush Wind torn to pieces. (I don't consider Gush Wind the Be All and End All of formations though. That in my opinion is Defense Wave or Attack Wave, depending on the battle. Gush Wind is more of my crutch for the battles I find absolutely infuriating. I HAVE won the swamp with Defense Wave before, using Split attack I believe, but I can't count on having Split Attack or Explode Team.
Attack Wave requires a different strategy than the standard "defend, wear down, all charge" from my experience. It only works on certain battles, but with Speed Attack Forwards and move back, you can mow through a few armies. (...maybe it's not move back? Hrm...not remembering WHY I like Attack Wave specifically, just that I've had it work when I didn't have Gush Wind and Defense Wave wasn't doing the job for me.)
My problem with Back Water is exactly as you said, you get pushed off the edge with it far too easily.
∗
Strategies for the Tommy Zom battle (Training Exercices 2)
Dark RPG Wizard 06:
Is there ANY way to beat Tommy Zom that isn't just slowly working your way across the battlefield while keeping morale up and then eventually performing an all charge to push zombies off the side and thus gain more morale? (While I've mixed it up for multiple battles, this one is pretty much a constant in my strategy.
Neko_Arle:
For the zombie fight, I just attack 'em when their backs are turned, fall back, wait for thm to turn around again and just keep back-stabbin' until they go poof.
midic:
My tactics are slightly different, if not necessarily better. Probably pretty similar to Arle's actually. Normally, I wait at the starting location till the zombies march up close to me and turn around. They won't go more than 3/4 of the way across the board. You could probably set your guys on move back and go out to lunch and find your army still there when you got back, although since the zombies become more and more spread out, one or two might get close enough to push a couple of guys off the edge of the screen. Anyway, whenever the zombies turn their backs, I rush at them, when they turn around, I rush back to my side of the screen. I would never take casualties, except as this is the slowest and most boring battle in the game, I tend to tap fast forward a lot, meaning the zombies sometimes get the jump on me. Still, I try to avoid casualties, because of the possibility that losing men here might reduce my chances of getting 2 tactics from the 3rd battle.
Thinking about your tactics caused me to wonder whether you were using the Straight (which is what I normally use here) or defensive wave formation. My general impression is that All Charge is weaker at pushing, doing damage, and maintaining morale, so using it for a morale boost/drain then switching back to forward attack is what I normally do when using the straight formation. However, with defensive wave, it is the only way to get the second row into the battle (well, except getting the first row slaughtered).
Anyway, I realized that I could use defensive wave and use the right edge of the screen to force the 2 rows to be on top of each other, so I not only get the defensive bonus, I get the damage spread out among all. The down side is that I only have 1/2 my guys attacking. Normally I have avoided trying to push more than the last few zombies off the edge of the screen, because the times I tried, it always seemed to go badly, but this was an experiment.
I played this one the way I normally do, attacking when their backs are turned, except that instead instead of trying to wear them down with my 1/2 strength front line, once their random meandering took them near the edge of the screen, I used All charge and pushed them off the screen. Worked beautifully, don't think I lost any men, and took way less time than normal. Guess I've got a new strategy for that one.
Dark RPG Wizard 06:
Yeah, this is how I do it. I've done the 'stab in the back" method, but it's just so horrendously time consuming. Once I figured out that they moved back far enough that you could do a big push and not lose ANYONE, it was my strategy of choice.
[End of Quote]
ORDER WORKSHOP ITEMS
Here is the main section concerning Pidona's Workshop / Blacksmith.
Workshop items can be ordered from your Throne in the Military section for just 50kG apiece, no questions asked (the crafting order is the same as in the Workshop), and you get 2 of each items if you pick them up on the Throne (only 1 if you get them at the Workshop).
Time required for the RnD to complete: 15 Throne actions/battles.
You can also order one weapon and one armor at the Workshop the regular way (with the required items if any is needed) and receive them (later) on your throne: this allows decent savings (100kG) and gets you two copies of each item (in your storeroom). Of course, if you have plenty of money to spare (or do not want to use very rare and precious crafting materials now in order to make more of the item later directly at the Blacksmith's Shops), it is better to order items from your throne.
Note (SFC) that if you have RnD-ed all items, on the Throne you can craft Soft or Spirit Stone (probably a glitch) but that would be a huge waste of money.